
Mistletoe has been used by many ancient cultures, and although the leaves and berries of some species are toxic the plant has also been used historically for curing a number of ailments, including arthritis and infertility. It was also associated with peace and love by the Romans, who hung it over doorways to protect the household.
It has become a part of Christmas celebrations worldwide since the 18th century, and nowadays couples are expected to kiss when standing under a bunch of mistletoe. This tradition has been popularized by the music of the 50’s – “I saw Mommy kissing Santa Claus, underneath the mistletoe last night….”, and by more recent songs. The tradition of kissing under the mistletoe became very popular with the servants in Victorian times. Apparently any man could kiss a woman who was standing under the mistletoe, and if she refused him she would suffer from bad luck. At one time a berry was removed for every kiss, until the branch was bare – and presumably the kissing stopped. This tradition is no longer popular, probably because bunches of mistletoe are usually quite small and expensive in countries where the European mistletoe does not grow, and often artificial plants are used, making the berries non-expendable.
Mistletoes are hemiparasitic plants that feed on other plants, so they do not need roots to grow in the soil, or green leaves that can photosynthesize. They produce specialized structures called haustoria that penetrate the host plants’ tissues to extract the water and nutrients necessary for their growth. However, they do have leaves capable of photosynthesis for part of their life cycle. A commonly known species of mistletoe, the European mistletoe (Viscum album), is native to Britain and much of Europe, and it is the mistletoe plant used in Christmas decorations. It is very noticeable in British apple orchards, particularly in wintertime, when the trees are leafless. The mistletoe consists of woody stems that bear smooth-edged, oval, yellowish evergreen leaves and waxy, white berries that are present on the branches in clusters of 2-6. Mistletoe berries contain seeds that are coated with a sticky jelly called viscin, and for many species the seeds are spread by birds. Different kinds of birds spread the berries of different species, and they may use different methods. The seeds may be ingested, then regurgitated from the crop. Seeds of other mistletoe species may pass through the digestive tract and are then dispersed in the bird droppings. The seeds may also stick to the bill of a feeding bird, and are then wiped off onto the bark of a different tree. When the seed germinates on the branch of a suitable host, it produces a hypocotyl (the stem of a germinating seedling) that grows towards the bark of the tree, and eventually penetrates the bark. This can take a year or more, and until the haustorium is formed inside the host and reaches the conductive tissue, the mistletoe has to rely on its own photosynthesis to survive and grow.
Other species of parasitic plants that grow in a similar fashion are also called mistletoe, and they are found in many parts of the world, including South America and Australia. There is even a species of mistletoe that occurs in Saskatchewan. Dwarf mistletoe (Arceuthobium pusillum) is parasitic on white spruce and other conifers. It has a fragile stem, and small, scale-like leaves. There are male and female flowers, found on separate plants, and although the mistletoe plant itself is inconspicuous it causes the host tree to form many branches around the infected area. These bushy growths are called “witches’ broom” and are very noticeable. I recall collecting specimens from infected coniferous trees south of Meadow Lake for plant pathology classes in the 1980’s, and they were easy to spot. Dwarf mistletoe is not a species that could be used as a Christmas decoration! It is now rare in the province and is only found in eastern Saskatchewan.
Very best wishes for a happy holiday season, I hope you have many festive plants to enjoy.
Jill Thomson is a plant disease specialist (retired) who enjoys gardening in Saskatoon with her family, including the dogs. This column is provided courtesy of the Saskatchewan Perennial Society (SPS; saskperennial@hotmail.com ). Check our website (www.saskperennial.ca) or Facebook page (www.facebook.com/saskperennial) for a list of upcoming gardening events
The Holly and The Ivy ….and The Mistletoes

Poppies, Poppies everywhere

Ginnie Hartley
Saskatchewan Perennial Society
Almost everyone recognizes the red poppy that many people wear on their lapels on Remembrance Day. And many people know that Lieutenant-Colonel John McCrae, who was a Canadian Medical Officer during the First World War, wrote the poem ‘In Flanders Fields’, which speaks of the poppies that bloomed there. However, records indicate that the significance of the poppy can be traced back to the Napoleonic Wars in the early 19th Century, over 110 years before being adopted in Canada. Records from that time indicate how thickly poppies grew over the graves of soldiers in Flanders, France during those wars. These poppies are of the species Papaver rhoeas, the red-flowered corn poppy, which often thrives in areas of disturbed soil.
John McCrae’s poem inspired Madame Anna Guerin of France to found a charity which created poppies made of fabric, to raise funds to help rebuild regions of France torn apart by the First World War. She presented her idea of using the poppy as a symbol of remembrance for fallen soldiers to the Great War Veterans’ Association, the precursor to The Royal Canadian Legion, and it was adopted in 1921.
Some people choose to wear white poppies as an alternative to the red poppy. It symbolises remembrance of all casualties of war, including civilian casualties. But white poppies have been criticised for detracting from the meaning and the funds of the red poppy. Animal Aid in Britain issues a purple poppy as a reminder that both humans and animals are victims of war. In 2018, another unique commemorative poppy, the Khadi poppy, was commissioned by the Royal British Legion to mark the Centenary of the end of the First World War. The red cloth poppy is identical to the usual Remembrance Day poppy, but it is made out of the traditional handwoven Gandhian cloth (Khadi) and honors the British Indian soldiers who fought in the World Wars.
In 2014 a sea of 888,246 ceramic red poppies were used to form a weeping wall of red at the Tower of London, UK. This art installation was made to mark the 100 years since the start of World War One, and for four years it was moved and installed on other cathedrals in Britain.
Of course, poppies have uses other than for remembrance of the fallen. Their beautiful colors (not only red) make them a popular addition to flower beds. Growing them can be as simple as planting seeds in average, or even poor soil in a sunny location. Roots can also be divided, and this should be done in the fall.
Ancient Egyptian doctors would give poppy seeds to their patients to relieve pain. The Minoan civilization (~2700 – 1450 BC) grew poppies for their seeds and used a milk, opium and honey mixture to calm crying babies. The seeds contain small quantities of both morphine and codeine. Seeds that are harvested about twenty days after the flower has opened are non-narcotic because then the morphine is no longer present. Seed capsules of the opium poppy can be processed chemically to produce heroin for medicinal use and for the illegal drug trade.
Poppy seeds are also a rich source of thiamin, folate and several essential minerals including calcium, iron, magnesium, manganese, phosphorus and zinc. They are often used as a spice and decoration for baked goods. The seeds can also be ground and used as a filling for pastries. They also produce an oil which has no odor and a pleasant taste, and is less likely than other oils to become rancid. The oil can be used for cooking, and also as a skin moisturizer.
The petals contain a red dye which is used in some medicines and wines. The dried petals are occasionally used to give color to potpourri.
So when you pin on your Remembrance Day poppy, remember that it is not only a symbol of memory, sleep and death, but also is ubiquitous in the flower bed, the pharmacy and the kitchen.Ginnie Hartley is a retired Speech-Language Pathologist who loves gardening almost as much as she loves words. This column is provided courtesy of the Saskatchewan Perennial Society (SPS; saskperennial@hotmail.com ). Check our website (www.saskperennial.ca) or Facebook page (www.facebook.com/saskperennial) for a list of upcoming gardening events.
Pumpkin Celebration

Jill Thomson
Saskatchewan Perennial Society
In Saskatchewan, October could well be known as the month of the pumpkin, because of the 2 celebrations that both use pumpkins. In early October, on the Thanksgiving holiday, many families celebrate by eating a special meal together, and pumpkin pie is often a favourite dessert. On October 31, we celebrate Halloween, and pumpkins are on display, carved so that a light can be inserted into the hollow pumpkin, to illuminate the carved design.
Many grocery stores have large bins of pumpkins for sale, some of which are now supplied by local growers. There are also “pumpkin patches” where you can select and buy pumpkins that are either pre-picked, or you can go out into the field to select your own. I visited a patch a few weeks ago and it was a very happy place, with small children, and adults, enjoying being able to choose ”their own” pumpkin.
It is not difficult to grow your own pumpkins as long as there is room in your garden for a plant that likes to ramble, climbing any obstacles in its path. The seed can be sown directly into the soil once the soil temperature is at least 15°C. However, the plants do need at least 110 days to grow to maturity and it is better to start seeds indoors not more than 3 weeks before the danger of frost has passed. The young plants can then be transplanted. It is important to remember, however, that vine crops do not like to be transplanted so disturb the pumpkins roots as little as possible when transplanting. Pumpkins like a fertile soil, so well-rotted compost or manure should be incorporated before planting, and plants should be watered well during the growing season. They also like a sunny location, and we plant ours beside a corn row, as they will grow through or along the row. They will also climb up a frame, or wire, but then you need to provide a sling, or other support, for the developing fruit.
Pumpkins can grow very large, and heavy, depending on the variety you choose. Some gardeners like to grow huge varieties, with competitions to see whose is the largest. The world record weight in 2021 was 1226.1kg. That would make a lot of pies! Some people have grown them big enough to act as boats when they are hollowed out, and in 2021 a man from Nebraska paddled 38 miles down the Missouri, in a 384 kg pumpkin, to challenge the previous record of 25.5 miles.
Typically, we grow mid-sized pumpkins that are large enough to be carved at Halloween, but can still be carried by a strong adult. This year our ‘Big Moon’ plants produced big pumpkins suitable for carving, and ‘Spirit’ hybrid cultivar was good for pies. We do also cook the flesh of the carved pumpkins to feed to our dogs: this is an excellent addition to their diet and helps bulk-up a meal for any dog on a diet.
The tradition of carving pumpkins is connected to the ancient Celtic festival of Samhain, which marked the end of summer and beginning of the New Year in ancient Britain and Ireland. On that day the souls of those who had died would pass to the Otherworld, and other souls might return to visit their homes. In Ireland, people began to carve turnips into frightening faces, to scare away a particularly bothersome soul called Stingy Jack. The Irish folk who immigrated to the USA began to carve faces into pumpkins, which were readily available, unlike turnips. As the trend is now to make Halloween less frightening, and more a fun time for children, the carvings are not intended to be scary but are rather a display of the skill of the carver!
Pumpkin plants are native to North America, and have been farmed by indigenous people for over 9,000 years. Pumpkins ripen in the fall and were used for feasts at that time. Early recipes mention roasting a hollowed pumpkin filled with milk, spices and honey, over an open fire. Native Americans gave settlers gifts of pumpkins and demonstrated how to cook them. It is likely that cooking pies using a sweet pumpkin filling would have been developed by settlers preparing Thanksgiving meals. There are many variations on the pie, my favourite is a pumpkin cheesecake. It has been estimated that about 50 million pumpkin pies are consumed for Thanksgiving every year in the USA.
Enjoy pumpkins this month; admire their glowing orange colours, the scrumptious desserts produced for Thanksgiving, and the elaborate carvings on display at Halloween.
Jill Thomson is a plant disease specialist (retired) who enjoys gardening with her family in Saskatoon. This column is provided courtesy of the Saskatchewan Perennial Society (SPS; saskperennial@hotmail.com ). Check out our website (www.saskperennial.ca) or Facebook page (www.facebook.com/saskperennial).
Brussels Sprouts – a superfood

Jackie Bantle
Saskatchewan Perennial Society
As cooler temperatures bring us indoors and in closer contact with other humans at the start of flu season, many of us are looking for superfoods to boost our immune systems. You may be familiar with the antioxidants found in blueberries, haskap and cranberries but were you aware of the cancer-fighting glucosinolates and immunity boosting Vitamin C in Brussels sprouts? Brussels sprouts are considered a cold-weather super food.
Believed to be a descendent of Mediterranean kale, Brussels sprouts have a been popular vegetable for centuries, first gaining significant popularity in 13th century Belgium. Like other members of the Brassica family (which include cabbage, broccoli and cauliflower), Brussels sprouts prefer growing temperatures around 20-25˚C for optimal growth. However, unlike other brassica vegetables, Brussels sprouts require a long season to mature and must be transplanted in spring.
Young Brussels sprout transplants look like any other cabbage, cauliflower or broccoli plant however, during the season, Brussels sprouts grow into 50-100cm tall stalks (depending on the cultivar). Each stalk may produce 15-20 or more sprouts.
Brussels sprouts transplants should be started indoors, in spring, 6-8 weeks prior to transplanting out. Seeds will germinate in 5 or 6 days after planting. Supplemental light will be necessary to produce healthy, sturdy transplants. Brassica transplants can be transplanted outdoors as soon as daytime temperatures reach 15°C and night temperatures are above 0°C. Harden off transplants prior to planting out by moving them outdoors into a sheltered, frost-free location at least 3 days prior to transplanting. Young brassica transplants that have been hardened off can withstand a few degrees of frost.
Brussels sprouts prefer full sun, rich healthy soil and about 2.5cm of water/week during the growing season. By mid-season, there should be some sign of tiny sprouts forming in the leaf axils along the stem. In order to get the modified leafy buds (sprouts) along the main stem to develop and enlarge, the growing point of each plant should be removed during the 3rd week in August. Simply break off the top 1cm of the plant. Instead of continuing to add growth on the top, the plant will put its energy into developing the sprouts along the side of the stem. By early October, the sprouts should be a good size for harvest. For best flavour, harvest Brussels sprouts after a fall frost (or two) of -3°C. The cold temperatures sweeten the sprouts. Brussels sprouts can withstand several hard frosts of -4/-5ºC as long as day time temperatures allow plants to thaw during the day. Sprouts should be harvested when they are bright green and before they turn yellow.
Harvest Brussels sprouts by removing the side leaves and cutting the stalks off just above the soil. Remove any diseased or yellowing sprout leaves. Store stalks and sprouts in plastic bags in the fridge for up to one week or remove sprouts from stalks and store sprouts in plastic bags in a fridge. Ideal conditions for fresh Brussels sprouts storage is 1ºC and 80% RH.
For long term storage, blanch Brussels sprouts in boiling water for 4 minutes. Remove from boiling water and immediately place in an ice bath. Remove sprouts from the ice bath, pat dry and freeze in sealed plastic bags or containers. Frozen sprouts can be stored for up to ten months.
When cooking after freezing, do not allow sprouts to thaw before cooking. Place frozen sprouts in sauté pan or oven directly from the freezer. Overcooking tends to produce a mushy texture and excessive sulphur flavour. Brussels sprouts are loaded with vitamin C, A, potassium, calcium and fiber. Unlike many vegetables, Brussels sprouts contain protein (100g contains 3.4g of protein).
Growing brassica vegetables like Brussels sprouts in an area where a lot of canola or mustard is grown on a large scale can be a challenge. The large acreages of these two field crops attract a wide variety of Brassica pests and diseases to the Prairies. Flea beetles, cabbage loopers, root maggots and club root are all possible problems with growing Brussels sprouts. Be prepared to use crop covers or contact your local garden center for pest and disease control solutions.
This column is provided courtesy of the Saskatchewan Perennial Society (SPS; saskperennial@hotmail.com ). Check out our website (www.saskperennial.ca) or Facebook page (www.facebook.com/saskperennial).
Mum’s the word

Sara Williams
Saskatchewan Perennial Society
Chrysanthemums (Chrysanthemum x morifolium) (also known simply as ‘mums’) bring colour to the autumn border, are great cut flowers and are attractive to butterflies. But they require special attention to overwinter and are not easy perennials to grow in prairie gardens. Cultivated in China for over 2,500 years, they were brought to North America in 1798. The genus name is from the Greek words chrysan and themum, meaning golden flower.
They have a short, fibrous root system which forms a dense, woody crown from which emerge many stems. Flowers may be single and daisy-like but are more commonly double. Varieties developed for northern gardens begin to flower in August, triggered by shortening days
Care
Plant them in full sun in well-drained but evenly moist soil rich in organic matter. A summer mulch helps to maintain even moisture and suppress weeds. Use a balanced fertilizer such as 20-20-20 or organic fertilizers such as alfalfa pellets, blood meal or bone meal to promote vigorous growth. Pinch the plants in early summer to encourage branching and more abundant flowering.
After the first severe killing frost in fall, cover them with 15 to 20 cm (6-8 in.) of organic mulch such as shredded leaves or clean straw to prevent soil heaving and drying due to freeze-thaw cycles and to protect the crowns from winter’s cold. Remove the heavy mulch as soon as spring temperatures rise above freezing and snow recedes. Divide every second year to keep the crowns vigorous and improve their chances of winter survival. Plants can be divided as soon as the soil warms in the spring or from cuttings taken in early spring.
The Chrysanthemum Conundrum
Experienced prairie gardeners report very limited success in overwintering mums in the garden as they seldom survive without significant interventions in zone 2 and 3. It might be easier to simply treat them as annuals.
Hugh Skinner grew and propagated the Morden series of mums for years in his nursery near Roblin, Manitoba. He started plants in the greenhouse in late winter from stock plants overwintered for one year in the garden. These plants had been grown with excellent drainage and shelterbelt protection. With the exception of ‘Morden Garnet,’ which died, the Morden mums generally survived only their first winter outdoors. The following fall, the large clumps would be dug, potted, and stored in a root cellar until brought into growth in the greenhouse to produce cuttings in late winter.
Plants left in the garden generally did not survive a second winter. The “secret,” beyond planting them in a protected, well-drained site, was to divide or start new plants every second year. The experience of a veteran gardener in Saskatoon has paralleled that of Hugh in Manitoba.
Varieties
‘Baby Tears’ – compact plant (30 cm / 12 in. x 40 cm / 15 in.), white pompom flowers tinged pink.
‘Holly’ – golden yellow, pompom flowers on compact plants (40 cm / 15 in.).
‘Prairie Lavender’ – shell pink with yellow centres (60 cm / 24 in.).
• The Firecracker series, from Jeffries Nurseries, breed by Rick Durand, are about 50 cm (20 in.) in height.
‘Dream Weaver’ – soft mauve-pink
‘Firestorm’ – mauve-pink to scarlet-red with yellow centres
‘Power Surge’ – double red
‘Showbiz’ – pink-mauve, pompom
‘Stardust’ – dusty mauve, quill-like petals with yellow centers
‘Suncatcher’ – bright yellow, double
‘Tiger Tail’ – bright orange-yellow
• The Morden Series, Agriculture Canada Morden Research Station, 1960s -1970s are 40 to 50 cm (15-18 in.) in height and spread.
‘Morden Cameo’ – double, creamy white (40 cm / 15 in.).
‘Morden Canary’ – bright yellow (45 cm / 18 in.).
‘Morden Delight’ – double, bronze-red (45 cm / 18 in.).
‘Morden Fiesta’- bright purple, compact (40 cm / 15 in.).
‘Morden Gaiety’ – bright orange (40 cm / 15 in.).
Other Species
Korean chrysanthemums (C. x rubellum hybrids) are reliable and generally easier to grow in northern gardens than those described above. The single flowers surround yellow disc florets.
‘Clara Curtis’ – deep pink, single flowers with yellow centres (60 to 75 cm / 24-30 in.), has survived for many years in Hugh’s Manitoba garden and in Saskatoon gardens with minimal attention.
‘Mary Stoker’ is of similar stature with yellow flowers overlaid with light pink.
C. weyrichii, an alpine species native to Japan and Sakhalin Island, has large, single, white or pink flowers (25 to 40 cm / 10-15 in.). The most available variety, ‘White Bomb’, is being used by Canadian breeders to develop hardy mums in a variety of colours and forms.
Sara Williams is the author and coauthor of many books including Creating the Prairie Xeriscape, Gardening Naturally with Hugh Skinner and, with Bob Bors, the recently published Growing Fruit in Northern Gardens. She continues to give workshops on a wide range of gardening topics throughout the prairies. This column is provided courtesy of the Saskatchewan Perennial Society (SPS; saskperennial@hotmail.com ). Check our website (www.saskperennial.ca) or Facebook page (www.facebook.com/saskperennial) for a list of upcoming gardening events
Water Wisely: Saving Water [Part II]
![Water Wisely: Saving Water [Part II]](https://paherald.sk.ca/wp-content/uploads/2022/09/RR-A10-drip-irrigation-768x576.jpeg "Water Wisely: Saving Water [Part II]")
Much of the water directed towards plants never reaches them. It is lost to evaporation, runoff or “non-target areas” such as driveways or patios. Evaporation losses are affected by temperature, relative humidity, wind, droplet size and water pressure. We can’t control temperature but wind can be decreased by shelterbelts, trees and shrubs and fencing.
Design: In conventional landscape design, we consider height, colour, texture and season of bloom, but seldom think of the water needs of plants. We often combine plants regardless of their drought tolerance and then water the entire bed to satisfy the needs of those plants that require the most water.
When designing or redesigning your landscape, group plants in “zones” according to their water needs: those with low water needs (such as yucca, lilac, shrub roses), moderate water needs (cranesbill geranium, basswood/linden, dogwood) and high water needs (birch, delphinium, hosta). Once their water needs are considered, arrange them according to design factors such as height, colour and season of bloom. Grouping plants into beds or borders based on their water needs and then watering them accordingly, makes irrigation more efficient. With an automated system, each landscape zone is scheduled as a single unit.
Mulching: A 10-cm (four-in.) layer of organic mulch (e.g. leaves, shredded post peelings, flax shives) spread on the soil surface between plants, conserves water and greatly reduces weeds. It also prevents water splash onto foliage, thus reducing soil borne diseases such as botrytis.
Bowl-shaped depressions: Forming bowl-shaped depressions with mini “dykes” around newly planted trees and shrubs directs water towards the plants’ roots rather than onto adjacent soil.
Timing: Evaporation losses can be reduced by irrigating when it is calm and cool, usually in the early morning. Plants dry quickly once the sun rises, reducing the risk of foliage diseases such as powdery mildew (which proliferate rapidly under humid conditions). It is also a nonpeak time for domestic water use, so municipal water facilities are less likely to be overtaxed.
Angles: A spray directed at a higher angle covers a greater area, but considerably more water is lost to evaporation and wind drift because the water is in the air longer and wind becomes stronger with increased height. The lower the “angle of trajectory,” the less wind drift and evaporation. Higher pressure usually breaks up the stream of water into smaller droplets which are more easily lost to evaporation and wind drift. The older oscillating type sprinklers are one of the worst for water waste.
Moisture sensors and rain shut-off devices: Rain sensors can over-ride prescheduled irrigation systems so they will not operate when there has been sufficient moisture due to rain. An automatic timer on a hose end sprinkler allows you to water a predetermined amount without fear of forgetting to turn off the tap if you’re away. When a predetermined amount of water accumulates in a collector cup, the system is shut off.
In the fall…
Discontinue watering in late September or early October, when the leaves of deciduous trees have begun to colour and drop. This is your signal that they’re beginning to harden off for winter in response to progressively shorter days and colder temperatures. Continuous watering or the application of fertilizer in late fall may slow the hardening off, leaving trees as well as other plants vulnerable to winterkill.
Once all of the leaves have fallen, give them several deep waterings prior to freeze-up. The objective is to allow them to harden off yet enter winter dormancy with ample water in their tissue and the surrounding soil. This reduces vulnerability to late winter and early spring desiccation.
Retired from the University of Saskatchewan, Sara’s most recent book is Growing Fruit in Northern Gardens with Bob Bors. She’s been hosting garden tours for over 20 years – to Great Britain, Ireland, Europe, Turkey and Iceland. Join her for a tour of French gardens this September [Contact Ruth at 1-888-778-2378, www.worldwideecotours.com] This column is provided courtesy of the Saskatchewan Perennial Society (SPS; saskperennial@hotmail.com ). Check our website (www.saskperennial.ca) or Facebook page (www.facebook.com/saskperennial) for a list of upcoming gardening events.
Water wisely: Water, Plants and Soil [Part I]
![Water wisely: Water, Plants and Soil [Part I]](https://paherald.sk.ca/wp-content/uploads/2022/08/RR-A10-create-reservoir-300.jpg "Water wisely: Water, Plants and Soil [Part I]")
Sara Williams
Saskatchewan Perennial Society
With an average annual precipitation of 30 to 50 cm (12–20 in.), and with about half falling as snow, most plants require some degree of irrigation on the Canadian prairies during the growing season. Our philosophy should be to satisfy the needs of our plants without wasting water.
Understanding the relationship between water, soil and plants helps. Water, whether from rainfall or irrigation, percolates into the soil from the surface, filling the pore spaces between the solid soil particles and forming a “wetting front” that moves downward through the soil.
Different soils absorb and hold water at different rates. The amount of water the soil is able to absorb is called its “water-holding capacity” and is directly related to the organic matter content of the soil and the soil texture. Sandy soils absorb water quickly but have a low water-holding capacity, so lose it quickly as well. The same volume of water moves further and more rapidly in sandy soil. Clay soils absorb water more slowly and are prone to runoff and puddling if water is applied faster than it can be absorbed. The more organic matter, such as compost, that is added to the soil, the greater its water-holding capacity.
Plants themselves require the same amount of water whether grown in a clay or sandy soil. But plants grown in a sandy soil will have to be watered more frequently to obtain the same volume of water. 2.5 cm (1 in.) of water will penetrate to a depth of about 30 cm (12 in.) in a sandy soil and to about 15 cm (6 in.) in a clay soil.
By weight, water makes up 80 to 90 percent of herbaceous annual and perennial plants and about 50 percent of trees and shrubs. Photosynthesis and nutrient transport depend on water. Soil nutrients are brought to the root, enter the root and are carried through the plant in water. It is the internal water pressure that causes cell walls to stretch and cells to grow. As each of the many thousand cells forming a plant enlarges slightly, we see the overall effect as plant growth. As plants increase in size and their root systems penetrate deeper into the soil, irrigation should be less frequent but for longer periods of time, so the water will reach the deeper roots.
How to water
Ideally, water should be applied to the soil, where it can be absorbed by plant roots, rather than to the foliage. When watering established plants, water deeply and thoroughly, to the depth of their root system and beyond to encourage deeper rooting. Roots will only grow where soil is moist. Frequent shallow watering confines roots to the upper level of the soil, leaving plants with a shallow root system prone to drying out between waterings. Greater root growth allows greater water uptake.
Be aware of competition from aggressive plants with extensive, fibrous root systems. The shallow, far-reaching roots of poplar, Manitoba maple, Siberian elm and spruce can rob moisture intended for a nearby lawn, vegetable garden or flower bed.
Remember the trees
Watering your lawn does not mean you have watered the trees in it. Newly planted trees and shrubs need regular watering from planting time to establishment – usually two or three growing seasons. Water (or check the soil to see if water is needed) twice a week during their first month and once a week for the remainder of that season. Through their second and third seasons, water deeply twice a month or as needed. Water mature trees at their “drip line” rather than at their trunk. This is the soil area below the furthest extent of the tree’s branches. Feeder roots – those which absorb water and nutrients – usually end just beyond the drip line and are within the upper 40 cm (16 in.) of soil. Set a soaker hose under the drip line and leave it on until the soil is moist to that depth.
Retired from the University of Saskatchewan, Sara’s most recent book is Growing Fruit in Northern Gardens with Bob Bors. She’s been hosting garden tours for over 20 years – to Great Britain, Ireland, Europe, Turkey and Iceland. Join her for a tour of French gardens this September [Contact Ruth at 1-888-778-2378, www.worldwideecotours.com]
This column is provided courtesy of the Saskatchewan Perennial Society (SPS; saskperennial@hotmail.com ). Check our website (www.saskperennial.ca) or Facebook page (www.facebook.com/saskperennial) for a list of upcoming gardening events
The rhubarb patch

When I was young, I was convinced that rhubarb grew wild on the Prairies. Every farm that I visited and every abandoned farmyard that I drove past seemed to have a giant rhubarb plant in it. Rhubarb, however, was introduced to the Prairies by early settlers and originally entered North America via Maine and Massachusetts. Its origins are in parts of China (Chinese Rhubarb) and Russia (Russian rhubarb); growing wild in the cold climate of Mongolia, the Himalayas and Siberia. Records show that rhubarb grew on the banks of the Volga river over 3000 years ago. At that time, it was not used in culinary dishes: only the root was used for medicinal purposes. Records from 2700 BC in China indicate that the Chinese rhubarb root (Rheum palmatum) was used extensively as a laxative but also known for curing fevers, preventing the plague, reducing inflammation and healing soldiers. Chinese rhubarb (also known as Turkey or Indian rhubarb) has a much stronger taste and medicinal properties that the rhubarb commonly found in the North American garden (Rheum rhaponticum). The rhubarb that is grown on the Prairies today is a hybrid that was developed in the nineteenth century: the roots have little or no medicinal value.
Rhubarb is one of the few perennial vegetables that survive our harsh Prairie winters. Since it is a perennial vegetable, it is best to plant it along the edge of the vegetable garden where the roots will not be disturbed by tillage or digging. Rhubarb grows best in full sun and rich soil.
Rhubarb seeds will germinate, however, the resulting seedlings can vary greatly in flavour, texture and leafstalk color. it is most efficient to grow rhubarb from disease-free root divisions: dividing roots of a desirable plant ensures that you clone the characteristics that you want. Although rhubarb doesn’t need much care once it is established, it requires a good start. Rhubarb prefers fertile, well-drained soil Dig a hole that is .45m – .6m square. If you are planting a bigger plant or root division, dig the hole to at least twice the size of the plant. Space rhubarb plants at least 1.5m apart. Mature rhubarb plants can be 1-1.75m wide with 2m high flower stalks. The top of the crown should be no more than 5-7 cm below the soil surface. Fill the hole with a mixture of soil and compost (or well rotted manure). Add ½ cup of 10-10-10 fertilizer mixed in with the compost/soil mixture. Pack the soil firmly around the roots and crown being careful not to damage the crown. Fill the hole with the soil/compost/manure/fertilizer mixture until it is level with the surrounding soil. Water in the newly planted rhubarb however, avoid overwatering rhubarb: this will encourage root rot. Spring is the preferred time to plant rhubarb, but planting can occur any time during the growing season.
Later in the season, rhubarb plants may produce flower stalks. On young rhubarb plants, these flower stalks should be cut off near the base. By cutting off flower stalks, the plant will focus all of its extra resources into the roots and leaves rather than using resources to produce seed. Mature rhubarb plants are not negatively affected by seed production.
Rhubarb has few disease or insect problems on the Prairies. Gardeners should be aware of red-leaf disease, however. As the name suggests, red leaf disease is characterized by red or yellow leaves on a rhubarb plant that is losing vigour. The plant will be reduced in size and the crown of the plant may be rotting with leaves eventually turning black or brown. There is no cure of this disease: infected plants should be removed from the garden immediately. Do not replant a new rhubarb plant in the infected area and do not put the infected plant in the compost.
Rhubarb on the Prairies is typically used in desserts, jams, jellies or sauces. Oxalic acid is what gives the rhubarb its tart flavor. Oxalic acid can be poisonous when ingested at high levels. Large amounts of oxalic acid in our body can result in poor calcium uptake and kidney stones. Rhubarb leaves and roots have high enough levels of oxalic acid to be poisonous. Ensure leaves at the top of the petiole and rootstalk at the base of the petiole are completely trimmed off before cooking. Cooking or steaming rhubarb petioles reduces the level of oxalic acid in the petiole. Petioles can safely be eaten raw in moderate amounts. The flower stalks on rhubarb can also be eaten. The flower stalks usually have the texture of cauliflower along with a strong, sour flavor.
Jackie Bantle is a horticulturist working in the Department of Plant Sciences at the University of Saskatchewan. This column is provided courtesy of the Saskatchewan Perennial Society. Check our website (www.saskperennial.ca) or Facebook page
Dwarf Sour Cherries: Enter ‘D’Artagnan’

Sara Williams
Saskatchewan Perennial Society
Also called pie cherries, these are most often used in cooking and processing. Traditionally, Canadians call them “sour” while Americans call them “tart.” regardless of the fact that many of the new ones are sweet enough to eat fresh. The shorter varieties bred at the University of Saskatchewan are referred to as dwarf sour cherries or bush sour cherries.
Sour cherries are believed to be descendants of natural hybrids between sweet cherries (Prunus avium) and Mongolian cherries (Prunus fruticosa). But P. cerasus and P. fruticosa easily interbreed so those two may be the same species.
‘D’Artagnan’ (along with ‘Cutie Pie’ and ‘Sweet Thing’) is one of the latest varieties from the University of Saskatchewan’s fruit breeding program – plants should be available within the next 12 months. Named after the fourth musketeer in Alexandre Dumas’ novel, it is closely related to most of the Romance cherries and has the same parentage as ‘Juliet’, ‘Valentine’, and ‘Crimson Passion’. Considered the best variety for homeowners who want a hedge of cherries, it suckers more readily than those in the Romance series. Because it is propagated on its own roots, the suckers will have the same high-quality fruit as the parent plant. Within a few years, it will fill in the row, forming a hedge of thin, flexible branches. And, it needs far less pruning than other varieties. Not until the plants are about 12 years old is there a need to thin out older branches. (Most of the other varieties need pruning when 7 years old.)
Tested for over 15 years, ‘D’Artagnan’ has had consistent production with superior hardiness to ‘Carmine Jewel’. It is shorter than most of the romance series, reaching only about 6 feet (180 cm) in height while other varieties eventually attain 8 or 9 feet (240-275 cm). The burgundy fruit tastes similarly to ‘Valentine’ and ‘Juliet’. Most years it ripens in early to mid-August.
To form a hedge, plant them about 3 feet (1 m) apart within a 3-foot (1-m) wide row. Mulch well to prevent grass or weed competition. Once suckers appear between the plants, allow them to fill in the rows.
Sour Cherry History 101
In the 1940s, Les Kerr (then superintendent of the PFRA Sutherland Tree Nursery) began hybridizing sour with Mongolian cherries with the goal of developing sour cherries hardy to zone 2. His job description limited his breeding to trees and shrubs useful in prairie shelterbelts. Chastised by his superiors for working with sour cherries, Les went underground. He continued his clandestine cherry breeding, giving his seedlings to various farmer friends for planting out. In 1983, while gravely ill and hospitalized, he met with Dr. Cecil Stushnoff, then head of the Horticulture Department. During that bedside meeting, Les revealed which farmers were maintaining his best seedlings. Les passed away a week later.
Dr. Stushnoff and technician Rick Sawatzky gathered Les’ best selections and relocated them to the University test plots. Les’ hybrids were a great improvement over the Mongolian cherries. By the late 1980s, Rick had begun crossing Les’ best selections with sour cherries from northern Europe with the goal of improving fruit size and flavour. He released ‘Carmine Jewel’ in 1999, just as Dr. Bob Bors became head of the fruit breeding program. Together, Rick and Bob began selecting the cherries that would eventually become the Romance series. These new cherries fulfill, and in some way surpass, Les’ original goal to develop sour cherries hardy to zone 2.
Retired from the University of Saskatchewan, Sara’s most recent book is Growing Fruit in Northern Gardens with Bob Bors. She’s been hosting garden tours for over 20 years – to Great Britain, Ireland, Europe, Turkey and Iceland. Join her for a tour of French gardens this September [Contact Ruth at 1-888-778-2378, www.worldwideecotours.com]
This column is provided courtesy of the Saskatchewan Perennial Society (SPS; saskperennial@hotmail.com ). Check our website (www.saskperennial.ca) or Facebook page (www.facebook.com/saskperennial) for a list of upcoming gardening event
How to prevent powdery mildew disease from taking over

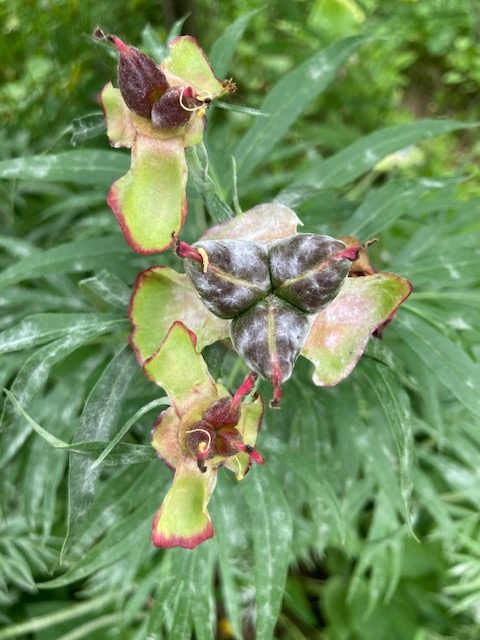
Powdery mildew infection of peony seed heads.
Jill Thomson
Saskatchewan Perennial Society
This growing season, there seem to be many plants affected by mildew early in the season, particularly in my shady front yard. The affected leaves are easily recognisable by the typical, white fungal growth, usually first noticed on the upper surface of infected leaves.
Powdery mildew is the common name for this fungal disease that attacks many different species of plants. Although the symptoms are usually very similar, there are very specific mildew fungi that cause disease on different hosts For example, mildew on grasses is caused by Blumeria (Erisyphe) graminis and on roses by Sphaerotheca (Podosphaera) pannosa. Lilacs are infected by Erisyphe syringae, whereas Sawadaea bicornis affects peonies. These mildew fungi have very similar life cycles: in the summer the fungus grows on living plant material and spreads from leaf to leaf, and from plant to plant by tiny airborne spores called conidia. These spores germinate on new plant surfaces and can penetrate the leaves, where they form specialized structures called haustoria. Haustoria have a central body with multiple finger-like projections that extract nutrients from the plant cell enabling the fungus to feed off the living plant.
Mildew is known as an obligate parasite because it must feed on living tissue. Mildew does not usually kill its host, but it will hasten the host’s decline. As the amount of infection increases, towards the end of the season, the fungus produces hard walled, black, pinhead-sized structures that can easily survive winter conditions. In the spring these structures produce a spore that initiates new infection, and once the infection is established, the summer spores are responsible for local spread of the disease.
In some plants, infected leaves can become misshapen: rose and high-bush cranberry leaves infected by mildew are curled and distorted as they expand. Peony flower heads seem to be more heavily infected after the petals begin to fall.
There are a number of ways to reduce mildew infection, and these apply to many types of garden plants – grasses, bushes, vegetables, annuals and perennials. Controlling the environment around your plants is a major tool to prevent or reduce mildew infection.
• Start by giving your plants space to allow good air circulation around and through the plants.
• Trim away bottom branches of lilac and rose bushes.
• Grow your plants in open, sunny areas, as long as these are also the right conditions for your plants.
• Although mildew spores do not need free water on the leaf surface in order to germinate and infect, they thrive in high humidity. To reduce infections, always water around the base of your plant in the morning, so the leaves can dry off quickly.
• Avoid using excessive nitrogen fertilizer as this encourages tender, new leafy growth, which is more easily infected than older, tougher growth.
• Remove infected material and clean up fallen leaves in the fall. This debris provides material for the overwintering stage of the fungus and will supply a new source of mildew infection in the spring.
• Mulching around bushes in the fall also keeps the spores from reaching leaves in the spring.
• There are some chemicals that can be purchased to help control mildew on favourite plants as well as many home-made recipes on gardening websites. Always treat a small area of the plant first, to see if it reacts adversely, allowing 24-48 hours to check for a response.
• When shopping for new plants, choose varieties that show resistance to mildew, if you are experiencing a persistent problem in your garden. There are roses that are less likely to develop mildew, however, they are not completely resistant.
These preventative measures also apply to the vegetable garden. Allow for good air circulation around your plants, in particular with cucumber, squash, pumpkins, muskmelon. These vine crops need to retain productive leaves to grow to maturity, so space them out to avoid early mildew infection. Young pea plants usually resist mildew infection; however, older plants almost always succumb to the disease, often after the main productive stage is over.
Mildew in your garden is something you cannot usually avoid, but keeping it to a manageable level is possible most years.
Jill Thomson is a plant disease specialist (retired) who enjoys gardening with her family in Saskatoon.
This column is provided courtesy of the Saskatchewan Perennial Society (SPS; saskperennial@hotmail.com ). Check our website (www.saskperennial.ca) or Facebook page (www.facebook.com/saskperennial) for a list of upcoming gardening events
Hardy Clematis that flourish on the Prairies

Sara Williams
Saskatchewan Perennial Society
Clematis (from the Greek word for vine) are among our most beautiful vines. While many do very well on the Prairies with average care, others, such as the Jackmanii, need a great deal of coddling, coupled with your most protected micro-climate, and still may not survive our winters. On benches in garden centres and nurseries, they all share equal space. So how does one know if the plant you’re considering is ruggedly hardy or needs shelter? Begin with the Latin or botanical name – which should always be listed on the plant tag in italics.
The hybrids from Clematis alpina and Clematis macropetala (both native to China), are among the loveliest and toughest. They vary in height from 2.6 to 4 m (8 to 12 ft.) and climb by means of twinning leaf petioles, so allow space behind their supports for the leaves to do their job. Both species bloom on the previous year’s growth from late spring to early summer. The hybrid varieties of both species need little pruning unless they’re blocking a window or an arbor, usually every three or four years. They benefit from being planted in deep, organically enriched soil with a 10 cm (4 in.) layer of organic mulch at their base, and deep watering (to a depth of 45 cm/18 in.) every two weeks. Bloom is greater if the vine is in sunlight. These clematis are hardy, easy to grow and vigorous. No fuss, no muss.
The alpine clematis (Clematis alpina), native to the alpine slopes of Europe and Asia, was introduced to England in 1792. It has bell-shaped flowers in shades of white, pink or blue. Its compound leaves consist of three groups of three leaflets and twine around its support as it grows. They generally reach heights of 2 to 2.5 m (6 to 8 ft.). Among the cultivars are ‘Ruby’ with deep pink-dusty rosy red flowers; ‘Willy’ with pale mauve-pink flowers with a darker edge; ‘Constance’ with bright pink, almost red flowers; ‘Francis Rivis’ with larger deep blue flowers; ‘Pamela Jackman’ with rich, deep purple-blue flowers; and ‘Helsingborg’ with deep purple flowers.
The large-petaled clematis (Clematis macropetela) was first discovered in China by a French missionary, Pierre Nicholas Le Chéron D’Incarville, in 1742. But it was not introduced to Europe until just before World War I. It is slightly taller, generally between 3.6 and 4 m (10 to 12 ft.), with bell-shaped flowers. Many of its varieties have been developed by Prairie plant breeders such as Frank Skinner and Stan Zubrowski. Among the Skinner introductions are ‘Blue Bird’ with deep lavender blue flowers, ‘Rosy O’Grady’ with long dark pink pointed sepals, and the snow white ‘White Swan’. ‘Joe Zary’, honouring one of Saskatoon’s promoters of horticulture, has double purple flowers and was introduced by Stan Zubrowski of Prairie River. Other Clematis macropetala varieties include ‘Lagoon’ and ‘Maidwell Hall’ with blue flowers, and ‘Markham’s Pink’ with pink flowers. ‘Jan Lindmark’, a Scandinavian introduction, has dark bluish-pink flowers, while ‘Purple Spider’ has double purple flowers.
Quite different from all of the above are the hybrids of the herbaceous Clematis integrifolia and the climbing Clematis jackmanii. These begin growth each spring at ground level and climb to about 1-2 m (3-6 ft), blooming on the current season’s growth in late summer. Although the roots survive, the above-ground portion is killed to soil level each winter and must be pruned off in early spring. One of the best known of these is ‘Blue Boy’, introduced by Frank Skinner in 1947. A lovely blue, it blooms in late summer. A more recent introduction from Crimea, Ukraine is ‘Pamiat Serdta’ with light violet flowers.
Note: The golden clematis (Clematis tangutica) is listed on Alberta’s noxious weed list and is discouraged by the Native Plant Society of Saskatchewan because of its vigour and abundant self-seeding.
Retired from the University of Saskatchewan, Sara’s most recent book is Growing Fruit in Northern Gardens with Bob Bors. She’s been hosting garden tours for over 20 years – to Great Britain, Ireland, Europe, Turkey and Iceland. Join her for a tour of French gardens this September [Contact Ruth at 1-888-778-2378, www.worldwideecotours.com]
This column is provided courtesy of the Saskatchewan Perennial Society (SPS; saskperennial@hotmail.com ). Check our website (www.saskperennial.ca) or Facebook page (www.facebook.com/saskperennial) for a list of upcoming gardening events
Don’t let slugs force you to sell your house!

Erl Svendsen
Saskatchewan Perennial Society
I joke that I sold my last house because I found myself sharing the garden with a multitude of slimy slugs. That wasn’t really the reason for moving… at least not the only one.
Slugs are gastropods, not insects. They are related to snails and clams rather than to flies or beetles. They should not be confused with pear slugs which are insects (the larval form of a sawfly), found on cotoneaster, pear, mountain ash and other related woody plants.
Slugs are nocturnal and the most telling clue that they are resident in your garden, aside from their damage, is the silvery trails they leave behind. Their preferred habitat is damp – which unfortunately describe a lot of territory.
Growing up on the West Coast where slugs come in many shapes, sizes and colours, I particularly remember the banana slug named for its resemblance to said fruit in colour AND size. Thankfully, in most Saskatchewan gardens, you’ll typically only encounter the diminutive grey garden slug (Deroceras reticulatum): small, 1-2 cm long, dark to light grey, shiny and, of course, slimy. Don’t let their size fool you. What they lack in size, they can rapidly make up in numbers, laying 200-300 eggs at a time. And in numbers, they are voracious, decimating leafy plants (e.g. hostas) and many other garden plants including root crops like potatoes and carrots (unfortunately not dandelions in my experience).
Selling your home is not a guaranteed or a long-term solution because slugs or their tiny eggs can move in from the neighbour’s yard, on plants from the nursery or your friends, on borrowed tools and even on the bottom of your shoes.
There are ways to fight back. Start by making your garden less hospitable by removing daytime hiding places such as wooden boards, bricks, stones, and garden gnomes. Remove all decaying vegetation throughout the season especially in the fall.
Trapping slugs is a good next option. They are attracted to yeasty, fermenting odors. But don’t waste your beer: add a package of bread yeast to a cup of water sweetened with sugar, stir and set aside to bubble away for a couple of hours. Add an inch of the yeast solution to any shallow container (e.g. empty cat-food or tuna tins). Place several in the garden in the early evening, about 10 feet apart. Next morning, empty the containers (hopefully filled with drowned slugs) and repeat. Another option is to place short boards in the garden. In the morning, just scrape any cowering slugs off the bottom-sides into a bucket of soapy water or straight into the garbage. Repeat. Another effective trap is an upside down rind of a half grapefruit. Slugs can’t help themselves and will be found munching away in the morning on the inside. Simply dispose of rind, slugs and all. Repeat.
There are a number of other control options, most of which are safe to use around the home, your children and pets. Slugs are said to avoid wood ash and coffee grounds (some coffee shops give bags of grounds away for free). If nothing else, the ash and grounds will help enrich your soil. To a slug, crushed baked eggs shells sprinkled around the garden act like razor wire, as does diatomaceous earth (DE), a powdery substance composed of sharp fossilized microscopic hard-shelled algae or diatoms. There are several registered insect and slug control products that are 100% DE (e.g. Safer’s Insectigone). Pool-grade DE is not effective in controlling slugs and other insects because it has been exposed to high heat during processing, altering it significantly. Wear a facemask to avoid breathing in the fine particles when sprinkling them around the garden. Reapply after heavy rains.
After a meal of eco-, human- and pet-friendly iron-based slug and snail killer, slugs stop feeding permanently and die (look for products containing sodium ferric or ferric phosphate). As a last resort, there are also registered metaldehyde-based slug control products. While very effective, metaldehyde is poisonous to slugs, people and pets alike and should be used with care.
Erl gardens in Saskatoon and enjoys being a climate zone denier by trying new and interesting perennials. This column is provided courtesy of the Saskatchewan Perennial Society (SPS; saskperennial@hotmail.com ). Check our website (www.saskperennial.ca) or Facebook page (www.facebook.com/saskperennial) for a list of upcoming gardening events.
Pines for the Prairies: Mugo pine

Mugo pine (Pinus mugo) is native to the mountains of southern and eastern Europe, from Spain to the Balkans. The species name, mugo, is the old Tyrolese name for this pine. Tyrol is a region in the Austrian Alps to which it is native.
Mugo pines have been gown on the prairies for over a century. You can still see venerable specimens in older neighbourhoods. Some are as high as a two-story building. These hark back to an era when they were grown from seed and the seedlings could be extremely variable in size and height. Today’s nursery offerings are almost always “vegetatively reproduced” from softwood cuttings and are genetically identical to their parents.
(If you’re looking for a smaller upright pine, consider either Swiss stone pine (Pinus cembra) or limber pine (Pinus flexilis). Both are dense and slow growing and ideal for a smaller landscape.)
The brownish-grey bark is covered with bumpy stumps – from which older needle bundles have fallen. The green needles, in bundles of two, are rigid, slightly curved, and retained for five years or more. Their tips sometimes become yellow-green in winter. The small round cones have prickles on their scales.
Mugo pines prefer a deep loam soil but are quite adaptable, growing well in heavy clay as well as sandy soils. They are at their best in full sun. Those growing in partial shade, are often less compact. Once established, they are quite drought-tolerant.
For a denser, more compact appearance, they should be pruned each spring once the “candles” have fully elongated but before the needles have begun to emerge laterally. At least 6 mm (1/4 in.) of the candle should be left.
Larger varieties are used in mixed or shrub borders, foundations, and for mass plantings, while dwarf ones are ideal for rock gardens or perennial borders.
The species and older subspecies such as mughus and pumilo, are generally seed grown and often from different strains of seed. What’s available is a dog’s breakfast, complicated by the fact that many of these may have been pruned to look cute and dense, but will eventually grow up to fulfill their genetic make-up. As well, differentiating between var. mughus and var. pumilo depends on their flower (cone) characteristics, not on size or form. In contrast, most cultivars are dwarf, vegetatively propagated and uniform.
•   Pinus mugo mughus is a low growing form from the eastern Alps and Balkans, usually about 1.5-4 m tall and 1.5 to 3 m wide (5-13 x 5-10 ft.), but variable depending on the seed source.
•   Pinus mugo pumilio, also from the mountains of eastern and central Europe, is generally 1.5 m high and 1-2 wide (5 x 3-6 ft.), but variable if raised by seed.
The following varieties are vegetatively propagated and uniform:
• ‘Mops’ is compact and symmetrical with a neat mounded round form. Very slow growing, it is generally 1-1.2 m high with a 0.75-1.2 m spread (3-4 x 2.5-4 ft.).
• ‘Slowmound’ is low and dense, very slow growing, with rich green foliage (1.2 x 2 m / 4 x 6 ft.)
• ‘Compacta’ is dense and globular (2 x 4.6 m / 10 x 15 ft)
Retired from the University of Saskatchewan, Sara’s most recent book is Growing Fruit in Northern Gardens with Bob Bors. She’s been hosting garden tours for over 20 years – to Great Britain, Ireland, Europe, Turkey and Iceland. Join her for a tour of French gardens this September [Contact Ruth at 1-888-778-2378, www.worldwideecotours.com]
This column is provided courtesy of the Saskatchewan Perennial Society (SPS; saskperennial@hotmail.com ). Check our website (www.saskperennial.ca) or Facebook page (www.facebook.com/saskperennial) for a list of upcoming gardening events
Beets: easy to grow and tasty

Sara Williams and Jackie Bantle
Saskatchewan Perennial Society
If you haven’t seeded your beets in the garden, it’s not too late. Beets (Beta vulgaris) are one of those root vegetables that can be seeded early in May but because of their relatively short growing season (55 days or so), they can be seeded as late as mid-July for a fall harvest.
Beets are a member of the goosefoot family (Chenopodiacea) because their leaves were supposed to resemble those of geese. The word beet is from the Celtic word, bett, meaning red.
For those of us who make beet leaf “roll-ups” stuffed with rice, it’s reassuring to learn that beets were indeed first cultivated for their leaves rather than their roots, as seen in 8th century BC cuneiform tablets from Babylon. They were well established in the Mediterranean region by Greek classical times where they were used medicinally and for flavouring.
The large roots that we use today were not known until the Christian era. Beets gradually spread through Europe where they were first called “Roman beets”, indicating that the swollen red taproots had been developed and introduced from Italy during the Roman era.
In his 1597 Herbal, Gerard wrote that “The greater red bet or Roman beet, boyled and eaten with oyle, vinegre and pepper, is a most excellent and delicate salad.”
These early beets tended to be coarse, misshapen and hairy. The smaller globes were not developed until the 1800s. By 1828, four varieties were listed in American seed catalogues. ‘Detroit Dark Red’, still a favourite today, was first listed in an American catalogue in 1892.
Beets can be seeded early in spring although if seedlings experience many days of cool weather (5°C or below), this may encourage plants to bolt, forming flowers and seed heads instead of good sized roots. Extreme heat in summer can also cause bolting. Plant beet seeds 5 mm deep, either in a scatter row or 30-45 cm between rows. Thin plants to 5-7.5cm spacings within the row. There is no need to ‘hill’ beet roots with soil if they push out of the ground; the feeder roots remain below ground.
Staggered plantings for beets are recommended to provide a long harvest period of tender, juicy roots: older beet roots tend to be oversized and may also have a tough, woody texture. By seeding a new row of beets 2-3 weeks apart until mid-July, one can ensure that the beets you harvest will have excellent texture and flavor right through to fall.
Young beet seedling leaves are a favorite of sparrows: don’t be surprised to see your morning beet seedlings disappear by the time you come home from work in the late afternoon. To prevent bird damage, cover beet rows with crop covers or supported bird netting early in the season.
Beet roots come in a variety of colours; from red to striped white and red, pink, black to orangish yellow and white. The flavour among all of the beet types is very similar. Beets that are used to make sugar (ie. sugar beets) are different than garden beets. Sugar beets have a sugar content of 15-20% and are a long season crop whereas garden beets usually contain only 5% sugar content. Garden beets are not only grown for their edible root but they can also be grown for their edible leaves; used in salads and beet-dough roll-ups. ‘First Crop’ and ‘Early Wonder Top’ are two beet cultivars recommended for their large, flavourful leaves.
Beet harvest can start as soon as roots are the size that you desire. Most beet roots have reached their prime flavor when they are 5-7.5cm in width. Cut petioles at approximately 4 cm above the top of the root. As with all root crops, do not cut off the root at the bottom as this will lead to desiccation in storage as well as beet ‘bleeding’. Beets will tolerate some autumn frost and will sweeten up with cool autumn temperatures.
Ideal storage conditions for beets are just above 0°C and high humidity. Storing root crops in a plastic bag in a fridge or in moist sand in your garage (just above 0°C) are good locations. Remove excess soil before storage. If you must wash roots before storage, wash gently: new wounds will encourage bacterial rots.
Betacyanin, the pigment responsible for the red colour, is extremely water soluble. Which is why borscht is red. And in some individuals, lacking the requisite genes to properly metabolize betacyanin, beets turn their urine pink.
Retired from the University of Saskatchewan, Sara’s most recent book is Growing Fruit in Northern Gardens with Bob Bors. She’s been hosting garden tours for over 20 years – to Great Britain, Ireland, Europe, Turkey and Iceland. Join her for a tour of French gardens this September [Contact Ruth at 1-888-778-2378]. Jackie Bantle is horticulturist living on an acreage north of Saskatoon.
This column is provided courtesy of the Saskatchewan Perennial Society (SPS; saskperennial@hotmail.com ). Check our website (www.saskperennial.ca) or Facebook page (www.facebook.com/saskperennial) for a list of upcoming gardening events. The Spring Plant Exchange will be held on Sunday, May 29. The plant exchange will start around two o’clock for more information please see the website. These are “member only” events, but memberships are available at the door for $10.00.
Be a Popeye and eat your spinach!

Saskatchewan Perennial Society
Popeye the sailor man, invented by Elzie Crisler Segar, first appeared as a comic strip character in 1929. By 1932, Popeye was telling the world about spinach. Placed in a hopeless situation, a can of spinach would miraculously appear. Popeye would quickly consume its contents, gain superhuman strength and save the day. Thus, several generations of children were told by their parents to “eat their spinach.” Thankfully, frozen and fresh spinach are now available through our prairie winters and it is easily grown in our gardens. Spinach is an excellent source of vitamin C, high in calcium, magnesium, potassium, a good plant based source of iron and is one of the earliest vegetables to seed in the garden.
The genus name may have been derived from isfanakh, a Persian word for “green hand.” Spinacia is from the Medieval Latin, probably originating from the Latin word spina, referring to the spiny seeds. Oleracea means vegetable-like.
Our garden spinach (Spinacia oleracea) is believed to have developed from a wild form, Spinacia tetranda, still found in the Caucasus, Iran and Afghanistan. It was first cultivated by the Persians (in what is modern Iran) and 647AD had spread via Nepal to China. It was brought to Spain by the Moors. By 1351, it was common enough that “spinachium” had appeared on a list of food that monks were permitted to consume on fast days. In his Herbal of 1597, John Gerard in England described it as “watery and tasteless,” but wrote that it would be good for those with a hoarse voice or who had trouble breathing.
Spinach can be seeded early in spring, as soon as the ground is thawed: plants can withstand a few degrees of frost. Sow seeds 1.5-2 cm deep. For full sized spinach plants, space rows 30cm apart. For baby spinach leaves, rows can be closer together or scattered in a 30-60cm wide bed. With air temperatures above 10°C, seedlings should emerge in several days. Depending on the cultivar, baby spinach leaves will be ready for harvest in as little as 4 weeks after sowing.
Spinach can be grown as a ‘cut and come again’ crop ie. that means that spinach can be cut again and again and leaves will grow back from the same roots. When spinach is grown as a ‘cut and come again’ crop, it is usually harvested as baby spinach and can be grown as close as 3-4cm apart. To produce full sized spinach leaves, thin plants to 7-10cm between plants. Harvest spinach leaves by cutting petioles with a sharp knife just above the soil line.
Because spinach is such a fast grower, consider doing multiple plantings throughout the growing season for a consistent supply. Seed a short row every 2 weeks from early May to mid-August. Plants that are seeded between July 1st and August 15th may need to be harvested as baby spinach as spinach tends to bolt (flower) under high day temperatures. Bolting spinach as been a problem as long as spinach has been grown. In 1784, the D. Landreth Seed Company in United States had developed a slow-bolting spinach variety called ‘Bloomsdale’ which is still available today.
When purchasing spinach seed, gardeners may encounter three different types of spinach: savoy, semi-savoy or flat/smooth-leaf spinach. Although there is not much difference in the flavour or nutrient value of the different types; the leaf appearance is unique to each type. Savoy spinach has curly, crinkly leaves that are slightly thicker than other types. Semi-savoy spinach plants are slightly more upright and have less crinkly leaves than the savoy spinach types. As the name suggests, flat or smooth-leaf spinach has flat leaves. The flat leaves are the easiest type to wash: flat leafed spinach is the main type to be used in frozen spinach.
New Zealand spinach (Tetragonia tetragonioides) is a slightly vining leafy plant that produces copious amounts of greens during the summer: it is not a true spinach. New Zealand spinach requires warm temperatures and a longer time period for seeds to germinate as compared to Spinacea oleracea. New Zealand is sometimes referred to as perennial spinach however, it is not perennial on the Prairies.
Malabar spinach (Basella alba) is a perennial vining plant native to tropical areas of Africa and Asia. The leaves are oval to heart shaped, semi-succulent and mucilaginous when cooked. When eaten fresh, Malabar spinach is similar in flavour to Spinacia oleracea but with a slight peppery, citrus flavour. Malabar spinach is very frost sensitive and should be started indoors about 6 weeks prior to transplanting out for best results.
Recommended fresh spinach cultivars include: ‘Tyee’, ‘Space’, ‘Kolibri’ (baby type), ‘Escalade’, ‘Avon’
Retired from the University of Saskatchewan, Sara’s most recent book is Growing Fruit in Northern Gardens with Bob Bors. She’s been hosting garden tours for over 20 years – to Great Britain, Ireland, Europe, Turkey and Iceland. Join her for a tour of French gardens this September. Contact Ruth at 1-888-778-2378, or www.worldwideecotours.com. Jackie Bantle is horticulturist living on an acreage north of Saskatoon.
This column is provided courtesy of the Saskatchewan Perennial Society (SPS; saskperennial@hotmail.com ). Check our website (www.saskperennial.ca) or Facebook page (www.facebook.com/saskperennial) for a list of upcoming gardening events. The Spring Plant Exchange will be held on Sunday, May 29. The plant exchange will start around two o’clock for more information please see the website. These are “member only” events, but memberships are available at the door for $10.00.
Arbor Week – Plant a tree or two or three or more

Sara Williams
I’ve been planting small trees every spring for almost half a century. At one time, hundreds; more recently, only a few. But the process inevitably brings a smile to my face, along with a sense of satisfaction, caring and hope for the future. And years later, I now live in a forest, surrounded by the bright orange bark of Scots pines, the cork-like bark of the Amur cork tree, the lobed foliage of bur oak, fruit of crab apples and mountain ash, the rustling of leaves, tweets of birds (instead of phone-obsessed humans), and flowers of various plum, apple and pear species. A feast for the senses that changes with the seasons.
Although schools and communities within Saskatchewan have long marked spring with tree planting, Arbor Day was not officially observed until 2021. The Government of Saskatchewan has made the last full week of May a permanent Arbor Week (the official Arbor Day is the Friday of that week) and Saskatoon is pulling out all the stops to mark the occasion. In celebration, plant a tree, take part in one of the many scheduled activities, or simply stroll through the University’s Patterson Gardens (enter from Preston, across from the Field House), an arboretum containing more than 800 trees labeled with English and botanical names.
Save Our Saskatoon Trees Coalition (SOS Trees), formerly known as SOS Elms, will again be organizing events to celebrate Arbor Week within our urban forests. The theme for 2022 is “Trees Breathe Life”. All events are free and open to the public. Registration and additional information are on their website: https://sostrees.ca/arborweek.html.
May 21-29: Interpretive Walk is a self-guided audio nature-walk describing the contribution of specific trees to our urban ecosystems. Ideal for families or small groups, signage will be in front of the trees included in the walk (bring your phone to scan the QR codes to access the audio clips). Parks hosting this event are Silverspring (710 Konihowski Rd) and Victoria (16th W & Ave H South).
Tuesday, May 24, 7 pm: Branimir Gjetvaj, representing ‘Wild About Saskatoon’, will lead a workshop on Creative photography of trees. With a background in ecology and genetics, his interest in photography focuses on appreciation and protection of natural environments and cultural legacies. Location: Chief Whitecap Park south of Saskatoon; meet in the dog park parking lot. Participation/pre-registration required (SOS Trees website); limited to 15 to 20 people. In case of rain, the alternate date is May 26.
Wednesday, May 25, 7 pm: Tree Spirit Connections: Exploring Spirituality in the Trees
Rev. Shawn Sanford Beck, known as the Green Priest, employs spirituality – using breathing, prayer, body movement and the active imagination – to connect with and bless the natural world around us. Location to be announced on SOS Trees’ website.
Thursday, May 26, 7-9 pm: Our Trees in a Changing Climate, a University of Saskatchewan webinar.Dr. Colin Laroque, Soil Science Department, University of Saskatchewan, explores the carbon sequestration by trees. How do they contribute to climate mitigation? What adaptation strategies can homeowners and city planners employ to maximize our efforts? The financial benefits to homeowners of planting trees? Free, but register through gardening.usask.ca.
Friday, May 7, 7 pm: Remai Modern Art Gallery Film Night. “What Trees Talk About”, directed by Ryszard Hunka, deals with the secret, dynamic life of trees in our boreal forests – how they communicate, wage war and work together to transform their world and ours. Check the Remai website for covid protocols.
Saturday, May 28, 9 am-noon: Arbour Crest Tree Pruning Workshop. This hands-on pruning workshop, instructed by local arborist Robin Adair, takes place at the Varsity View Community Garden (Wiggins Ave and 12th St. E). It covers the what, when, why and how of pruning and tool care. Bring your own pruning tools, gloves and safety glasses. Registration is limited (SOS Trees’ webpage).
Sunday, May 29,1 pm: Community Tree Planting of a Food Forest. SOS Trees has partnered with the Sunnyside Care Home, the City of Saskatoon and the Saskatoon Nature Society to plant fruit trees in the care home’s garden, 2200 St. Henry Ave.This initiative will connect vulnerable populations with access to nutritious food, improving food security in a sustainable manner. It also encourages bird populations. Please bring your own tools.
In celebration of Arbor Week, plant trees – with your family, neighbours, school, club or community organization – and breathe in that sense of satisfaction, nurturing and hope for the future of our urban forests.
Retired from the University of Saskatchewan, Sara’s most recent book is Growing Fruit in Northern Gardens with Bob Bors. She’s been hosting garden tours for over 20 years – to Great Britain, Ireland, Europe, Turkey and Iceland. Join her for a tour of French gardens this September. Contact Ruth at 1-888-778-2378, www.worldwideecotours.com
Pines for the Prairies [Part III]
![Pines for the Prairies [Part III]](https://paherald.sk.ca/wp-content/uploads/2022/04/RR-A06-Pinus_ponderosa_16866-768x1024.jpeg "Pines for the Prairies [Part III]")
The following pines are all native to North America. And with a little bit of care, all have been successfully grown on the prairies. All prefer full sun, a lighter, well trained soil, and a more protected location.
Limber pine (Pinus flexilis) is an alpine/subalpine species, often found in exposed areas in the foothills of the Rockies. Both the species name, flexilis, and the common name, limber pine, refer to the supple young branches that can be tied in knots. It was discovered by Edwin Jones, an American army doctor who accompanied an 1820 expedition to the Rocky Mountains.
Dense and pyramidal when young, it becomes rather broad and flat-topped with age (like many of us) developing a large and uneven crown. Single or multiple trunked, both the trunk and the branches appear thick in proportion to their length. The bark is a soft grey-green, later turning greyish-brown to black.
The needles, in bundles of five, are a dark blue-green, stiff and slightly curved, with three or four lines of stomata on each surface. They persist for 5 or 6 years, lending the tree is very dense appearance. The cylindrical and resinous cones are erect when young, becoming pendulous, hanging at right angles to the stem, once they mature. The edible seeds can be eaten raw, roasted or ground into flour. Although slow growing, limber pines can live for over a hundred years.
They prefer a light soil but are quite adaptable as long as it is reasonably well drained. They’ll grow in sun or partial shade, are drought-tolerant once established, and have no problems other than the occasional sapsuckers who seem to find them attractive. Limber pines are well used as specimens, accents or within a mixed border.
Ponderosa pine (Pinus ponderosa var. scopulorum) is native to South Dakota’s Black Hills, eastern Wyoming and the Rocky Mountains’ eastern foothills. Ponderosa means heavy, a reference to the wood, while scopulorum means of cliffs or rocks, describing its native habitat. It’s smaller and hardier that the species (P. ponderosa) and better adapted to the prairies. Broadly pyramidal (15 x 6 m / 50 x 20 ft.), its bark is dark grey, nearly black. The needles are very sharp and in bundles of three. The brown cones are round, and each scale has a tiny bristle. Obtain trees from seed collected from its northern-most range.
White pine (Pinus strobus), native to much of central and eastern North America, including Manitoba’s southeastern corner, is probably the softest and most sensuous pine available to prairie gardeners. The species name, strobus, refers to its cones.
A valuable softwood lumber tree, during the colonial era white pine was reserved by law for the exclusive use of the Royal Navy for ship masts. Today, it makes a handsome specimen tree. Place it were it can be touched!
But be aware of provenance, the extent of a plant’s native range! Plants grown from seed that originate in the most northern and western portion of its natural range are more likely to be hardy on the prairies than those from further east or south. My own white pine came as a seedling, dug by a friend from the ditch on the highway west of Thunder Bay. It has grown and prospered for four decades, whereas two earlier attempts with commercially available white pines of unknown seed origin had failed.
White pines are graceful, pyramidal trees (15 x 7 m / 50 x 23 ft.) with thin gray bark that becomes brown and furrowed with age. The long, soft pliable blue-green needles are in bundles of five, point forward to the tips of the branches, and generally remain on the tree for two years. The curved cones are long and cylindrical, an attractive lilac-purple, exude a white resin and are retained for two years.
Fast growing, especially when young, white pines live for well over a century. Place them where they’re sheltered from wind as they are vulnerable to winter browning, more so in their early years. Somewhat adaptable, they do well on fertile, moist, well-drained soil in full sun or partial shade.
Although white pine blister rust and white pine weevils are serious concerns where large populations of white pines exist, neither has been very problematic on the prairies where these pines are relatively uncommon.
Retired from the University of Saskatchewan, Sara’s most recent book is Growing Fruit in Northern Gardens with Bob Bors. She’s been hosting garden tours for over 20 years – to Great Britain, Ireland, Europe, Turkey and Iceland. Join her for a tour to France this September [Contact Ruth at 1-888-778-2378, www.worldwideecotours.com]
This column is provided courtesy of the Saskatchewan Perennial Society (SPS; saskperennial@hotmail.com ). Check our website (www.saskperennial.ca) or Facebook page (www.facebook.com/saskperennial) for a list of upcoming gardening events. The Spring Plant Exchange will be held on Sunday, May 29. The plant exchange will start around two o’clock for more information please see the website. These are “member only” events, but memberships are available at the door for $10.00.
ASPARAGUS – A PERENNIAL VEGETABLE WORTH THE WAIT

Jackie Bantle and Sara Williams
Saskatchewan Perennial Society
Asparagus (Asparagus officinalis) is a perennial vegetable that is easily grown on the Prairies despite being native to the Mediterranean areas of Europe, northwest Africa and Asia. Called “sparrow grass” by many (including Shakespeare and Sara’s Dad when she was a kid), both the common and generic names are from the Greek word asparagos or sparago which means turgid or full to bursting – an allusion to its supposed phallic properties.
The species name, officinalis, is from a Medieval Latin term denoting plants used in medicine, herbalism and cookery. Hippocrates, the Greek physician considered the “Father of Medicine’, alludes to the use of asparagus as an aphrodisiac, possibly because of its phallic appearance. (Yet he also advised it as a treatment for diarrhea.) During the Middle Ages, monks grew it in abbeys and monasteries. Europeans of the Renaissance swore by it as an aphrodisiac and the church banned it from nunneries. The English herbalist Gerard (1633) likewise said eating asparagus was thought to increase seed (semen) and provoke lust.
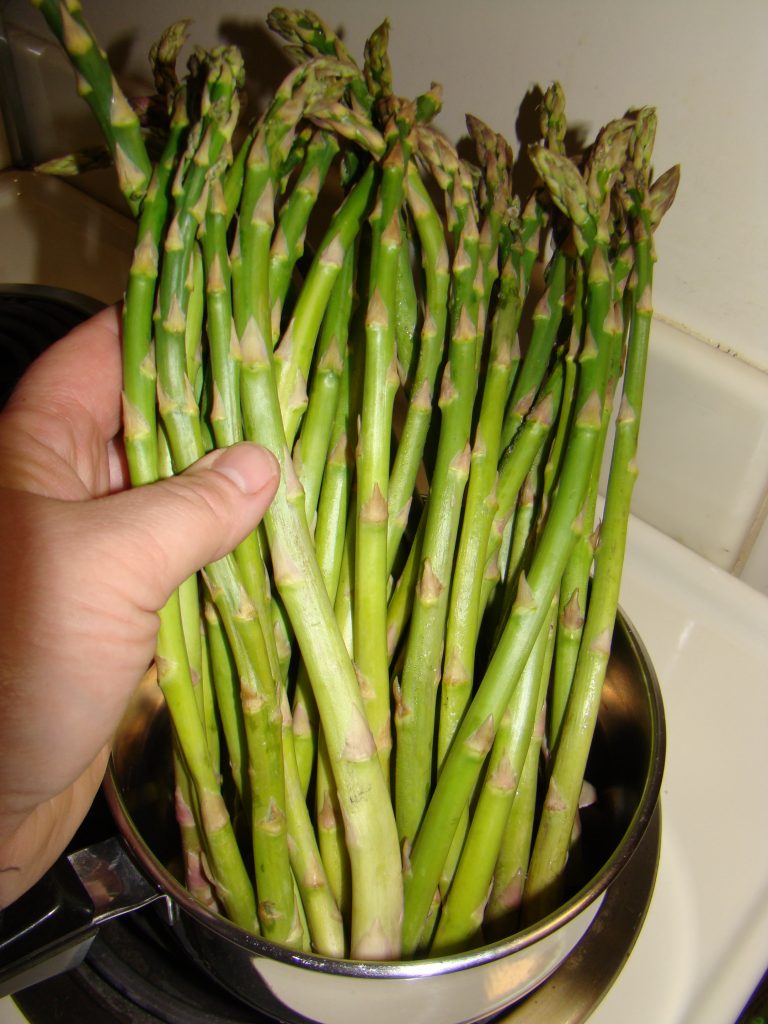
Asparagus plants are dioecious: this means that each plant is either a male or female plant. Older asparagus cultivars (such as ‘Martha Washington’ and ‘Viking’) have both male and female plants. The female plants produce small red berries which are eaten and transported by birds, enabling asparagus to become an invasive weed in natural areas throughout Saskatchewan. Gardeners should avoid older asparagus varieties that produce female plants. More recent recommended seedless male asparagus varieties are ‘Guelph Millennium’, ‘Guelph Thiessen’, ‘Jersey Supreme’ and ‘Jersey Giant’.
An asparagus garden patch can be directly seeded outdoors, transplanted as seedlings or started with established asparagus crowns. Avoid direct seeding and begin seedlings indoors in late winter/early spring. Seed is slow to germinate and plants are very tender and fragile when they emerge.
Asparagus crowns, the roots of the asparagus plant, can be purchased from your favorite seed catalogue or local nursery. Beware that there is a risk of planting diseased crowns. Fusarium crown rot is a devastating disease that can destroy an asparagus patch and render your soil uninhabitable to asparagus for years. There is no certification program to ensure that asparagus crowns are ‘fusarium free’.
Because asparagus is a perennial, prepare the soil with care and attention. If possible, choose an area with well-drained loam to sandy loam soil. Prior to planting, incorporate a layer of well-rotted manure (at least 5 cm thick) into the soil. Plant the asparagus as soon as the soil has thawed and can be easily worked. Dig a trench at least 20cm deep. Plant seeds, crowns or transplants in the trench, covering with 5cm of soil. As the growing season progresses, fill in the furrow a little every few weeks, covering part of the plant but never burying the entire crown. By the end of the growing season, the trench should be level with the surrounding soil. Space the plants 30 cm within-the-row and 2m between rows.
To establish a strong, healthy asparagus patch, refrain from harvesting any spears until the plants are at least 3 years old. Premature harvesting decreases the vigor and health of developing crowns. In year 3, harvest up to 2 spears per plant. In year 4, harvest spears for 4-5 weeks. In year 5, harvest for 6-8 weeks. A good rule of thumb is to stop harvesting when spear diameter is less than 10mm (3/8 in.). Spears should be harvested when they are 10-20cm (4-10 in.) in length. Older spears will be fibrous. Cut spears up to 5cm below the soil line. Asparagus harvest occurs from spring until mid-June, then allowing plants to form a ferny hedge for the remainder of the growing season.
After asparagus ferns turn yellow and die in the fall, the ferns should be mowed or removed from the patch. In northern latitudes we tend to leave asparagus ferns in place over winter to catch snow. This is not recommended if you have a problem with asparagus beetles such as the common asparagus beetle (Crioceris asparagi) or the spotted asparagus beetle, (Crioceris duodecimpunctata).
In 1781, Benjamin Franklin wrote that “A few Stems of Asparagus eaten, shall give our Urine a disagreeable odour…” This was echoed by Marcel Proust, the French novelist in 1913 when he noted, perhaps with sarcasm, that it “…transforms my chamber-pot into a flask of perfume.” So, why does your urine smell after eating asparagus? Asparagusic acid is broken down into sulfur containing by-products. When you pee, these evaporate almost immediately, causing that unpleasant scent.
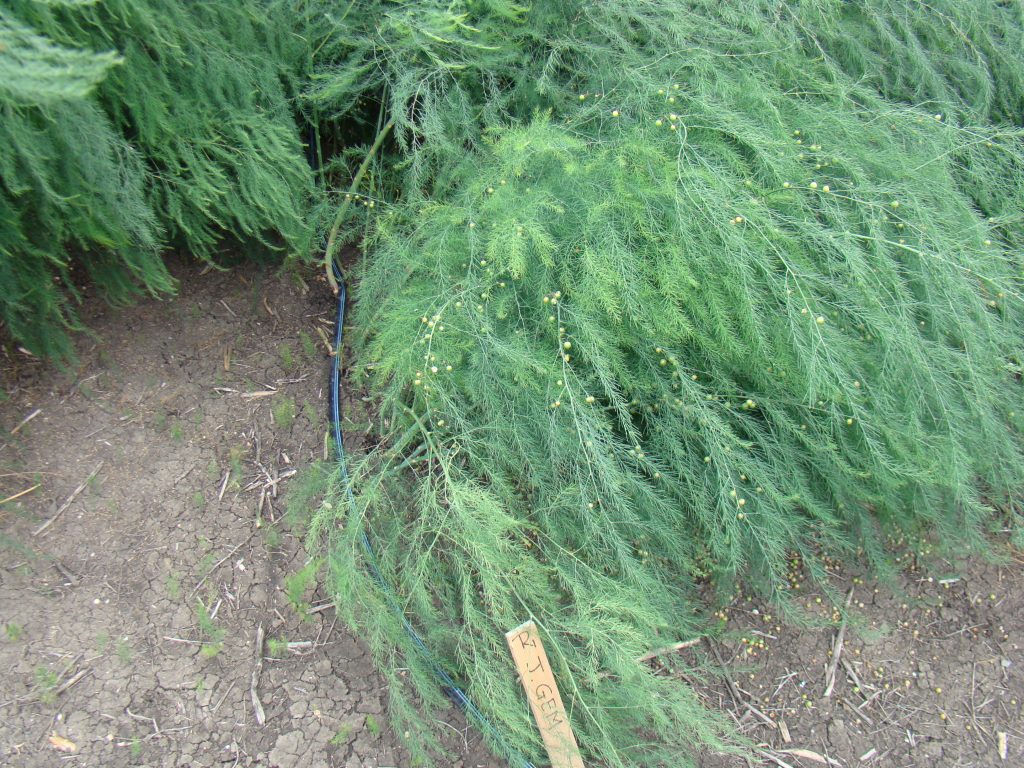
Retired from the University of Saskatchewan, Sara’s most recent book is Growing Fruit in Northern Gardens with Bob Bors. She’s been hosting garden tours for over 20 years – to Great Britain, Ireland, Europe, Turkey and Iceland. Join her for a tour to France this September [Contact Ruth at 1-888-778-2378, www.worldwideecotours.com]. Jackie Bantle is horticulturist living on an acreage north of Saskatoon. This column is provided courtesy of the Saskatchewan Perennial Society. Check out their website at www.saskperennial.ca or Facebook page (www.facebook.com/saskperennial) for a list of upcoming gardening events. The Spring Plant Exchange will be held on Sunday, May 29. The plant exchange will start around two o’clock for more information please see the website. These are “member only” events, but memberships are available at the door for $10.00.
Plant Sunflowers – In solidarity and hope for peace
Sara Williams
Saskatchewan Perennial Society
This is the first time I have ever written a gardening article with political overtones. I visited Ukraine about 10 years ago with a good friend who has cousins in a small village in Ukraine he had never met. We had no contact information and arrived unannounced. Yet we were overwhelmed with kindness and food and love. And there were sunflowers everywhere.
How did sunflowers make the journey from the Americas to Ukraine?
Native to South and Central America, the original plants were believed to have been multi-branched, bushy and with smaller flower heads. Variously dated to over 4500 years ago, the edible seeds have been used by indigenous peoples since time immemorial: for flour in bread and cakes, or roasted and eaten. The oil and pigments were used as sunscreen and the stalks in construction. In Peru, the Aztecs worshipped sunflowers.
Spanish sailors were thought to have brought sunflower seed to Europe where they were established in ornamental gardens in Madrid, Spain by the early 1500s. They were introduced to other parts of Europe by later that century. John Gerard, the English herbalist, writing in 1597, considered them to be somewhat of an aphrodisiac:
“We have found by triall that the buds before they be flowered, boiled and eaten with butter, vinegar and pepper after the manner of artichokes, an exceeding pleasant meet, surpassing the artichoke far in procuring bodily lust.”
During the 1700s, the Orthodox Church had issued a diktat for the period of Lent which banned the consumption of food made from various oils and fats but had omitted sunflower oil from the list, thus ensuring its popularity. By 1769, they were being cultivated for oil production and had arrived in Ukraine by the early 1800s. Today, they are widely grown as a field crop for their edible seeds (which contain up to 49% oil). They are considered a premium edible oil because of their light colour, high level of unsaturated fatty acids and high smoke point. Ukraine is now the world’s leading sunflower oil producer with 12.24 million tonnes in 2017. And no village garden is without them.
Why are they called Sunflowers?
The large round flower heads are thought to resemble the sun. As well, they are heliotropic, tilting to follow and face the sun as it moves across the sky. The botanical name (Helianthus annuus) repeats this information: Helios means sun and anthos flower; annuus indicates it is an annual, living for one season.
Most sunflowers are tall plants, generally 7 to 10 ft in height, but there are also many dwarf varieties of 2-3 feet available. The flower heads are held on thick bristly stems and can be 4-12 inches in diameter. A composite flower, each head is composed of 1,000 to 2,000 individual flowers. The outer ray flowers (single petalled in cream, yellow, red, orange and burgundy) surround the interior disc flowers which are usually brownish-orange. The large heart-shaped leaves are toothed and bristly.
Growing Sunflowers
Sunflowers should be sown directly where they are to be grown in ordinary garden soil, in full to partial sun, once the soil is warm. Sow the seeds 1 to 2 inches deep and about 2 feet apart. They will germinate within two weeks. They are fairly drought tolerant.
Aside from their ornamental value as garden and cut flowers, sunflowers provide both people and bird seed.
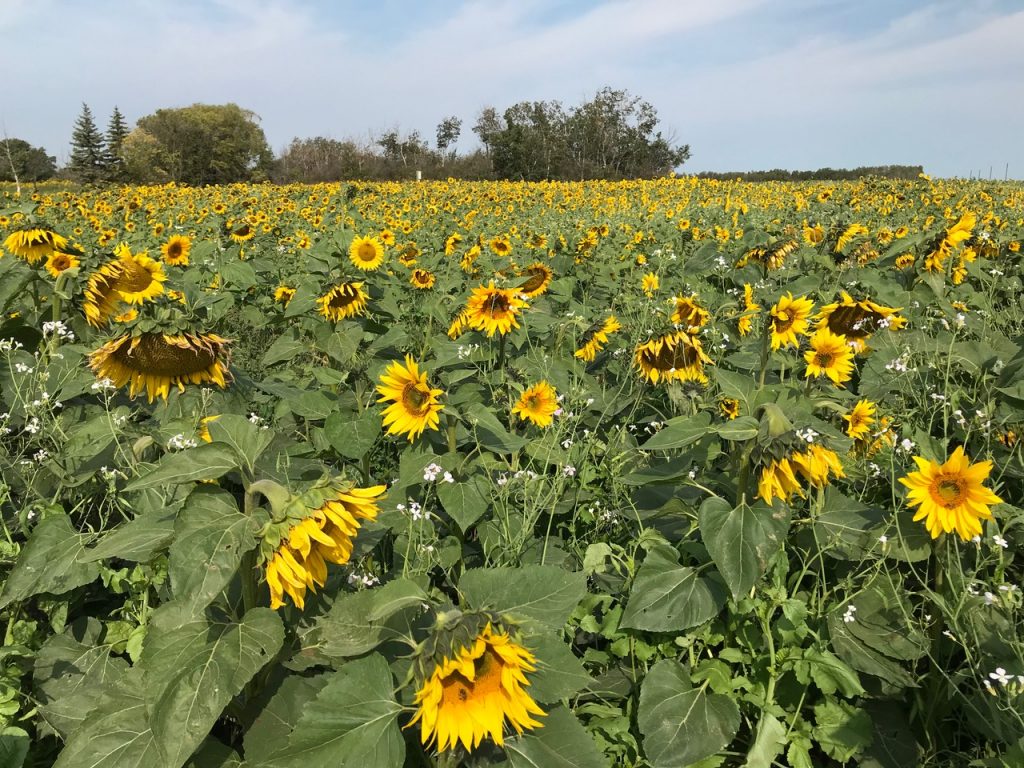
Peace
Throughout Ukraine’s history, the sunflower has been used as a symbol of peace. In June 1996, to celebrate Ukraine giving up nuclear weapons, USA, Russian and Ukrainian defense ministers planted sunflowers in a ceremony at southern Ukraine’s Pervomaysk missile base.
And from the cousins in the village:
Dear relatives … today Veronika received the money and we divided it into three families. This is a great support for us. We will be able to buy food and medicine. My son and his family were with us in the village, and now they went to Kamenets, where Veronika’s father stayed in the apartment. We often hear alarming sirens, which means that you need to run to the shelter, to the basement. This is when the Russian military launches missiles, but our military shoots them down. Margarita has difficulty with Angelina, 2 months old, constantly running to the basement. In both cities and villages, local boys built checkpoints and took turns guarding. For the seventh day the war is terrible, people and children are being killed, big cities and villages are being destroyed. It’s terrible. We do not sleep normally at night. I listen to the sirens. A lot of love. Bless you. To the whole world.
Retired from the University of Saskatchewan, Sara’s most recent book is Growing Fruit in Northern Gardens with Bob Bors. She’s been hosting garden tours for over 20 years – to Great Britain, Ireland, Europe, Turkey and Iceland. Join her for a tour to France this September [Contact Ruth at 1-888-778-2378, www.worldwideecotours.com]
This column is provided courtesy of the Saskatchewan Perennial Society (SPS; saskperennial@hotmail.com ). Check our website (www.saskperennial.ca) or Facebook page (www.facebook.com/saskperennial) for a list of upcoming gardening events.
Keeping Dutch Elm Disease under control

Jill Thomson
Saskatchewan Perennial Society
Dutch Elm Disease (DED) has been with us for many years. It is thought to have originated in Southeast Asia, travelled to Europe in the late 1800s, and was first observed in North America in 1930. It was found in Quebec in 1944, and has since moved across Canada, being found in Manitoba and Saskatchewan in the 1970s and 80s. In Saskatchewan, the disease has travelled west along natural corridors of native elms that grow beside waterways such as Carrot River in the north and the Qu’Appelle valley in the south.
It is particularly important to keep the disease out of our urban areas because elms are invaluable shade trees that line our city streets – there are few trees that are as long-lived, sturdy and hardy. Some cities like Winnipeg have lost nearly all their elms and the city takes extreme measures to save the few that remain. Infected trees were identified in Saskatoon in 2015, 2020 and 2021. In Regina, it first appeared in 1981 and has popped up sporadically since.
The disease is caused by Ophiostoma ulmi, a fungus that clogs the water and nutrient transport tissues in the elm tree, killing branches and ultimately the whole tree. The fungus spreads from tree to tree by spores that cling to elm bark beetles. The spore-laden beetles bore into dead or dying elm wood to make cavities where they lay their eggs. Spores get dislodged inside the tree during this process, and fungal infection develops. The insect eggs hatch into larvae and feed inside the tree. They eventually emerge as mature beetles, which will likely be coated with fungal spores that can then be spread to other trees during egg-laying. This complex life cycle provides several points that allow us to reduce or prevent infection.
Many dollars have been spent to try and contain DED. The City of Saskatoon Parks Department has a crew dedicated to DED surveillance and testing during the season. The City also has programs for distributing educational materials, DED inspections, permits, specialized pruning schedules and monitoring. Additional budget resources are provided to promptly remove and dispose of infected trees when a positive infection is detected in the community. Infected trees in Saskatoon are removed immediately, chipped, and disposed of in the landfill. Neighbouring trees are monitored for up to 4 years to make sure that the disease hasn’t spread. There is also funding for educating the public on ways to recognize and deal with diseased trees.
Pruning elms at the correct time is critical to remove the dead or dying branches that are attractive egg-laying sites. The provincial elm pruning ban runs from April 1 to August 31; this coincides with the elm bark beetle’s egg-laying period. However, if infected trees are identified during spring and summer they are removed immediately, chipped and disposed of in the landfill site (not as compost waste).
Several years ago, in April, we noticed a broken elm branch above our garage, that was likely to fall and damage the roof. Also the same tree had branches overhanging and brushing against our neighbour’s roof, with the potential to damage the shingles. We contacted the city, and within 24 hours an inspector came to assess our tree. He wrote a permit which allowed us to prune specific branches, with instructions for the correct disposal of material (chipping on site and transfer to landfill in covered transport). This prompt response ensured the potential hazard was removed quickly, and no dying branches or cut wood offered an egg-laying site for the beetles.
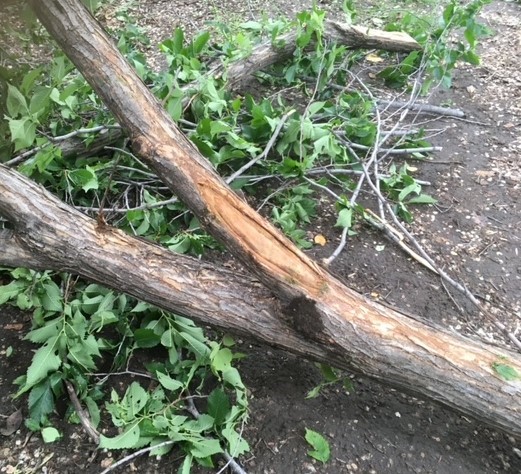
Another way to minimize spread of the disease is to dispose of any dead elm wood correctly and not to use as fire wood. Storing and transporting elm wood is prohibited by provincial regulation at any time of the year.
In order to prevent DED from ruining our urban landscape it is important to follow these guidelines:
• Keep your elms healthy by pruning dying or dead branches during September 1 – March 31.
• Dispose of elm wood by chipping and taking to landfill.
• Do not store or move elm wood.
• If you see signs of DED (such as large, dead branches or individual branches with wilting and browning leaves that do not fall off in the summer), report them to your municipal authority.
Jill Thomson is a plant disease specialist (retired) who enjoys gardening with her family in Saskatoon.
This column is provided courtesy of the Saskatchewan Perennial Society (SPS; saskperennial@hotmail.com ). Check our website (www.saskperennial.ca) or Facebook page (www.facebook.com/saskperennial) for a list of upcoming gardening events.
Pine for the Prairies – Part 2

Sara Williams
Saskatchewan Perennial Society
Scots pine and Swiss stone pine are from Europe but have grown well here for generations. It’s always a horticultural high point to see a plant you’ve long loved in its natural habitat. I’ve been fortunate to see natural forests of both of these. And seedlings of Scots pines planted three and four decades ago have now grown to form their own forest.
Scots pine (Pinus sylvestris) is among my favourite conifers. The species name, sylvestris, is from the Latin word silva meaning “of the forest” (just as the state of Pennsylvania means “of Penn’s woods”, referring to the Royal Charter given to William Penn).
“Scots” is somewhat misleading as this species is a widely distributed pine with a native range from Scotland in the British Isles through Spain and into Siberia. Most of the Scots pines that have proven hardy on the prairies come from seed that originated in Scandinavia and northern Russia – not Scotland. The wood was once widely used for the masts of sailing ships as the resin slowed their decay. Scots pine are large (15 x 6 m / 50 x 2o ft.), fast growing and long lived.
Although they can be almost symmetrical and pyramid-like when young, they become more open and flat-topped as they mature, with all the character of a “Group of Seven” painting. Their bark is a very attractive foxy orange to reddish brown, later becoming rough and fissured. With age, they develop a deep and wide-spreading root system, especially when grown on sandy soils.
Needles are in bundles of two with a sharp point. They are blue-green, stiff and slightly twisted, often becoming yellow-green by late winter. The cones, pointing backward toward the trunk, are in clusters of two or three. They are retained for two years and then fall. They have no prickles on their scales but are rock hard and exceedingly tough on lawn mower blades – another good reason to apply mulch below these trees!
Scots pines do well on sandy, well-drained soil in full sun and are exceptionally drought-tolerant, even when fairly young. They are occasionally infested with white scale insects, and sap suckers have been known to leave their mark on them, but are otherwise trouble-free.
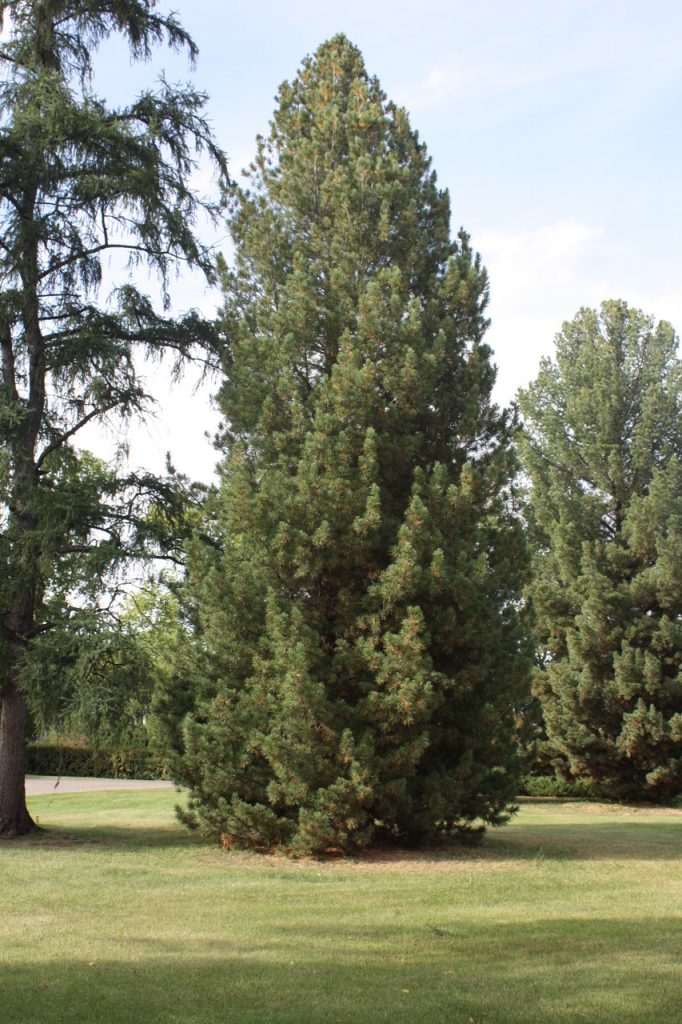
They are excellent as specimen trees (when perfectly formed and symmetrical) or as character trees (when not perfectly formed and asymmetrical), as well as in groupings. They have been planted in shelterbelts for nearly a century and are well appreciated by birds when used in wildlife plantings. They are xeriscape trees par excellence. [355]
Native to the Carpathian and Alps Mountains as well as parts of Asia, the Swiss stone pine (Pinus cembra) is long lived but very slow growing – it’s a tree you plant not for yourself but for future generations and your grandchildren.
Narrow, columnar, dense, and clothed to ground level (if not browsed by deer), it’s one of the loveliest pines available. Up to 12 m in height and 5 m wide (40 x 16 feet), the bark is gray-green and smooth. The long soft needles are dark green with bluish-white stomata lines on their undersides. In bundles of five, they’re resistant to sunscald and retained for up to 5 years, giving the tree a very dense appearance. The erect cones are greenish-violet when young, maturing to purple-brown. They are prickle-free with edible seeds (pine nuts) and drop in their third year without opening. Once on the ground, seeds are released through decay or dispersed by birds.
Plant in full sun in well drained loamy soil. Once established, they’re moderately drought-tolerant. Although it has a painfully slow growth rate from a gardener’s point of view, the Swiss stone pine is considered one of the best pines for a small landscape. Certainly, it will not outgrow its location in your lifetime. It’s excellent as an accent tree, as a grouping or in a mixed border.
Sara Williams is the author and coauthor of many books including Creating the Prairie Xeriscape, Gardening Naturally with Hugh Skinner and, with Bob Bors, the recently published Growing Fruit in Northern Gardens. She continues to give workshops on a wide range of gardening topics throughout the prairies.
This column is provided courtesy of the Saskatchewan Perennial Society (SPS; saskperennial@hotmail.com ). Check our website (www.saskperennial.ca) or Facebook page (www.facebook.com/saskperennial) for a list of upcoming gardening events.
Learning and Giving Back: The University of Saskatchewan Master Gardener Program

Sara Williams
Saskatchewan Perennial Society
As “pandemic fatigue” seems to drag on and on, we look for the positive to brighten our world. In the world of prairie gardening, look no farther than Saskatchewan’s Master Gardener Program which trains home gardeners to effectively volunteer within their communities: from providing good advice to getting their hands dirty doing for others what they love best (i.e. gardening).
The original Master Gardener program began at the Washington State University Cooperative Extension in 1973. From there it expanded to across the USA and most of Canada. Initiated in 1989, the Saskatchewan’s Master Gardener Program is over thirty years old and is managed through the University of Saskatchewan’s Gardening at USask program. In addition, Manitoba residents can also learn online with USask and certify through the Manitoba Master Gardener Association.
USask Master Gardener training provides new and experienced gardeners with a “best practices” approach to pesticide-free gardening on the Canadian Prairies; one that recognizes that there are many ways to garden successfully but some are more practical and effective than others. You don’t have to certify to take these classes though. All classes are available to everyone; many students take only one or two courses that target their special interests or to “get their feet wet” before committing to certification.
What motivates people to seek Master Gardener certification? Among the reasons given by the Master Gardeners themselves: learning more about gardening through the resource materials and seminars; personal satisfaction; becoming better able to help others; meeting people with similar interests; and developing a gardening business or employment opportunities.
Certification has two components: horticultural training and volunteer service. Participants study at their own pace (usually 6-24 months), complete their classes (which include many self-tests along the way). And when they feel they are ready, they write an open-book multiple choice exam based on the practice questions used throughout the course.
The horticulture workshops were originally given in Saskatoon and communities throughout the province. Because of COVID, they are now offered exclusively on-line on an “on-demand, take at your own pace” format that includes video lessons, self-tests, written support, and access to an instructor for questions. These workshops consist of the following:
• Gardening Fundamentals is the most comprehensive class, covering basic gardening, botany and soil health.
• Botanical Latin focuses on the practical application of plant classification and naming systems.
• Tree and Shrub Identification helps participants recognize the common trees and shrubs of the Prairies.
• Insects in your Yard and Garden explains the critical role of insects in a healthy ecosystem, how to recognize those that may live in your garden, and when to be concerned.
• Plant Diagnostics for Home Gardeners analyzes and diagnoses plant problems in an approach that goes beyond looking at only insects and diseases.
• Common Plant Disorders covers the wide spectrum of causes of plant disorders and how these impact plants while focusing on how to garden more sustainably.
• Common Plant Diseases involves how to identify common diseases, their life cycles, prevention and control.
• Safe Use of Pesticides and Alternatives discuses when and how to use home pesticides safely as well as techniques to avoid pesticide use. Although the USask program is pesticide-free, this is a required course as pesticide use remains common. Master Gardeners need an understanding of common practices in order to provide appropriate advice.
• Communications teaches Master Gardeners how to be effective communicators and thus more effective volunteers within their communities.
Students seeking to certify receive a total of 64 hours of education.
Master Gardeners in Training must complete 40 hours of volunteer community service. This can be done where the student lives or virtually. Students can create a volunteer situation that is suited to their needs. This can take many forms: behind the scenes building gardens at events like Gardenscape, setting up plant learning stations for school tours, writing projects through Gardening at USask, presenting gardening seminars for community groups; horticulture projects in care homes; school or youth group projects; writing gardening articles; or landscaping or caring for local parks or hospital grounds.
Once fully certified, Master Gardener certification may be renewed every two years.
To maintain Master Gardener status, participants subsequently volunteer a minimum of 20 hours a year and take six hours of classes every two years.
To learn more about Gardening at USask’s Master Gardener program, check out their website at www.gardening.usask.ca
Sara Williams is the author and coauthor of many books including Creating the Prairie Xeriscape, Gardening Naturally with Hugh Skinner and, with Bob Bors, the recently published Growing Fruit in Northern Gardens. She continues to give workshops on a wide range of gardening topics throughout the prairies.
This column is provided courtesy of the Saskatchewan Perennial Society (SPS; saskperennial@hotmail.com ). Check our website (www.saskperennial.ca) or Facebook page (www.facebook.com/saskperennial) for a list of upcoming gardening events.
Pines for the prairies [Part I]
![Pines for the prairies [Part I]](https://paherald.sk.ca/wp-content/uploads/2022/02/RR-A08-thumbnail_Jack-pine-wikimedia-commons-CC-BY-4.0-_DDumais-768x1024.jpg "Pines for the prairies [Part I]")
Sara Williams
Saskatchewan Perennial Society
Pines are found world-wide, mostly in the Northern Hemisphere. Pinus is the classical Latin name for this genus. Many pines, both native and introduced, do well on the prairies. These range from dwarf “buns” such as ‘Slowmound’ mugo pine to towering trees like white pine and lodgepole pine.
In spite of their size differences, they share many characteristics. Most prefer lighter sandy soils. All grow best in full sun. Generally tougher than spruce or fir, their deep tap root enables them to “tap” water from the subsoil during drought.
Pines have needles in bundles of two, three or five, depending on the species. Needles that are in bundles of two, such as those of Scots, mugo and jack pine, are semi-circular in cross-section and tend to be stiff. Needles in bundles of three or five, such as those of white pine and limber pine, are triangular in cross-section and softer and more slender.
Depending on the species, the needles remain on a tree for 2 to 5 years (or longer), turn yellow, later brown, and then drop. Because needles on the “inside” of the tree, closest to the trunk, are the oldest, they are the ones that brown and fall first. When pines are stressed by heat or drought, many needles may fall at once. This is your cue to water deeply and then mulch.
As pines age, they often (but not always) lose their lower branches, exposing attractive, furrowed bark. Deer love the younger needles of pines (especially those with softer needles such as Swiss stone pine) and may denude branches within browsing level.
Male and female “flowers”, in the form of cones, are separate but formed on the same tree. Small red male pollen cones, quite visible in early spring, are formed in clusters at the end of branches at the base of the tree on new shoots. They open in the spring to release wind-born pollen and then disintegrate. The female cones are formed at the tips of new shoots.
We’ll begin with those closest to home: Jack pine and lodgepole pine.
Jack pine (Pinus banksiana) is the most widely distributed pine across Canada with a natural range from the Arctic Circle to the Great Lakes, including the boreal forests of the prairies. The species name honors Sir Joseph Banks (1773-1820), the British horticulturist of Kew Gardens fame who initiated many of the plant hunting expeditions of his era.
Jack pines can naturalize on poor soils. They are extremely hardy with the ability to survive adversity but are not generally recommended as an urban ornamental conifer. For those who have lived in the Boreal forest they are a reminder of home. For others, perhaps a reminder of a Charlie Brown Christmas tree.
They have an open irregular form (20 x 7 m / 65 x 25 ft.), dark brown, furrowed, irregular bark, and short dull green needles in bundles of two. The dark purple curved cones, often in pairs, point toward the tips of the branch, and persist on the tree until they open and release seeds by the heat of fire. They are the first trees to colonize a burned area. Their natural habitat is dry sandy or gravelly soil in full sun to which their deep and extensive root system is well adapted. They can live for 150 years.
Lodgepole pines (Pinus contorta var. latifolia) are native to the Cypress Hills of Alberta and Saskatchewan as well as the Rocky Mountains. The species name, contorta, means twisted. It may refer to the gnarled branches or the twisted needles. The long straight young trunks were once used in the construction of teepees and lodges, hence the common name. Indigenous Peoples used the resin to waterproof canoes, baskets and moccasins.
Over 18m (60 ft) tall, lodgepole pines can live to be 200 years old. The dark green to yellow green needles are in bundles of two, twisted and sharply pointed. The cones persist on the tree for 10 to 20 years. It is drought-tolerant and adaptable to a wide range of soils. It is useful in a large landscape, for screening, as a specimen tree and in shelterbelts.
Sara Williams is the author and coauthor of many books including Creating the Prairie Xeriscape, Gardening Naturally with Hugh Skinner and, with Bob Bors, the recently published Growing Fruit in Northern Gardens. She continues to give workshops on a wide range of gardening topics throughout the prairies.
This column is provided courtesy of the Saskatchewan Perennial Society (SPS; saskperennial@hotmail.com ). Check our website (www.saskperennial.ca) or Facebook page (www.facebook.com/saskperennial) for a list of upcoming gardening events.
Information at your fingertips: www.gardening.usask.ca!

Sara Williams
Saskatchewan Perennial Society
When the Department of Horticulture of the University of Saskatchewan was created in 1921, one of its major responsibilities, along with teaching and research, was “Extension”: extending the knowledge base of the Department to Saskatchewan gardeners. In that era, extension consisted of writing newspaper articles, distributing pamphlets, hosting tours of the research facilities and test plots and holding workshops in communities throughout the province.
Dr. Cecil Patterson, the first head of the Department, mostly used the then provincial bus service to travel the province to give lectures. In the 1980s and 1990s, as the Horticulture Specialist with the Extension Division, I put on many miles driving to communities all over Saskatchewan, giving talks and workshops on various gardening topics. Always warmly received “as the lady from the University”, it was an experience I continue to treasure.
Decades later, the methodology has changed considerably as has the name. What was then Extension, is now called “Outreach”. And, intensified by the COVID pandemic, this free public service has more recently been carried out almost entirely online at www.gardening.usask.ca.
As COVID eliminated in-person classes and workshops, alternative methods of Outreach became necessary. Vanessa Young, the program coordinator since 2008, has become an innovator par excellence. Her strong background in horticulture and education (PAg, BSc, BEd), coupled with a great deal of practical experience in hort therapy, community education, and graphic design work, has enabled her to develop a number of useful resources for Prairie gardeners. Among these: expanding the website while making it easier to access and navigate; a user-friendly technology for presenting on-line classes via Zoom; and enabling the Gardenline information service to be more widely accessible.
The website features hundreds of articles specific to gardening on the prairies and in the far north. Many of these focus on growing food, flowers, trees and native plants, as well as techniques to reduce water use, increase biodiversity, extend the season and preserve harvests. Pesticide-free strategies to tackle plant disorders, diseases and pests are emphasized.
It’s easy. But you’ll need a computer or cell phone. How does it work? Begin by typing in: www.gardening.usask.ca. Once on the site, there are a number of choices. If you’re solely after information and you’re using a phone to access the site, there will be a green Menu button at the top right corner of your screen. Push that button and select Gardening Advice. From there, you have a wide array of gardening topics to choose from. If using a computer, you can find the Gardening Advice section easily along the top menu bar.
The website also includes information on how to access Gardenline; free and low-cost on-line live classes on a wide range of topics; on-demand workshops you can take at your own convenience; and both the Saskatchewan and Manitoba Master Gardener Programs.
The number of viewers of the website during 2020 and 2021 was an astounding 428,868 people! Although the majority were from Canada (62%), viewers resided in almost every country of the world.
Around 3,500 people have registered for the free and low-cost live classes since they were launched at the start of COVID (March 2020). This year, Gardening at Usask is offering almost fifty, two-hour, on-line webinars from January through June. They range from “Vegetable Gardening” to “The Colour Purple”. A number of these classes are free. Among the freebees are: “No till vegetable gardening”, “Low water, low maintenance gardening: principles, plants and practices”, “Mulch”, “Compost 101: scraps to soil”, “Lot drainage: managing water on your property”, “Pesticide free gardening” and “Waste-free living”.
Gardening at Usask also has a FaceBook page: www.facebook.com/gardeningatusask. About 5 “posts” are created every week. A post is a concise, informational/educational writeup about a discrete gardening topic which always includes a photo. The posts are timely and correspond to what gardeners need to know that week – for example, a post about when to start tomato seedlings would appear in mid-April, while one dealing with harvesting potatoes would pop up in late August. The post dealing with the 2021 drought captured almost 80,000
Sara Williams is the author and coauthor of many books including Creating the Prairie Xeriscape, Gardening Naturally with Hugh Skinner and, with Bob Bors, the recently published Growing Fruit in Northern Gardens. She continues to give workshops on a wide range of gardening topics throughout the prairies.
This column is provided courtesy of the Saskatchewan Perennial Society (SPS; saskperennial@hotmail.com ). Check our website (www.saskperennial.ca) or Facebook page (www.facebook.com/saskperennial) for a list of upcoming gardening events.
What does your Tussie-Mussie have to say?

By Ginnie Hartley
Floriography – isn’t that a gorgeous word? It means the language of flowers. People have attributed meaning to flowers for thousands of years. Plants and flowers are used as symbols in the Hebrew Bible, particularly of love and lovers in the Song of Songs. In the fifteenth century, herbs such as rosemary, thyme and rue, were carried in posies close to the nose to mitigate bad smells and to ward off the plague (a possible deterrent for COVID?).
Do you remember playing “Ring a ring o’ roses” as a child? Folk lore has it that it originated after the Great Plague of 1665 in England. The plague caused a rosy rash, and people carried “a pocket full of posies” to ward off the sickness. If they caught it, they sneezed and then “all fall down [dead]”.
Shakespeare made good use of the symbolism of flowers, especially Ophelia’s “madness” speech in Act 4, Scene 5 which begins, “There’s rosemary, that’s for remembrance. Pray you, love, remember. And there is pansies, that’s for thoughts.” She continues by mentioning fennel and columbine (adultery), rue (repentance), daisies and violets (flowers of faithfulness). And in Henry VI, English noblemen picked either white or red roses to symbolize their allegiance to the Houses of Lancaster or York.
The craze for using flowers to send messages was brought to England in 1717 by Mary Watley Montagu who had witnessed a similar practice while she was in Turkey. In Victorian England, specific floral arrangements were used to send coded messages. Nosegays, posies or tussie-mussies were “talking bouquets” which could be worn to express feelings that could not be spoken aloud in Victorian society. “Nosegay” was a small bunch of flowers that appealed to the nose. At that time, “gay” meant an ornament. Tussie-mussies might be wrapped in a doily or put in a special posy holder which might be made of silver. Messages could include a yellow camellia for longing, a gardenia for secret love or an amaryllis to denote shyness. Worn in a woman’s cleavage, it would be bad news for her suitor since it signified friendship. Pinned over her heart, it was an unambiguous declaration of love.
Floriography is not limited to Western culture. For example, in Korea you can send a ‘birthday’ flower to a family member or friend as there is a flower for each day of the year! There are also flowers for each month. The flower for February is a violet for faithfulness. And in Japan, cherry blossoms represent both birth and death.
Nowadays, the rose is the most commonly used sender of messages of love, especially on Valentine’s Day. But the colour chosen is most important. Red is the lover’s rose, white signifies innocence, yellow equals friendship, orange indicates desire and purple, love at first sight. Why are red roses chosen above all other colours for Valentine’s Day? According to legend, the Greek goddess Aphrodite was scratched by a white rose thorn while rushing to the aid of her lover Adonis. Drops of her blood fell on the flowers turning them red. The number of roses in a bouquet is significant: one rose indicates love at first sight, six roses means infatuation, 15 roses is an apology, 50 means unconditional love and 99 means “I will love you till the day I die” (but results in a depleted bank account).
Which brings us to the language of flowers in sickness and at funerals. The daffodil is the symbol of the Canadian Cancer Society and the sunflower is used by the ALS Society. Flowers are ubiquitous at funerals, the most popular being lilies which represent the soul’s return to a state of innocence. Pink carnations are for remembrance and white chrysanthemums are typically given in Korea, Japan and China to express grief.
So next time you want to send someone a secret message, take a trip to the flower shop or take a turn around your flower beds and pick out something special!
Ginnie Hartley is a retired Speech-Language Pathologist who loves gardening almost as much as she loves words.
This column is provided courtesy of the Saskatchewan Perennial Society (SPS; saskperennial@hotmail.com ). Check our website (www.saskperennial.ca) or Facebook page (www.facebook.com/saskperennial) for a list of upcoming gardening events.
Dieter Martin, the man about campus

Bernadette Vangool
Saskatchewan Perennial Society
A friend of mine was recently invited to a birthday party in honour of Dieter Martin who is ninety years young. Dieter is a well known player on the horticultural scene in and around Saskatoon. He is the man who was instrumental in looking after all the green space at the University of Saskatchewan as head gardener from 1957 to 1976. He moved to Langham, Saskatchewan in 1970 where he and his late wife Ilse had begun a small greenhouse business attached to the house. In 1976, he retired to Langham to devote his time to the greenhouse operation. Dieter Martin Greenhouses, now operated by two of his children, Nancy and Peter, continues to thrive. And Dieter’s many acquaintances still drop by on occasion to spend an enjoyable afternoon with one of its founders.
Dieter Martin was introduced to horticulture by his grandfather. He worked for Parks and Urban spaces in his native town of Aschaffenberg, Germany before coming to Canada in 1953 and working at the University of Alberta. A year later Ilse Brauning immigrated to Edmonton where they met and married in August, 1955. In 1957 he was hired as the head gardener for the University of Saskatchewan. He was just 26 years of age. Although the bowl area and a nursery for plants were well established, much of the campus was in a steady state of construction for the first 12 years of his tenure, with 10 new buildings added. So besides having to maintain the existing grounds, he was also in charge of creating new green spaces to replace the construction zones surrounding the new buildings.
Besides what he referred to as “clean up, clean up and more clean up”, his first concern after his arrival on campus was the sorry state of the elm trees along what was then known as King George Drive leading into the bowl. The elms were doing poorly and at first it was thought they had Dutch elm disease. Dieter diagnosed the problem as compaction of the soil and lack of adequate moisture. He developed lawn areas around the trees which provided some winter protection, and with irrigation in summer, gave them the much needed moisture the trees required.
When asked about his first impression of the campus, he recalled that the bowl looked impressive, but he did not like the John Mitchell building and that Kirk Hall reminded him of an European prison. Rather than prisoners, he found out it actually housed Agriculture students. In his own words “I thought to myself, if I have a chance, I’m going to hide that building.” A master of disguise, he was very successful in his task. With the careful planting of trees and shrubs, the building has faded into the background.
Originally Dieter used tree material from the nursery and test plots developed by Dr. Cecil Patterson. But in order, to make an immediate impression, he sometimes needed bigger trees for his projects. He asked permission to move larger trees, a practice of which Jim Wedgewood, his supervisor, and Dr. Cecil Patterson were skeptical. President Thompson allowed him to give it a try and in 1958 the first trees were successfully moved from the area near the Biology building. The work was done in winter, using a method Dieter had observed in Germany. A slow burn over five days to a depth of about five feet around the roots thawed the soil. The dormant trees were then lifted using slings, and the trees and root-balls were then transported to the new location. This method proved very successful and many trees were moved in subsequent years from other places on campus, as well as some 200 trees from a shelterbelt at the nearby Forestry Farm.
Dieter made things happen around him, through mentorship, co-operation, collaboration and sometimes subterfuge to get things done. He was equally at home conversing with and chauffeuring the President of the University, Dr. Spinks, around town, as talking to students about tasks that needed doing. He is such a genuine person that when I think of him, I get a smile on my face and get ready to hear his latest story or to obtain a new plant I just had to give a try. Happy birthday Dieter.
Thank you to the University of Saskatchewan for the Youtube video ‘Landsaping at the U of S – A storied History’.
This column is provided courtesy of the Saskatchewan Perennial Society (saskperennial@hotmail.com ). Check out our website (www.saskperennial.ca) or Facebook page (www.facebook.com/saskperennial).
Is It Time to Replace my Garden Seeds?

Jackie Bantle – Saskatchewan Perennial Society
In the deep, dark cold of winter, gardening season seems like a distant memory or wishful thinking. I have too many houseplants so, to satisfy my gardening itch, I have decided that I am finally going to clean up and organize my extensive flower and vegetable seed collection. I am harboring seed from many years and it is time to unclutter that mess!
I’m often asked, “How do you know if your vegetable or flower seed is still viable? How long can I store my vegetable seed? Should I buy new seed this year?” Storage conditions and storage time varies for each vegetable and flower. Flower seeds generally last longer than most vegetable seeds. Some seeds are easily kept for up to five years, while others should be replaced annually.
A general rule of thumb is that high moisture and high temperature reduce the quality and viability of flower and vegetable seeds. This doesn’t mean that you need to invest in a dehumidification system for your “high tech, airtight, temperature controlled, underground seed storage unit.” For most seeds, storage temperatures between 5 and10ºC are more than adequate for at least one year of storage, as long as the seeds are dry and stored under dry conditions (air tight containers or plastic bags are adequate).
Vegetables that have a seed storage life of five years, under dry conditions with average to cool temperatures, include: cucumber, endive, lettuce, muskmelon and radish. At the other extreme, some vegetables that should only be stored for one year include: onion, parsley and parsnip. Seed storage of sweet corn, leek and okra should be limited to two years. Germination rates will decline significantly decline after that time. A maximum of three years of seed storage is recommended for asparagus, beans, broccoli, carrots, celery, kohlrabi, peppers, spinach and peas. Beet, Brussels sprout, cabbage, cauliflower, Swiss chard, eggplant, kale, pumpkin, squash, rutabaga, tomato and watermelon seed should have good germination rates even after four years of storage.
Flower seed viability varies immensely. For example, nasturtium and zinnia seeds can easily last up to 7 years whereas pansy and impatiens seeds may remain viable for only 1 or 2 years.
Even though some of your seed might be older than these recommended dates, there is no need to throw it out. Instead, do your own simple home germination test this winter. Take two pieces of paper towel. Place one piece of moistened paper towel on a plate. Spread out ten seeds on the paper towel. Moisten the second paper towel and place it lightly over the seeds. Keep the paper towels lightly moistened and place the plate in a warm location (20ºC), out of direct sunlight. After several days, check the seeds for germination. Some seeds germinate faster than others, so be patient. For example, the average germination time for radish and lettuce is four days at 20ºC, whereas beans can take up to 18 days to germinate at that temperature. If seeds haven’t germinated after 20 days, they are probably not going to.
By counting the number of seeds that have germinated, you can determine your germination percentage. For example, if 4 seeds out of the 10 have germinated, your germination rate is 40%. This number is important when it comes to seeding time. A 40% germination rate tells you that in order to have plants at your desire spacing, you will need to seed 2.5 seeds for every desired plant. Since half seeds don’t grow very well, you will need to seed 3 seeds for every desired plant to ensure you have an adequate plant stand. If all 3 seeds germinate, your hoe can easily take care of the extra plants.
Next week, I will discuss some guidelines on what to look for when choosing new cultivars of vegetables to grow: how to decipher the seed catalogue lingo.This column is provided courtesy of the Saskatchewan Perennial Society (SPS; saskperennial@hotmail.com ). Check out our website (www.saskperennial.ca) or Facebook page (www.facebook.com/saskperennial)
What is full sun?

By Bernadette Vangool – Saskatchewan Perennial Society
‘On a given day, only the uppermost leaves on the tallest trees enjoy the luxury of direct sunlight from daybreak to nightfall. Most plants simply have to tolerate some period of shade during the growing day. From a gardening perspective, the definition of ‘full sunlight’ is therefore described as a block of at least six hours of direct sunshine during the mid-part of the solar day. Anything less is partial shade, meaning a plant’s growth and productivity is reduced unless they are among the ‘shade plants’ that have evolved various mechanisms over the millennia for capturing and using sunlight more efficiently to compensate for life beneath a canopy.’
Brian Baldwin
This column was inspired by one written by Brian Baldwin, one of the early submissions by the Saskatchewan Perennial Society and published in 2007. Brian was well known by the horticulture community for his sharp wit, as a teacher and as a writer of all things horticulture. He left us too soon, in 2009, but is fondly remembered by many.
The intensity of the sun changes over the seasons. The sun is much lower in the sky at the end of August, resulting in very different shade patterns in our landscapes. The best time to measure the sunlight in your yard is during the active growing months, after the trees have fully leafed out. In Saskatchewan that would be June and July. Observe and record the light in different planted areas over several days. A quick look out the window at each hour of the day, should suffice to give you a pretty good idea of which areas receive full sun. Six to eight hours for perennials and flowers and eight to ten hours for the vegetable garden.
Now for some more terms, that may or not be interpreted the same by gardeners. “Part sun”, or “full sun to part shade”, I would interpret as four to six hours of sunlight with most of those hours being in the afternoon when the sun tends to be hotter. If these are sun-loving flowering perennials, the more sunlight provided the more flowers you can expect.
Place plants that do best in “part shade” in the morning sun, with an exposure of three to six hours of direct sunlight.
“Full shade” plants can be placed under tree canopies. They still need some dappled light to thrive. Deep shade is seldom conducive to healthy growth. In my yard, I mulch deep shade areas and plant my shade loving plants around the drip-line of trees. No amount of fertilizer is going to make plants thrive in the dark. (except perhaps some hardy dead-nettle or Lamium). Full shade plants can tolerate some sun in the morning or late afternoon, but seldom do well in mid-day sun.
Some areas on the north side of buildings, may be consistently shaded, but still receive an abundance of reflected light. This is especially true of those planted adjacent to light coloured buildings. Reflected light anywhere in the landscape is difficult to measure and can make a large difference in which plants will do well in a specific area.
No matter what the labels say, many plants are quite flexible. Over time you will become quite adept at choosing just the right location for individual plants. If leaves are curling up in the middle of the day, or the flowers on certain perennials are sparse, just moving them to another spot in your garden may be all that is needed. Make sure any such moves are done on overcast days, and water the transplants regularly. Treat them as newly acquired perennials, that need extra care until established.
Of course, light is not the only consideration when thinking about your plants well being. Good soil with lots of nutrients and adequate water, especially for those perennials close to large trees, (very adept at robbing moisture from their smaller cousins) are very important. This column is provided courtesy of the Saskatchewan Perennial Society (SPS; saskperennial@hotmail.com ). Check out our website (www.saskperennial.ca) or Facebook page (www.facebook.com/saskperennial).
Holiday Cactus: Care and Keeping (Part II)
")
by Sara Williams
Saskatchewan Perennial Society
Christmas cactus, Thanksgiving cactus and Easter cactus have added joy to our homes for over two centuries, since they were brought back from Brazil in the early 1800s. They are long lived, relatively inexpensive and easy to care for. Here’s how!
Light: They grow best in light shade or bright indirect sunlight. Direct sunlight can burn the leaves, giving the stems a pink to reddish tinge. During the fall, the Thanksgiving and Christmas cacti require shorter daylengths (8 to 10 hours) and cooler temperatures to set flower buds.
If placed indoors near a west- or south-facing window, make sure the light is filtered through a sheer curtain or hang them high enough so that they only receive indirect light.
Water: Holiday cacti are tolerant of dry, slightly under-watered conditions during the spring and summer. Following bud set in the fall, the growing medium is best kept more evenly moist to prevent flower bud drop.
Water plants thoroughly about once a week, allowing excess water to run out through the drainage holes. Never let them sit in water or allow the soil to become waterlogged, especially during winter. Nor let the soil completely dry out either.
Temperature: They do best with daytime temperatures of 65 to 70 °F (18-21 °C), and evening temperatures of 55 to 65 °F (13-18 °C). Ideal spring and summer growth from April to September occurs at temperatures between 70 to 80 °F (21-27 °C). This sounds complicated, but if your home is 70 °F (21 °C) during the day and slightly lower at night, and the plants are near windows, they’ll do fine.
Place them away from warm, dry drafts coming from heat vents, fireplaces or other sources of hot air which can cause the flower buds to drop.
Fertilizer: Fertilize plants monthly, using a complete, soluble fertilizer with trace elements, such as 20-10-20 or 20-20-20, applied at half the recommended rate.
Growing Media: The soil should be well-drained with good aeration. They do not grow well in heavy, wet potting mixes.
Repotting: They don’t need re-potting often and actually bloom better when “pot bound.” Use terra cotta or clay pots which are porous and tend to wick water away. Ensure they have drainage holes.
Choose a pot that’s only a bit larger (e.g. an inch or two [2.5-5.0 cm] wider pot). Repot once every three years, when they look ragged or when roots begin to grow out of the drainage holes. This is best done after flowering in late winter or spring.
Summer holidays? Holiday cactus can be set outdoors in the summer in a shady location protected from the wind. Bring them in once the temperature drops below 50°F (10 °C).
Pruning: Remove one or two stem segments from each branch immediately after blooming. This forces the plant to branch out, developing additional stems (and flowers).
Propagation: Take cuttings of 3 to 5 stem segments in May or June, allowing the cut ends to dry out for a few days. Use well-drained potting soil and clean containers for rooting. Place the cuttings about one inch (2.5 cm) deep. Water the soil well and cover with clear plastic. Keep the soil evenly moist but not overly wet. Place them in bright, indirect light until roots have formed, generally after three to eight weeks. Remove the plastic and apply a very dilute fertilizer solution when watering. Wait about eight to ten weeks before repotting in permanent pots. New leaf or stem growth usually indicates that roots have formed. Temperatures above 70 °F (21 °C) and up to 81 °F (27 °C) in long day/short night conditions speed rooting.
How to get a holiday cactus to bloom
In my experience, holiday cacti are not nearly as fussy in terms of daylength and temperature as a lot of books and articles would lead one to believe – maybe because the plants haven’t read those articles? Or more likely, modern breeding has developed a more flexible response to daylength and temperature for flower bud initiation.
For about six weeks prior to blooming, they require 12-14 hours of dark to set buds. This corresponds to the naturally shorter days of fall.
Once flower buds form, do not move the pot until flowering is finished. Unopened flower buds can drop if there is a sudden change in temperature, light or insufficient water.
Blooming starts when the daylength is approximately equal to the night length (12 hours each) and when the temperature is between 50 to 60° F (13-16 °C).
Mine are hanging fairly high in north- and west-facing windows where they are shaded from direct sunlight. Indoor lights are turned on randomly from morning to night and have not disrupted the initiation of flower buds or flowering.
Sara Williams is the author and coauthor of many books including Creating the Prairie Xeriscape, Gardening Naturally with Hugh Skinner and, with Bob Bors, the recently published Growing Fruit in Northern Gardens. She continues to give workshops on a wide range of gardening topics throughout the prairies.
This column is provided courtesy of the Saskatchewan Perennial Society (SPS; saskperennial@hotmail.com ). Check our website (www.saskperennial.ca) or Facebook page (www.facebook.com/saskperennial) for a list of upcoming gardening events.
The Story of our Holiday cactus: part 1

by Sara Williams
Saskatchewan Perennial Society
Easy to care for, long-lived (40 years is not unusual) and relatively inexpensive, holiday cacti are popular flowering houseplants. They are available in a wide variety of colors, including red, rose, purple, lavender, peach, orange, cream, white and bi-colours, and their pendulous branches make them ideal for hanging baskets. Depending on their bloom period, they are variously called Thanksgiving cactus, Christmas cactus or Easter cactus.
But how did that Thanksgiving cactus find its way from Brazil to my kitchen window?
Enter Allan Cunningham
We have Allan Cunningham to thank for the introduction of the first holiday cactus to Kew Gardens and ultimately to the world. He was born in Wimbledon, Surry, England, in 1791. At the time, his father was head gardener at Wimbledon Park House. Well-educated at the Reverend John Adams Academy, a private school in Putney, Cunningham initially went on to practice law. But in 1810, at the age of 19, he began work as a botanist under Sir Joseph Banks in Kew Gardens.
On Banks’ recommendation, Cunningham accompanied James Bowie to Brazil as a Botanical Collector for Kew between 1814 and 1816. It was on this expedition that he found the first of these holiday cacti. He would spend the remainder of his life as a plant explorer and collector in Australia and New Zealand. He died of consumption in Sydney in 1839 after 25 years of plant collecting, almost all of it in Australia. He was 48 years old.
His obituary reads: “Few men have done more for botany and geography than Allan Cunningham, and his loss will be sincerely deplored by all who had the happiness to know him.”
Further development
The first of these cacti, discovered by Cunningham and brought to Europe by 1818 was Schlumbergera truncata which flowers in October and November and became known as the “Thanksgiving cactus.”
Schlumbergera russelliana, discovered in 1837 and introduced by 1839, blooms between February and April and became the “Easter cactus.”
In 1852, William Buckley, of Rollisson Nurseries in England, crossed S. truncata with S. russelliana, resulting in the plant we call the “Christmas cactus” (S. × buckleyi). By the 1860s, a substantial number of varieties in a range of colours were available. These were grown in “stoves” (Victorian heated greenhouses) and in homes, and greatly valued for their autumn and winter flowers.
From the 1950s onwards, breeders in Europe, North America, Australia and New Zealand produced new plants by crossing the species and varieties of S. truncata, S. russelliana and S. × buckleyi. The result was a wide range of flower colours which had not been previously available, including the first true yellow ‘Gold Charm’.
Today’s Holiday Cactus
In their native habitat of the coastal mountains of Brazil, they grow in shady rain forests in pockets of leaf debris in the clefts of tree branches or on rocks. With a height and spread of about 12 inches (30 cm), they are densely branching, with pendent stems consisting of many thin, flat segments, each about is 1-1.5 inches (2.5-3.8 cm) long x ¾-1 inch (2-2.5 cm) wide and with a prominent midrib. Because they lack true leaves, photosynthesis occurs within the green stem segments.
Thanksgiving cactus (Schlumbergera truncata) generally flowers for about 7 weeks around American Thanksgiving in November. Their stem segments have 2 to 4 saw-toothed serrations or projections along the margins. The pollen-bearing anthers of the flowers are yellow.
Most of the modern varieties of Schlumbergera are Thanksgiving cacti.Their flowers are held more or less horizontally, and the upper portion of the flower is shaped differently from the lower portion.
Christmas cactus (Schlumbergera x buckleyi) blooms about a month later. The stem segment margins are more rounded, and the anthers are pink to purplish-brown. The teeth on the stem segments are more symmetrical as are their flowers which hang down.
Easter cactus (Schlumbergera gaertneri) flowers primarily in the spring and sporadically throughout the year with pink or red flowers. The star-shaped flower buds form in February and flower from March through May. Easter cacti have pointed teeth with fibrous hairs or bristles in the stem joints.
Next week: Part two, Care of Holiday Cacti
Sara Williams is the author and coauthor of many books including Creating the Prairie Xeriscape, Gardening Naturally with Hugh Skinner and, with Bob Bors, the recently published Growing Fruit in Northern Gardens. She continues to give workshops on a wide range of gardening topics throughout the prairies.
This column is provided courtesy of the Saskatchewan Perennial Society (SPS; saskperennial@hotmail.com ). Check our website (www.saskperennial.ca) or Facebook page (www.facebook.com/saskperennial) for a list of upcoming gardening events.