All I want for Christmas is…

By Bernadette Vangool

As I was perusing my bookshelf, I thought I would share with you the many book gift possibilities for you, your resident gardener or gardening friends.

For the cut flower grower among them, consider Cultivated, The Elements of Floral Style by Christin Geall. This book delights with photographs of beautiful flower arrangements interspersed with pertinent information on contrast and composition. It is well written, easy to digest and pleasing to the eye. Erin Benzakein, flower farmer and floral designer, says it best: “Christin Geall is the rare talent who has an eye of the artist, the pen of a poet, and the heart of a gardener”. Christin takes you from supplies, to flower selection through colour and design, always with great bouquets, beautifully photographed, to illustrate her points. The author is a designer, writer and gardener in Victoria, British Columbia who teaches floral design through her company Cultivated by Christin.

Complement the book on floral design with Mastering the Art of Flower Gardening, a Gardener’s Guide to Growing Flowers, from Today’s Favorites to Unusual Varieties by Matt Mattus. Here, you’ll learn how to grow cut flowers for the express purpose of making these beautiful arrangements. Matt gardens in Massachusetts. Although he discusses perennials and bulbs, the majority of plants covered are annuals, for which the differences in growing zones are negligible. He shares his experience with seed germination of various flowers, as well as the time to sow and when and how well seedlings transplant.

I’m unsure about the availability of the above books in local book stores, so order early or obtain them on line. The following books are available locally.

Backyard Bird Feeding, A Saskatchewan Guide by Trevor Herriot and Myrna Pearman is an excellent introduction for beginner bird watchers. In just a few years, I have increased the number and variety of birdfeeders in my back yard and the feathered friends visiting have been a great delight and form of entertainment.  Originally written by Myrna Pearman and first published by Ellis Bird Farm in Alberta in 2015, it has now been adapted to Saskatchewan. Many of the photographs were submitted through the Sask Birders Facebook page and credits are noted. It covers feeders, types of feed, individual bird preferences, bird baths, feeders to discourage four legged critters and bully birds. Chapter 7 describes a large number of birds that may frequent the backyard feeder. It includes a photograph and discusses their habits and preferred feed, such as suet, cracked corn, millet, sunflower seeds etc. This could also be a great gift for the grandkids.

One little book that has been around since 2001 is Best Bulbs for the Prairies by Liesbeth Leatherbarrow & Lesley Reynolds. Still as relevant today as the day it was published, it includes information on the many bulbs available, from spring flowers such as crocus, fritillary and tulips to iris, lilies, gladiolus and much, much more. Beautiful photographs accompany the descriptions of cultivars and their use in the landscape. “Perfect partners” for particular bulbs are also discussed.

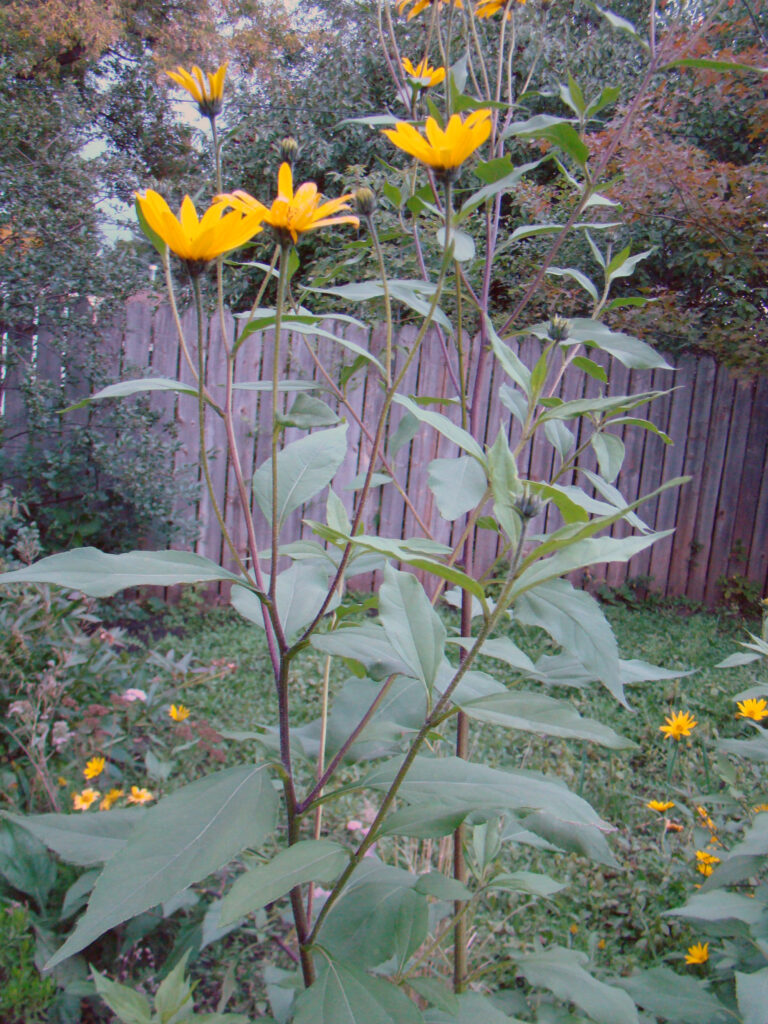
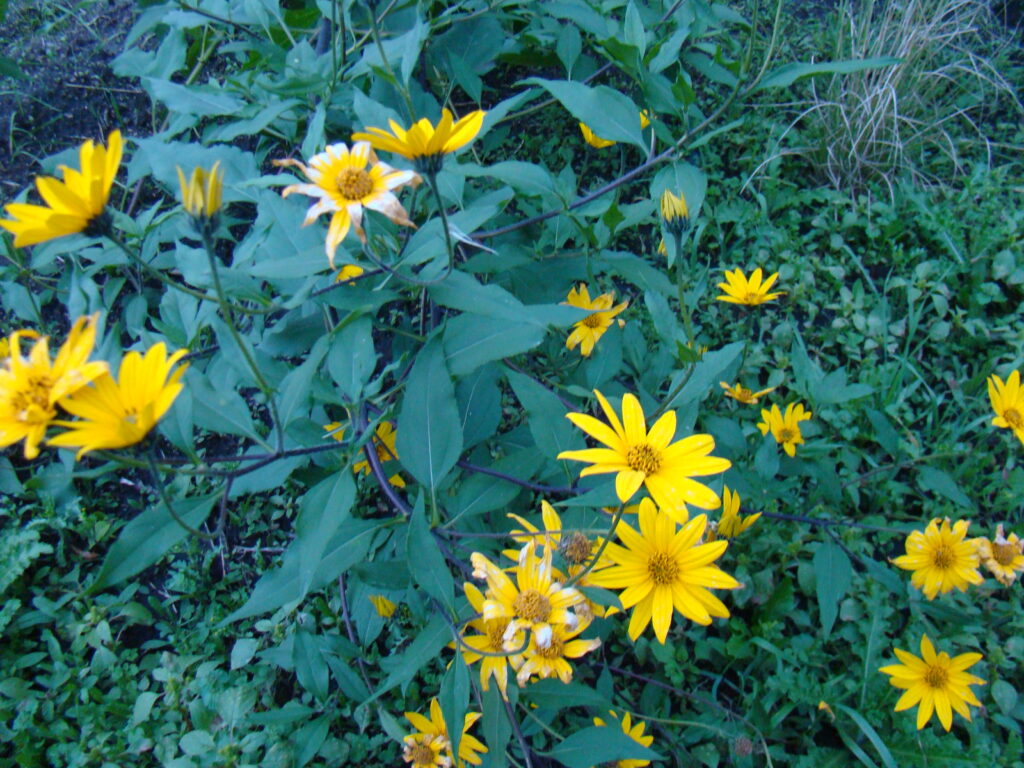
Last but not least is Native Plants for Prairie Gardens by June Flanagan (2005). I just revisited this book, and of course found some new to me native plants to incorporate into my landscape. Each plant featured includes its natural range (eastern prairie, widespread across northern prairie), its habitat (dry slopes, rocky hillsides, stream banks, woodlands) and type of plant (grass, herb, upright perennial) along with hints that will help you best place it within your own perennial border. I discovered that the prairie coneflower (Ratibida columnifera)  which I planted last year is a short-lived perennial that will self-seed. So, I’ll have to replace it if I decide to mulch my new border!

More bookshelf favourites to follow……This column is provided courtesy of the Saskatchewan Perennial Society (SPS; saskperennial@hotmail.com ). Check out our website (www.saskperennial.ca) or Facebook page (www.facebook.com/saskperennial).

Garden Soil, Part II. Top Soil and Soil Amendments

By Sara Williams – Saskatchewan Perennial Society

Once you’ve tilled your existing soil to a minimum depth of 15 cm (6 in.) (more is better), you’re ready to add topsoil, soil amendments or a combination of these.  Add a minimum depth of 15 cm (6 in.) for lawns. For flowerbeds or mixed borders of perennials and shrubs, add 30 to 45 cm (12 to 18 in.). If this seems like a lot, visualize the root balls of most shrubs or even perennials such as peonies or delphiniums.

If your existing soil is poor and verging on unworkable, you’re well advised to go with topsoil.  If it’s predominantly loam, you will benefit more from added soil amendments.

In either case, start with adding about 10 cm (4 in.) of topsoil or amendment to the existing soil, rototill to establish a gradient and avoid layers, add more of the topsoil or amendment, till again, and continue in this fashion until the desired depth has been reached.

There are reputable topsoil dealers with proven customer satisfaction. Ask friends, neighbours, or coworkers for a recommendation. If in doubt, it’s best to meet your topsoil face to face before purchasing.  Make an on-site field visit and ask if you can take a small amount (half an ice cream pail) home.

Check for salt content. Excess salt is often indicated by white powder or crystals on the dried soil A high salt content stunts plant growth. This might not be apparent on a load of moist topsoil, but generally shows up once the soil is dry.

Weeds, especially perennial weeds such as thistles and quack grass, can introduce new problems to your yard. If quack grass rhizomes or other long white roots are present, that’s grounds for rejection.

Using the soil from your ice cream pail, follow the guidelines in the previous article to determine the soil’s texture and organic matter content. Then place some in a pot and sow seeds with a high germination percentage and quick germination rate (such as grass seed or lettuce,) water and place in bright indirect light. If the seeds germinate and grow as expected, the soil is fine. If the seedlings are stunted or fail to germinate, the soil may have a high salt content or residual herbicides may be present. If a multitude of weed seedlings emerge, it’s an indication of weed seed contamination.

If your existing soil is a loam, or a sandy or clay loam, you may only need to add soil amendments or materials that increase drainage, productivity, workability, nutrient or water-holding ability.

If your soil is predominantly sand, add as much coarse organic matter as possible such as home-made, commercial or municipal compost; well rotted manure; or coarse peat moss. Coarse peat moss has been sifted or screened the least, is stringy and chunky rather than powdery, and may contain bits of sticks. You may have to order it and it may be slightly more costly than the powdery type, but it is peatmoss is much more effective and longer lasting.

If you have a predominantly clay soil, add equal volumes of coarse organic matter and “sharp” (or coarse) sand. Look at the sand particles under a magnifying glass.  The particles should be large and their edges irregular or jagged. Avoid using fine sand with small and round particles. Never add sand alone to clay or you will end up with something resembling concrete. And always thoroughly incorporate the amendments into the soil. Do not leave them layered.

Although new soil amendments appear on the market with alarming regularity, there are few if any “miracle” soil cures. Neither perlite nor vermiculite are recommended for outdoor use. They become ineffective within a season or two and may compound existing soil texture problems.

Sara Williams is the author and coauthor of many books including Creating the Prairie Xeriscape, Gardening Naturally with Hugh Skinner and, with Bob Bors, the recently published Growing Fruit in Northern Gardens. She continues to give workshops on a wide range of gardening topics throughout the prairies.This column is provided courtesy of the Saskatchewan Perennial Society (SPS; saskperennial@hotmail.com ). Check our website (www.saskperennial.ca) or Facebook page (www.facebook.com/saskperennial) for a list of upcoming gardening events

Garden soil part I: know what you have before you plant

by Sara Williams
Saskatchewan Perennial Society

If you’ve recently purchased a new home, you’re probably anxious to begin landscaping. But before planting, check out your soil. New homes in new developments may or may not include topsoil: it could either have been sold, covered, or moved in the process of grading, developing infrastructure (roads, sewers, etc.) or building the house itself. Even if your ‘new’ home is in a mature neighbourhood, it is still worth the time and effort to evaluate your soil.

The first step is to identify your soil’s texture or the proportion of sand, silt and clay. This can be done through a time-honoured method called “manual texturing”. Simply place a bit of soil in the palm of your hand along with enough water to wet it. Then rub the mixture between your thumb and forefinger.

If it’s gritty and you can feel individual particles, the soil is predominantly sand. If slippery and sticky, it’s predominantly clay. If it’s soapy or silky, it’s predominantly silt. If you can’t figure it out, it’s probably somewhere in between these extremes – and that’s a good thing. A soil that has equal proportions of sand, silt and clay is called “loam” and is the preferred type for most gardening activities. Note: The word “loam” describes soil particle size, not organic matter content.

The next step is to figure out how much, if any, organic matter the soil contains. This is straightforward. Regardless of texture, the darker the colour, the more organic matter is present – and the more the better. Black soils are high in organic matter; grey soils are low.

Step three is determining drainage. Few plants tolerate seasonally or permanently waterlogged soils. Drainage will likely be a problem if your lot is in a low area of a development with other lots draining toward it, or if your subsoil is predominantly clay.

If you find yourself in either of these situations, and water sits for a while in spring or after a heavy rain, there are solutions. You can build “dry stream beds” that act as drainage channels, carrying excess water away from your landscape. These can lead to a back lane or across a front sidewalk into storm sewers. Check with your town or city authorities for information about drainage bylaws.

A second solution is to plant flowers, bulbs, and small shrubs on raised berms so their root systems are not sitting in seasonally standing water. A berm is a mounded planting bed up to 60 cm (2 ft.) in height and 2 to 3 m (6-9 ft.) in width, with sides that slope gently down to the original grade. Besides keeping plants out of waterlogged soil, it makes for a more interesting backyard topography in our flat prairies. When developing a berm, add a generous amount of organic matter so it doesn’t dry out in the prairie wind. Berms that are gently curved to fit the space they occupy are more pleasing than rigidly geometric ones.

Prior to purchasing and spreading topsoil or soil amendments, cultivate the existing soil to a depth of about 15 cm (6 in.). This can be done by hand digging (which is said to build character) or tilling. 

It’s critical that this step be carried out to improve drainage. Avoid creating distinct layers of different types of soil. By first loosening the existing soil, it becomes much easier to thoroughly incorporate any topsoil or amendments that are added later. If good quality topsoil is simply dumped on top of poor soil, you’ll find that many plants will root into the first layer, but then tend to root laterally or sideways once they reach the “poor” soil below.

This results in shallowly rooted plants that are vulnerable to environmental stress such as heat, cold, strong winds, drought or flooding. As well, the upper layer (the good soil) will become saturated with rain or irrigation water before any water begins to percolate into the different type of soil texture below. Again, the final result is shallowly rooted plants.

Next week: Purchasing top soil and soil amendments.

Sara Williams is the author and coauthor of many books including Creating the Prairie Xeriscape, Gardening Naturally with Hugh Skinner and, with Bob Bors, the recently published Growing Fruit in Northern Gardens. She continues to give workshops on a wide range of gardening topics throughout the prairies.

This column is provided courtesy of the Saskatchewan Perennial Society (SPS; saskperennial@hotmail.com ). Check our website (www.saskperennial.ca) or Facebook page (www.facebook.com/saskperennial) for a list of upcoming gardening events

A visit to a spring garden

by Bernadette Vangool
Saskatchewan Perennial Society

I visited Keukenhof in 2012 as part of a garden tour to Holland and Belgium. It was the highlight of the trip for me. I was blown away by the sheer size and beauty of the spring park in full bloom.

Keukenhof was originally a hunting estate of the castle of Jacoba van Beieren, herbs and vegetables for the castle kitchen were grown here, hence the name ‘Keukenhof’ or ‘Kitchen Garden’.  In the 19th century, architect Zocher designed the park for the current owners in the English landscape style. The property is now owned and overseen by a foundation. The first annual flower exhibition was held here in 1949.

All the flowering bulbs you see at Keukenhof are provided free of charge by over eighty ‘Royal Suppliers’ the best growers and exporters of spring bulbs. When Keukenhof closes at the end of May, the majority of the bulbs are dug up and wont be used again. In the fall, seven million new bulbs will be planted over a two month period, by the thirty some gardeners employed at the park.

In some areas of the park grape Hyacinths have been allowed to naturalize among the beech trees. Here bulbs are allowed to remain in the ground after blooming. They come up every year and multiply to form a continuous carpet.

Four pavilions with coffee shops and indoor displays are scattered throughout the park. These are named after Dutch Royalty and each has its own themed displays and gardens. For example the Beatrix Pavilion contains a huge variety of orchids and outside showcases a Japanese garden, while the Juliana Pavilion houses the bulb information centre and the Museum The Black Tulip and outside features a natural garden with perennials and naturalized bulbs. Besides the four pavilions named after royalty the Oranje Nassau Pavilion feature new judged flower shows every two weeks.

The park would not be complete without the very symbol of Holland the windmill. The mill gives visitors an opportunity to view the fields of tulips adjacent to the park.

When confronted in Holland with the vista of field after field of tulips and bulbs, it is easy to forget that the tulip did not come from that country, but originated in Central Asia in mountain ranges west of the Himalayas. Millions of years ago, the tulip began to spread to India and China and was cultivated in the Black Sea area since the 12th century.

Turkey became enamoured with the tulip during the reign of Sultan Suleiman the Magnificent (1520-1566), who was a great plant enthusiast and especially loved the needle tulip, a narrow tulip with small long tapered petals.

Augier Ghiselain de Busbecq, Ambassador for the Holy Roman Empire, arrived in Turkey in 1554, and he too loved the tulips and distributed them freely to international contacts. Tulip trading started between Constantinople (now Istanbul) and Antwerp, and nurseries started to grow bulbs in the Flanders and France. It was another 50 years before Carolus Clusius introduced the bulbs officially to the Netherlands.

Carolus Clusius, was a well respected botanist who was in charge of the Imperial Gardens of Venice in 1573. In 1592 Carolus Clusius was appointed Hortus Profectus, Head Botanist of the Leiden University, and brought with him the bulbs that his friend Augier had given him. In 1594 the first Dutch tulip flowered in the medicinal nursery garden of Leiden University. A passionate scientist Clusius developed classification systems to determine early, middle and late blooming varieties. Nursery owners were intrigued and saw the value of this relatively new plant, but Clusius refused to part with any of his beauties, except for outrageous prices. They finally resorted to raiding his gardens at the University. And this is how it is said that the Dutch tulip industry got its infamous start.

If you are planning a spring vacation to Amsterdam or the Netherlands don’t forget to set one day aside for a visit to Keukenhof.

This column is provided courtesy of the Saskatchewan Perennial Society (SPS; saskperennial@hotmail.com ). Check our website (www.saskperennial.ca) or Facebook page (www.facebook.com/saskperennial) for a list of upcoming gardening events

Jerusalem Artichoke: A Fall Planted Root Vegetable

by Jackie Bantle
Saskatchewan Perennial Society

When most of us think of artichokes, we think of the green scaley immature flower buds that can be found in the produce aisle at the grocery store.  However, Jerusalem artichokes (Helianthus tuberosus), also known as sunchoke, are grown for their edible underground tubers and are a completely different plant than the globe artichoke.  Jerusalem artichokes are native to North America, are extremely hardy and grow under most prairie conditions.  Although they are sometimes referred to as ‘Canada’s potato’, fall is as excellent time to plant Jerusalem artichokes on the Prairies. 

Jerusalem artichokes are one of the easiest plants to grow in a garden.  Because they produce tubers underground, a sandy loam to loam soil is best for growth but any soil that is rich in nutrients and organic matter and free of rocks and hard clay lumps is suitable.  As with any root crop, regular irrigation is beneficial (about 2.5cm/week) – especially in dry years. 

The average days to maturity for most Jerusalem artichoke cultivars is 130. Tubers should be planted in late fall or early spring. Do not irrigate newly planted tubers in fall. Sourcing tubers for planting can be a challenge. Fall is the best time of the year to find tubers at your local farmer’s market. Some retail outlets will carry tubers in spring. Whether planted in spring or fall, tubers should be planted 10 cm deep, 30-35 cm apart within the row and 60-100 cm apart between rows. Each tuber piece should have at least two eyes or buds for planting.

Jerusalem artichoke plant in early August, approximately 2m tall. Photo credit: Jackie Bantle

In spring, hill plants once they reach 30cm in height: this will help provide stability to the tall stem. After plants have emerged, mulch the area around the plant with straw to help conserve moisture, reduce weed growth and regulate soil temperature. Extremely high soil temperatures reduce yields. To optimize tuber production, it is recommended to cut stems back to 1.5m in late summer and remove flower heads. In this way, excessive water and nutrients will not be lost to top growth but will be focused on bulking up tubers. One Jerusalem artichoke plant yields approximately 400g (1 lb)/plant, depending on the cultivar.  Harvested tubers range in size from 5-8 cm across, 10 cm long and knobby. Tubers from more wild forms of Jerusalem artichoke are much more knobby and smaller than types that have been domesticated. Outer skin color of the tubers ranges from creamy white to brown to red. Flesh color is usually off white.

Like potatoes, Jerusalem artichokes respond well to nitrogen fertilizer. However, over-fertilizing Jerusalem artichokes will encourage excessive top growth and compromise tuber production. Top dressing plants in early spring with compost or well-rotted manure at least every two years will provide adequate fertility.

Jerusalem artichoke flowers in early September.

Sunchoke plants can grow up to 3m tall, depending on the cultivar.  Plants grow relatively quickly and produce yellow sunflowers in mid-late summer that are 7-8 cm in diameter. The height of the plant suggests that Jerusalem artichokes can be used as a miniature shelter belt around smaller garden areas. They also provide a nice background plant along the north edge of a perennial bed.

It is best to harvest tubers late in fall and preferably after at least one killing frost. During the growing season, tops accumulate sugars. In late summer or early fall, the sugars are transferred to developing tubers. There are also several reports that the nutty flavour improves significantly after the first killing frost. 

Ideal storage conditions for Jerusalem artichokes are 0˚C at 90-95% relative humidity. Jerusalem artichoke tubers are thin-skinned and do not store well unless kept moist in a root cellar or bagged in the refrigerator. Harvested tubers should be refrigerated for short term storage. For long term storage, tubers store best if kept in moist sand in a cool place. Tubers should not be washed prior to storage as the skin is easily damaged. Jerusalem artichokes are to be consumed like a potato tuber: boiled, baked, fried, in soups or stews or raw in salads.

This column is provided courtesy of the Saskatchewan Perennial Society (SPS; saskperennial@hotmail.com ). Check our website saskperennial.ca) or Facebook page (facebook.com/saskperennial). All Saskatchewan Perennial Society events are on hold until further notice.

Fall Harvest: Onions and Potatoes

by Jackie Bantle
Saskatchewan Perennial Society

Although you may have been harvesting onions and potatoes since summer, fall is the time to harvest these two crops for long term storage. 

All onions should be harvested and removed from the garden prior to the first fall frost. Onion bulbs will freeze below 0°C. 

By early September, onion plants have started to mature:  leaves start to turn yellow and fall over. Collapsing onion leaves at the end of the growing season indicate that the plant is shutting down and the onions are maturing. Onion bulbs whose leaves have not fallen over naturally at the end of the season will not store as long as those onion bulbs whose leaves have fallen over.  A gardener can aid the process by gently stomping on onion leaves so that they fall over and form an abscission layer which will aid in the curing process. Do not stomp onion leaves prior to September!

After tops have fallen over, pull onions out of the soil and let the bulbs (attached to the tops) dry in a warm dry location for two to three days. This is known as curing. Curing can be done directly on the dry garden soil for several days in the sun as long as there are no heavy dews or rain. An empty greenhouse bench or hanging over a fence also works for curing onion bulbs. When harvesting bulbs from the soil, take care not to damage any of the bulbs. 

After curing, cut off onion tops where the leaves have collapsed (i.e. the abscission layer); approximately 2.5-5cm above the bulb. Move onions into a warm dry location (20°C) and store for at least one week prior to long term storage: this is also part of the curing process. Ideal long term storage for onions is between 0-5°C and 65-70% relative humidity. Onions can be stored under warmer and drier conditions however, sprouting and moisture loss will be hastened.

Guenther the Garden Gnome in the onion patch. Photo submitted by Jackie Bantle.

It is unlikely that Spanish onions will reach full maturity prior to harvest time at northern latitudes. For this reason, Spanish onions do not store well. Follow the same directions for harvest and curing as with storage onions however, use Spanish onions within one or two months of harvest for best results.

Potatoes can be harvested as soon as the tubers reach the desirable size for eating. This can be as early as mid-July.  Potato tubers that are harvested from a plant that still has green leaves will have a soft outer skin.  These potato tubers have not been cured and will not store for a long period of time.  To harvest potato tubers for long-term storage, remove the potato tops at least one week prior to harvesting: this encourages good skin set on the tubers. Good skin set ensures that the tubers will resist dehydration and disease during subsequent storage. If the tops have been frozen or have senesced naturally prior to harvest there is no need to remove the tops prior to harvesting.  Potato tubers in the soil do not need to be harvested prior to fall frosts of 0°C to -3°C.  Once night temperatures start to reach -4°C or lower, potato tubers (especially near the soil surface) may start to freeze.  Frozen potato tubers do not store.  When harvesting potatoes, carefully dig around the underground tubers with a digging fork or spade.  Take care not to damage tubers as damaged tubers do not store well.  Carefully remove excess soil from the tubers, do not wash potatoes.  Do not allow potatoes to dry or ‘cure’ in the hot sun: move freshly harvested tubers to a dark, dry, cool location (ie. a root cellar is perfect).

Ideal long term storage conditions for potatoes are about 4˚C and 90-95% humidity with regular air exchanges. Black spots in the potato flesh indicate a lack of oxygen to the tuber tissues, resulting in cell death. Tubers exposed to flooding during growth or insufficient air exchange/oxygen supply during storage commonly show this disorder. Do not store apples next to potatoes. The ethylene from the apples will cause the potatoes to sprout.

Happy harvesting!

This column is provided courtesy of the Saskatchewan Perennial Society (SPS; saskperennial@hotmail.com ). Check our website saskperennial.ca) or Facebook page (facebook.com/saskperennial). All Saskatchewan Perennial Society events are on hold until further notice.

Peonies; divide and conquer

by Sara Williams
Saskatchewan Perennial Society

Peonies have adorned our prairie farmsteads for over a century. They are well-behaved, long lived (sixty years in not unusual), often fragrant, drought-tolerant once established, of easy care, make excellent cut flowers, and are deer and rabbit resistant – of special value to rural gardeners.

First introduced to Europe from China in 1784, they are native to the Northern Hemisphere with species found in Europe, Asia and even the northwest coast of North America. The vast majority of our modern garden hybrids are descendants of species originating in China and Japan.

Although the availability of containerized plants has extended the planting season considerably, peonies are best moved and divided in mid-September. Each root division should contain three to five “eyes” or buds (generally pink in colour and easily identified) and a portion of the thick fleshy root. When dividing, first cut off the stems at ground level. Then dig up the entire clump. (Alternatively, half can be left where it is, and the remainder dug up, divided and moved.) Both roots and stems will be brittle. To avoid breakage, let the clump sit for a couple of hours to become more pliable. Then divide it using a sharp knife. Washing off or removing excess soil makes the job easier and the process more visible.

Dig a generous planting hole in well drained soil to which organic matter has been added in the form of compost, well rotted manure or peat moss. Space peonies about 1.3 m (4 ft.) apart to accommodate their mature spread. Although full sun is generally recommended, they will also perform well in afternoon shade.

Ensure that the buds or eyes are covered with no more than 5 cm (2 in.) of soil. Planting too deep is the most frequent cause of their failure to bloom. Keep in mind that peonies seldom bloom the first year after planting, and if they do, these flowers may not be typical of those of a mature plant.

Peony ‘Bowl of Beauty’. Photo Courtesy Sara Williams

When selecting peonies, choose various colours and times of bloom for a longer more interesting season. All are spring blooming but are further classified as early, mid, or late within that time frame. Most mature at 75 to 90 cm (30 to 36 in.) in height. 

I prefer the single or Japanese types. Single peonies have one or more rows of large petals surrounding the pollen-bearing stamens in the centre. Japanese forms are similar but the stamens have been changed to non pollen-bearing, petal-like staminoides, often of a contrasting colour.  I like the simplicity of form and stronger stems of these types that require neither staking nor hoops.

[The flowers of many of the older double varieties tend to flop in the dirt when hammered by wind or rain. As well, fully double flowers can collect and hold rain or irrigation water, causing an increase in weight, leading to bending and breakage.]

Some of my favourites:

  • The fernleaf peony (Paeonia tenuifolia ‘Rubra Plena’): an abundance of small, dark red, double flowers on a dwarf plant with finely divided foliage; very early.
  • ‘Bowl of Beauty’ (1949): Japanese; fuchsia-rose petals surround a creamy yellow centre; mid to late.
  • ‘Claire de Lune’ (1954): single, ivory-yellow with orange anthers, cup-shaped flowers; thin, straight stiff stems; early.
  • ‘Do Tell’ (1946): Japanese; orchid-pink outer petals surrounding a centre of darker rose-pink; strong plant with good foliage; mid to late.
  • ‘Early Scout’ (1952): dark red, single with dense ferny foliage; very early.
  • ‘Flame’ (1939): my very favourite; single, hot pink with orange tones, cup-shaped flowers; good foliage and strong straight stems; early.
  • ‘Gay Paree’ (1933): Japanese, cerise-pink with a creamy white centre; late.
  • ‘Jan van Leeuwen’ (1928): Japanese; white flowers on strong stems; very late.
  • ‘John Harvard’ (1939): single to semi-double, deep red; strong stems; early.
  • ‘Largo’ (1929): Japanese; soft medium pink flowers around a central ball; strong stems; mid.
  • ‘Moon of Nippon’ (1936): Japanese; white petals, a yellow centre and stiff stems; mid.
  • ‘Nosegay’ (1950): single, pale salmon pink; deeply divided foliage; early.
  • ‘Requiem’ (1941): single, waxy white petals; mid.

Sara Williams is the author and coauthor of many books including Creating the Prairie Xeriscape, Gardening Naturally with Hugh Skinner and, with Bob Bors, the recently published Growing Fruit in Northern Gardens. She continues to give workshops on a wide range of gardening topics throughout the prairies.

This column is provided courtesy of the Saskatchewan Perennial Society (SPS; saskperennial@hotmail.com ). Check our website (www.saskperennial.ca) or Facebook page (www.facebook.com/saskperennial) for a list of upcoming gardening events.

A look at container gardening

By Grant Wood
Saskatchewan Perennial Society

“Container gardening” is not a new method of gardening, but it has become quite popular in recent years. Plants, annual, perennials and vegetables, can be grown in a variety of containers including nursery pots, decorative pots, half barrels, garden planters, and even raised beds.

Consider the purpose of your garden. Do you want a soup & salad garden where the objective is to harvest fresh vegetables with no long term storage or processing involved? Or, do you want a sustenance garden, that will produce as much food as possible to feed your family through the winter. Sustenance gardens tend to be large and most commonly involve storage and processing of vegetables. The third option is a combination, which includes both types of gardening. Your choice will determine if container gardening is suitable, and how many / type of container to use.

Container gardening offers many benefits, however, there are also challenges.

Benefits:

            •           Containers allow you to start gardening on a small, manageable scale

            •           Convenience ;  vegetables and herbs close to the kitchen are more likely to be used

            •           Depending on design, containers can make gardening more physically accessible

• Can create a superior growing environment; if containers are portable, they can be moved to an area of the yard which receives more light and heat. They can be filled with high quality potting media that is superior to garden soil. Use of garden soil is not recommended for containers, as it may negatively influence drainage and aeration around the roots

            •           Container media can be watered and fertilized more uniformly which will produce better quality vegetables

            •           If there is a chance of frost you can bring plants into the house/garage and put outside again when it is warmer, thus extending the growing season. You can also bring plants inside the house for the winter – for example, herbs and several ornamental flowers

            •           Can utilize areas of the yard including deck, patio, driveway, balcony, sidewalk, rooftop, etc. for food production

            •           Can control aggressive herbs, mint for example and prevent it from spreading in your yard

            •           Weeding usually is less of an issue in containers than in a garden

• Can isolate any diseased plants ; you can easily remove diseased plants so they don’t contaminate nearby plants

Submitted photo. Potted herbs.

Challenges:

            •           Entire root system is above ground level and is restricted to the size of the container, so plants require more frequent watering , probably daily when plants become large. Plants die without water!  

            •           Entire root system exposed to sunlight/heat, so often containers are hotter than if plants are growing in the ground ; cool-season crops prefer a cool root system, and may need double-potting

Almost any container will work, but should have the following requirements:

            •           Hold media ; within reason, the larger the rooting area, the better

            •           Water drainage is essential ; plants need moisture but they also require air around their root systems. Excess water should drain via a hole at the container base

            •           The material the container is made from, influences the moisture loss and the temperature; clay pots look good but are heavy, plus they dry quickly and require more frequent watering. They also need careful handling as they break easily.

            •           Light-weight containers are easier to move; for balconies, rooftops, and decks the weight-bearing load is important

            •           Longevity of containers ; fiber pots have a life span of 2 or maybe 3 years, while wooden containers may last many years

            •           Consider the look of the container ; even though the container may be free or cheap, does it fit into the landscape design, and will the neighbours approve

            •           Match size of plant to size of container ; larger plants like semi-determinate tomatoes require a larger container than smaller plants like spinach and lettuce 

            •           Select cultivars recommended for container growing ; cultivars specifically selected for containers are often called “patio” “compact” or “bush”. They are often smaller plants, and yield less, but you will still be harvesting fresh vegetables

            •           Remember to carry out crop rotation for disease and insect control ; don’t plant the same vegetable type in the same container more than once every four years, and remove media if plants become diseased.

Container gardening can be very rewarding, so give it a try! 

Grant Wood
Retired faculty, Department of Plant Sciences, U of S

This column is provided courtesy of the Saskatchewan Perennial Society (SPS; saskperennial@hotmail.com). Check our website saskperennial.ca) or Facebook page (facebook.com/saskperennial). With the end of the pandemic hopefully in sight we have reserved the Hall at the Forestry Farm for our Fall Plant Exchange, September 12, 2021.

Common Garden Vegetable Pests

-by Jackie Bantle
Saskatchewan Perennial Society

Along with the success of growing a vegetable garden often comes the challenge of managing pests.  There never seems to be a shortage of insects in the garden:  some are good, some are not so good.  Following are a few of the common insect pests in your garden that can cause damage. 

Cabbage loopers are the fleshy, green caterpillars that can be found inside broccoli, cabbage and cauliflower heads throughout the season.  Not only do they chew holes in the leaves of the plant but their green mushy excrement can be found throughout the crevices of leaves and heads.  Although the excrement is not harmful to humans, it is unsightly.  The adult form of the cabbage looper is the small white butterfly often found flying around the garden.  These butterflies lay their yellow colored eggs on the underside of leaves which then hatch into the caterpillars.  Covering plants with thin supported crop covers or fine screens will prevent butterflies from laying their eggs on plants.  Bacillus thuringiensis (Bt) is a type of bacteria that is not harmful to humans and can be sprayed on the plant to control loopers.  Check with your local garden centre for available products.  

Root maggots are a huge problem in brassica vegetables in areas with large acreages of canola. Pupae overwinter in the soil. Grey-black flies emerge from the soil and lay eggs at the base of cole crops. The first round of egg-laying occurs from late May to early June. Shortly after eggs are laid, white maggots hatch and attack the roots of the young plants. Brassica plants affected by root maggots will appear stunted and older leaves will turn yellow or purplish-red and then eventually die. Affected plants can easily be pulled out of the ground since the roots have been eaten off my maggots. In severe cases, the maggots will be visible. A second flush of flies and maggots occurs in mid-late August. At this later stage, maggot damage may also occur at the base of the cabbage heads: they eat holes into the head. There are no chemical controls for root maggots. Covering brassica crops with a thin crop cover can help but it does not eliminate maggots that develop from overwintering pupae. Radishes have become especially difficult to grow due to maggot problems. Try growing radishes and other brassica crops in containers or raised beds filled with new growing media each year.

Cabbage leaves damaged by cabbage butterfly larvae. Photo submitted by Jackie Bantle.

Has something been eating your potato leaves?  Colorado potato beetle adults are about 1cm long, orangish-red to yellow in color with black stripes on their back.    Overwintering adults appear in the late May or early June; feed for a few days on the emerging potato crop and then mate.  Individual females lay 300-500 eggs from June to late July.  These eggs will be found in yellow clusters on the underside of potato leaves.  Once the eggs hatch, larvae appear as 3-5mm long yellow-orangey red soft bodied organisms.  The larvae feed heavily on the leaves for the next 3-5 weeks and then burrow into the soil.  Pupation occurs in the soil and new adults emerge in 1-2 weeks.  The new adults feed for a few days and then begin to look for a protected spot to hibernate through the coming winter.   Whenever possible, avoid growing potato plants in or near the same area of the garden for a minimum of three years.  Consider hiring your children to pick the first flush of adult beetles by hand: this will reduce eggs laid, larvae and the number of adult beetles later in the season.  Rototill in fall to expose the overwintering adult beetle to cold and dehydration.  For chemical controls contact your local garden center.

With the increasing acreage of field corn being grown on the Prairies, there is also an increase in the number of corn pests in Prairie gardens.  There’s nothing more disappointing that husking that beautiful cob of corn out of your garden and finding a disgusting worm near the tip of the ear.  Although the corn earworm often damages only a few kernels at the end of the cob, their presence and droppings can quickly destroy anyone’s appetite.  If corn earworms are a problem in your garden, try applying mineral oil to the silk of each ear of corn, as soon as the silk is present, to prevent invasion by the worm.   

Remember that for every pest, there is a beneficial insect out there that likes to eat your pest.  In nature, there is always a balance.  Trying to maintain that natural balance is the key to having healthy vegetables, a healthy yard and a healthy ecosystem. 

This column is provided courtesy of the Saskatchewan Perennial Society (SPS; saskperennial@hotmail.com ). Check our website saskperennial.ca) or Facebook page (facebook.com/saskperennial). All Saskatchewan Perennial Society events are on hold until further notice.

The Care and Pruning of Grapes

by Sara Williams and Bob Bors
Saskatchewan Perennial Society

This is the second part of an article on grape growing. For part one, see the June 24 edition of Rural Roots.

Watering is important the first year or two, until the roots develop. Grape roots are both deep and extensive and the plants will need little supplemental water unless it is very dry.  If soil fertility is poor, top dress them with an organic mulch a few inches deep applied to a metre diameter around the base of the plant.  Grapes have few problems although powdery mildew and spider mites are sometimes present.

Training and Pruning There are many ways to train grapes. To cover a low deck or a patio, using a large trellis structure, choose the hardy and vigorous variety ‘Valiant’. The result will be highly ornamental and provide shade but may not produce the highest quality grapes because many will be shaded.

Build the trellis using heavy gauge wire with metal or wooded fence posts.  Place the posts a meter or two apart with the grapes planted between the posts.  Using a few wires makes pruning much easier than if the vines are growing on a chain link fence, a deer fence or another more complicated structure. Three wires parallel to the ground provide an ideal support which encourages short plants with permanent arms on the lowest wire. Any snow that accumulates will insulate the vines and often the first arms. 

Do not prune grapes while the sap is running in spring as they will “bleed” for several days, wasting sap that is full of sugar, carbohydrates and other nutrients that should be going into the formation of fruit, leaves and shoots.

Submitted photo. Training grapes.

1st Year: Allow the vines to grow with no pruning.  This will encourage maximum root establishment. Any vines that crawl around on the ground should be lifted up onto a trellis, fence or other support.

2nd Year: Before growth begins in spring, choose the strongest “cane” (grape talk for an individual vine) and cut it back to about 4 or 5 buds. Remove all of the other canes. Growth will be very fast. Within a couple weeks choose one of the shoots to form the new trunk keep other shoots. one or two of those to serve as backups for the new main trunk.  The backups should be regularly trimmed to only a few nodes so as not to compete with the trunk.  When the main shoot reaches the lower wire, pinch it to encourage more canes to form. Once they have formed, select two canes, one for each arm (to the right and to the left). Remove all other shoots except the backups.  

3rd Year: During the winter, cut back each arm to about 10 buds. Also leave two renewal spurs closer to the trunk. Renewal spurs are canes of young wood that have only 2 buds.  They will make new wood to be used the following year to form the new arms. Fruit production usually begins during this third season.

As the vines climb up the trellis, grapes are formed mostly from the arms and should hang just below the bottom and middle of the three wires. The vines will continue growth onto the top wire.  Trimming out some of the vines or removing some of the leaves through the summer reduces leaf diseases by increasing air circulation. It also increases  sunlight penetration that should result in more even (and possibly earlier) ripening. 

4th year and beyond. Each year prune back the vines to new wood as close as possible to the main trunk. A common method is to leave four young canes with five or 6 buds each. Another method is to leave one or two arms with many short canes of young wood that may have only 2 buds each.

This column is provided courtesy of the Saskatchewan Perennial Society (SPS; saskperennial@hotmail.com ). Check our website saskperennial.ca) or Facebook page (facebook.com/saskperennial). All Saskatchewan Perennial Society events are on hold until further notice.

Rugosa Roses: what’s not to love?

By Bernadette Vangool
Saskatchewan Perennial Society

Few roses are more rewarding than the Rugosas (Rosa rugosa). Beginning gardeners can enjoy these robust additions to the perennial border without worrying unduly about the many things that can go wrong when growing roses. Rugosas are hardy through our freezing winters and are relatively pest and disease free. On top of these redeeming qualities, they often offer repeat or continuous bloom, providing colour, fragrance and interest throughout the growing season. When not in bloom, the wrinkled dark green foliage fills out a perennial border and in fall plants are adorned with beautiful rose hips.

To keep your rose shrubs looking healthy, prune out the old canes (at ground level) and any winter die back in late May. In summer, remove the spent blooms until about mid-August. This will encourage repeat bloom but delay the production of rose hips. When pruning always make the cut just above an outfacing bud.

Plant your roses where they’ll receive six or more hours of direct sunlight. Anything less results in less bloom as well as the slow deterioration of the plant. Afternoon sunshine is best as it is generally hotter. Avoid planting roses too close to foundations as those areas tend to get too hot and too dry and do not provide enough air circulation. These conditions stress the plants and stressed plants are more prone to pests and diseases.

When planting, dig the hole deep and wide, at least twice the size of the pot, and in clay soil even larger. Throw a handful of bone meal in the hole (I often don’t bother with this step), fill the hole with half soil and half compost or composted manure. If working with clay soil, discard the clay soil and replace it with half and half good top soil and compost. If you bought a potted rose, plant it at the same depth as in the pot. Gently untangle the roots on the sides of the pot if required, to ensure that they will grow into their new environment.

Most Canadian hardy roses are grown on their own rootstock. If you bought bare root roses, often available in early spring, soak them overnight in water. Some of these may be grafted and will show a swelling or knobby area where the graft union is located. This should be placed about 10 cm below the soil line. When planting bare root plants, mound good soil at the bottom of your planting hole over which to drape the roots while slowly filling and gently tapping the soil around the plant. Leave a small depression/dyke around the rose for ease of watering. Water thoroughly to ensure no air pockets exist around the roots. Mulch after watering to keep the roots cool and retain moisture.

There should be no need for fertilizer the first year. In subsequent years, move the mulch away from the base and top dress the area around the rose with compost and fertilize with a granular fertilizer with a higher middle number (phosphorus). If you tend to baby your roses, you can fertilize lightly once a month starting in May. Do not fertilize after the end of July as the rose needs to go dormant for winter.

Water your newly planted rose every two to three days, to the depth of their root system and a bit beyond, to encourage deeper rooting. Water them once a week thereafter when there is no rainfall.  Unless you use drip irrigation, it is best to water roses and perennials in the early morning. Less water is lost to evaporation and the plants have a chance to dry out before nightfall. Once established, roses are quite drought tolerant.

Rugosa roses you may want to try;

Pavement series: ‘Purple Pavement’ with purple-crimson blooms and ‘Snow Pavement’ with white blooms were introduced from Germany and are typically 1.2 x 1 m. They can be used as a low hedge if pruned to 50 cm high each spring.

‘Henry Hudson’ has white blooms and is 1.2 x 1 m. It was part of the Explorer series, introduced 1976.

‘Reta Bugnet’, introduced by Georges Bugnet from Alberta in 1958, is 1.2 x 2 m and has pink buds that develop into white blooms.

‘Therese Bugnet’, also a Bugnet introduction (1950), is 2 x 2 m, with red buds that open pink.

Bernadette Vangool is a long-time member of the Saskatchewan Perennial Society.

This column is provided courtesy of the Saskatchewan Perennial Society (SPS; saskperennial@hotmail.com ). Check our website (www.saskperennial.ca) or Facebook page (www.facebook.com/saskperennial). All Saskatchewan Perennial Society events are ‘ON HOLD’ till further notice.

How Sweet it is to Grow a Northern Strawberry

by Jackie Bantle
Saskatchewan Perennial Society

Wild strawberries have been eaten by people around the world since ancient times.  The modern strawberry that is popular today, Fragaria ananassa, originated from crosses of two New World species of strawberries, Fragaria chiloensis (originating in Chile) and Fragaria virginiana (originating in North America). 

For Prairie gardens, three main types of strawberries are recommended:  June-bearing, ever-bearing and day-neutral.  Overwintering June-bearing strawberries produce flowers in spring and fruit is ready to be picked in late June and early July (about a 3 week fruiting time).  The runners that the plants send out in fall will produce and fruit for the following summer.  Common June-bearing strawberry cultivars include; ‘Kent’, ‘Bounty’, ‘Honeoye’ and ‘Cavendish’. 

Ever-bearing strawberries start fruiting in late June – early July and continue to fruit until fall.  Typically, ever-bearing strawberries have better winter hardiness than other strawberry types but the fruit is smaller.  If planted in spring, ever-bearing strawberries may produce fruit in late summer or fall of that same year.  ‘Ogallala’ and ‘Fort Laramie’ are common ever-bearing strawberry cultivars. 

On the Prairies, day-neutral strawberries are planted in spring and treated as an annual.  The first crop of day-neutral strawberries ripens in early July with the heaviest production occurring in late August and September until a killing frost.  Even with winter protection, day neutral strawberries do not overwinter well.  One big advantage of growing day neutral strawberries is that they will produce fruit in the same year that they are planted.  Additionally, day neutral strawberries also produce fruit on runners that have not rooted.  Day-neutral strawberry cultivars recommended for northern locations include: ‘Seascape’, ‘Tristar’, ‘Fern’, ‘Albion’.

Select a sunny, sheltered location for your strawberry patch.  Although strawberries are self fertile (they contain both male and female parts in the same flower), research has demonstrated that larger fruit will form if the flowers have the help of insects for pollination.  A sheltered location helps bees and other pollinators do their work.  Strawberry plants can withstand a slight frost. 

Strawberries are planted as rooted transplants or bareroot.  ‘Bare-root’ strawberries refer to plants that have no soil around their roots.  After purchasing, keep bare root strawberry plants cool and moist until you are able to plant them out; a plastic bag in the fridge works well for several days.  During transplanting, keep the exposed roots out of the sun and wind:  carry the plants in a pail of water, if necessary. Strawberries are very sensitive to planting depth:  keep the midpoint of the strawberry crown level with the soil surface.  If the crown is covered by soil, the plant will either rot or fail to send out runners.  If the strawberry plant is planted too shallow, the crown and roots will dry out.  Gently firm the soil around all strawberry plants for good soil to root contact.  Water in all transplants with 10-52-10 fertilizer.  Mix according to label directions.  For best results, keep strawberry plants well-watered throughout the growing season but especially for several weeks after transplanting.  Spacing for strawberries is 20-30cm on center. 

If grey mold is a problem on fruit or plants, avoid watering strawberries in the evening and place straw mulch or post peelings around the strawberry plants to prevent soil born diseases from splashing onto the fruit or plants. 

A common insect problem in strawberries is the tarnished plant bug (Lygus lineolaris).   Tarnished plant bug damage is characterized by deformed berries that are often described as “cat-facing” or “button berry”.  The damage occurs when the bug eats parts of the flower during flower development.  Tarnished plant bugs are about 0.5cm long oval shaped bug, bronzy in color with a distinctive white triangle or v-shape behind their head.  To prevent tarnished plant bug infestations, control weeds in and around the strawberry patch and keep lawn and garden edges mowed.  Remove leaf litter in fall to reduce the number of overwintering sites.  If your patch is small enough, physically remove the tarnished plant bug by tapping the flowers and dislodging the insects into a pan of soapy water. If the infestation cannot be brought under control, you may need to destroy your current strawberry patch and start a new patch in a different area of your yard. 

Strawberries can be easily be grown in containers as long as ample water and nutrients are available throughout the growing season.  Use day neutral strawberry cultivars for containers as plants will not overwinter in above ground containers. 

This column is provided courtesy of the Saskatchewan Perennial Society (SPS; saskperennial@hotmail.com ). Check our website saskperennial.ca) or Facebook page (facebook.com/saskperennial). All Saskatchewan Perennial Society events are on hold until further notice.

Lilacs grow a-plenty on the prairies

by Sara Williams
Saskatchewan Perennial Society

“When Lilacs last in the dooryard bloomed…” – Walt Whitman

I think I had memorized Walt Whitman’s poem long before I ever saw a lilac (Syringa spp.) in bloom. I had an early teenage crush on the poet, but growing up in Maryland, it was simply too warm a climate for lilacs. They need a cold period. Oh, Saskatchewan! Cold periods and lilacs a-plenty!

As I write this, lilacs are in bloom all over my rural yard in a myriad of colours with many of them reaching more than 15 feet in height. I love them for their colour, their fragrance and their shear exuberance and bring big blousy bouquets inside.

Most lilac species are native to northern China and do well on the Canadian prairies. Plant breeders have improving them for over 150 years and have developed many varieties with attractive blooms and more compact plant forms. Their small, tubular flowers, in densely packed panicles, are spectacular due to the sheer size of these panicles, the subtle variety of colours, and the intense scent of many.

Lilacs still growing around long-abandoned homesteads are a testament to their adaptability and longevity. Once established, they are drought-tolerant and need little attention. Plant them in full sun and well-drained soil. After bloom, prune off the developing seed heads and, if desired, to reduce their height. This is also a good time to remove unwanted suckers. Their ability to sucker varies. Some varieties are restrained (ideal for smaller urban landscapes) while others are far more energetic and more suitable for farms and acreages.

Here are some favourites:

The Meyer or dwarf Korean lilac (Syringa meyeri ‘Palibin’), originally collected in Beijing, China by Frank Meyer in 1909 (where it is known only in gardens), is 5-7 feet high and about the same width, maintaining a dense form with little pruning. It is miniature in size, foliage and flowers, making it ideal for smaller spaces. Deep purple buds develop into pinkish-lavender flowers.

The late lilac (Syringa villosa) is native to northern China. A large, round-topped shrub composed of many upright branches, it is non-suckering. The flowers are produced in narrow triangular panicles and vary from pinkish to near white. In the 1920s, Isabella Preston of the Central Experimental Farm, Ottawa, developed Syringa x prestoniae hybrids of S. villosa and S. reflexa. Among these are ‘Donald Wyman’ (10 x 6 feet) with purplish buds that open to reddish purple flowers and ‘Miss Canada’ (8 x 6 feet) with deep reddish buds that open to bright pink.

The Common lilac (Syringa vulgaris) has given rise to a large group of lilacs known as the French hybrids. The first of these were introduced by Victor Lemoine of France in 1878. Colours range from white to pink, to blue and dark purple. With a height and spread of 6 to 12 feet, they expand over time through suckering. Among these hybrids are ‘Beauty of Moscow’, a heavy bloomer with white flowers tinged with rose; ‘Charles Joly’ which has double, dark purple flowers in large heavy panicles; ‘President Grevy’, over a century old but still one of the finest double blue lilacs; and ‘Sensation’ with beautiful single, deep purple flowers with each petal edged in white.

Hyacinth flowering lilac (Syringa x hyacinthiflora) are early flowering hybrids of the French hybrids and the Korean lilac (S. oblata var. dilitata). They have early bloom, excellent winter hardiness, less suckering and a more compact habit. Many of these were developed by Frank Skinner of Manitoba. These hybrids include ‘Asessippi’ with single, lavender-lilac flowers; ‘Maiden’s Blush’, an outstanding, compact shrub with pink flowers; ‘Mount Baker’ with single white flowers which is a profuse bloomer from an early age; ‘Pocahontas’ with single, dark purple flowers and exceptionally profuse bloom; and ‘Sister Justina’, a compact shrub with outstanding single, white flowers.

Sara Williams is the author and coauthor of many books including Creating the Prairie Xeriscape, Gardening Naturally with Hugh Skinner and, with Bob Bors, the recently published Growing Fruit in Northern Gardens. She continues to give workshops on a wide range of gardening topics throughout the prairies.

This column is provided courtesy of the Saskatchewan Perennial Society (SPS; saskperennial@hotmail.com ). Check our website saskperennial.ca) or Facebook page (facebook.com/saskperennial). All Saskatchewan Perennial Society events are on hold until further notice.

Grapes (Part I)

by Sara Williams and Bob Bors
Saskatchewan Perennial Society

There are few if any commercial vineyards on the Prairies but walk down the back lanes in any older neighbourhood and you’ll find an abundance of grapevines hanging over fences, many laden with grapes every fall. These are almost always plants of our native riverbank grape, Vitis riparia. The range of North America’s most cold hardy grape species, Vitis riparia, (meaning “of the riverbank,” its natural habitat) includes parts of the Canadian prairies. Although extremely hardy, the grapes are small, very sour, useful for jelly, but not good for fresh eating or wine making.

Two very hardy, higher quality grape varieties have been developed by crossing Vitis riparia with other species. Both are good for fresh eating and jelly. ‘Beta,’ developed by Louis Suelter in Minnesota in the 1880s, is a hybrid of ‘Concord’ (Vitis labrusca) x ‘Carver’ (Vitis riparia) and was the first grape planted commercially in Minnesota. It has the flavour and “slip skin” characteristics of its ‘Concord’ parent but with smaller fruit. Designated as zone 3, it can be grown in zone 2 if placed in a protected microclimate. Only one plant is needed for pollination and fruit set. ‘Valiant,’ bred by South Dakota University in 1982, is a cross of ‘Fredonia’ x SD S9-39 (Vitis riparia). Hardy to zone 2, it is the more frequently grown. Very vigourous, it can be used as a table grape or for jelly or juice. It has the preferred tangy flavour of its wild parent but is much superior. Like ‘Beta’, only one plant is needed.

Some of the varieties from the Minnesota breeding programs could be tried in zone 3, but they have not yet been fully evaluated in colder areas of Canada. These include ‘Frontenac’, ‘Marquette’, ‘Frontenac Gris’ and ‘Swenson Red’. All are hardy to -35°C, but winters on the Canadian prairies are generally colder. Grapes are fast growing and require drastic annual pruning, from which they regenerate to become large vines by season’s end. Often, they continue growing until hard frost. If not pruned, they soon take over fences and choke out trees.

The flower buds develop in fall on vines of the previous season, forming at the base of the leaves in groups of three. Usually, only the largest (or primary bud) “breaks” the following spring to form two or three clusters of grapes along a new vine. If that bud is injured by late frost, insect damage or a very cold winter, a secondary or tertiary bud may develop. But these are usually vegetative or produce only very small clusters of fruit. Grape flowers, resembling tiny bottle brushes with no petals, are wind pollinated. ‘Beta’ and ‘Valiant’ are self-fruitful, with only one plant needed.

Remember Galileo! Plant grapes in full sun in well-drained sandy or sandy-loam soils with good air circulation. Avoid frost pockets in low lying areas or at the bottom of hills. Ideally, grapes are best placed on south, southeast or east-facing slopes. Or, plant them on the south, southeast or east side of a building, fence or hedge. These locations warm up quickly in spring (in effect lengthening the growing season), receive more sunlight and are protected from prevailing westerly winds. As well, they accumulate snow during the winter that insulates the roots and any vines below the snowline from extreme cold. Sun exposure ensures that grapes will ripen. In partial shade they are less productive. Overly fertile or nutrient-rich soil may encourage growth into fall, making them more susceptible to winter damage. They have extensive, deep root systems, able to absorb sufficient nutrients, but do not tolerate standing water.

Grapes are best planted in spring 1 to 3.5 meters apart. Often sold in pots or bags, they have usually begun growth by the time garden centres open. Select plants which have begun to leaf out. Bagged plants usually benefit from being soaked in a pail of water for an hour. Prepare a much larger hole than that of their container. Fan out the roots in all directions but plant the main stem at a similar depth to the one in which it was originally grown. Mix in compost with the soil when filling the hole. (Too much can cause vines to become vegetative at the expense of fruit production.) A trellis should be set up at the time of planting as grapes grow rapidly and soon need support.

Lilacs grow a-plenty on the Prairies

Sara Williams

Saskatchewan Perennial Society

“When Lilacs last in the dooryard bloomed…” – Walt Whitman

I think I had memorized Walt Whitman’s poem long before I ever saw a lilac (Syringa spp.) in bloom. I had an early teenage crush on the poet, but growing up in Maryland, it was simply too warm a climate for lilacs. They need a cold period. Oh, Saskatchewan! Cold periods and lilacs a-plenty!

As I write this, lilacs are in bloom all over my rural yard in a myriad of colours with many of them reaching more than 15 feet in height. I love them for their colour, their fragrance and their shear exuberance and bring big blousy bouquets inside.

Most lilac species are native to northern China and do well on the Canadian prairies. Plant breeders have improving them for over 150 years and have developed many varieties with attractive blooms and more compact plant forms. Their small, tubular flowers, in densely packed panicles, are spectacular due to the sheer size of these panicles, the subtle variety of colours, and the intense scent of many.

Lilacs still growing around long-abandoned homesteads are a testament to their adaptability and longevity. Once established, they are drought-tolerant and need little attention. Plant them in full sun and well-drained soil. After bloom, prune off the developing seed heads and, if desired, to reduce their height. This is also a good time to remove unwanted suckers. Their ability to sucker varies. Some varieties are restrained (ideal for smaller urban landscapes) while others are far more energetic and more suitable for farms and acreages.

Here are some favourites:

The Meyer or dwarf Korean lilac (Syringa meyeri ‘Palibin’), originally collected in Beijing, China by Frank Meyer in 1909 (where it is known only in gardens), is 5-7 feet high and about the same width, maintaining a dense form with little pruning. It is miniature in size, foliage and flowers, making it ideal for smaller spaces. Deep purple buds develop into pinkish-lavender flowers.

The late lilac (Syringa villosa) is native to northern China. A large, round-topped shrub composed of many upright branches, it is non-suckering. The flowers are produced in narrow triangular panicles and vary from pinkish to near white. In the 1920s, Isabella Preston of the Central Experimental Farm, Ottawa, developed Syringa x prestoniae hybrids of S. villosa and S. reflexa. Among these are ‘Donald Wyman’ (10 x 6 feet) with purplish buds that open to reddish purple flowers and ‘Miss Canada’ (8 x 6 feet) with deep reddish buds that open to bright pink.

The Common lilac (Syringa vulgaris) has given rise to a large group of lilacs known as the French hybrids. The first of these were introduced by Victor Lemoine of France in 1878. Colours range from white to pink, to blue and dark purple. With a height and spread of 6 to 12 feet, they expand over time through suckering. Among these hybrids are ‘Beauty of Moscow’, a heavy bloomer with white flowers tinged with rose; ‘Charles Joly’ which has double, dark purple flowers in large heavy panicles; ‘President Grevy’, over a century old but still one of the finest double blue lilacs; and ‘Sensation’ with beautiful single, deep purple flowers with each petal edged in white.

Hyacinth flowering lilac (Syringa x hyacinthiflora) are early flowering hybrids of the French hybrids and the Korean lilac (S. oblata var. dilitata). They have early bloom, excellent winter hardiness, less suckering and a more compact habit. Many of these were developed by Frank Skinner of Manitoba. These hybrids include ‘Asessippi’ with single, lavender-lilac flowers;  ‘Maiden’s Blush’, an outstanding, compact shrub with pink flowers; ‘Mount Baker’ with single white flowers which is a profuse bloomer from an early age; ‘Pocahontas’ with single, dark purple flowers and exceptionally profuse bloom; and ‘Sister Justina’, a compact shrub with outstanding single, white flowers.

Sara Williams is the author and coauthor of many books including Creating the Prairie Xeriscape, Gardening Naturally with Hugh Skinner and, with Bob Bors, the recently published Growing Fruit in Northern Gardens. She continues to give workshops on a wide range of gardening topics throughout the prairies.

This column is provided courtesy of the Saskatchewan Perennial Society (SPS; saskperennial@hotmail.com ). Check our website saskperennial.ca) or Facebook page (facebook.com/saskperennial). All Saskatchewan Perennial Society events are on hold until further notice.

New and under-used deciduous trees, part two

by Sara Williams
Saskatchewan Perennial Society

Looking for trees that are a bit unusual but have been tested for winter hardiness on the prairies? As I mentioned in part 1 of this article, the Western Nursery Growers Group established four test sites across the prairies, including Saskatoon, where “new” (and sometimes old) tree species and varieties were tested from 2008 to 2016. For additional information, see their website: www.prairietrees.ca. Here are more trees hardy to zone 2 and recommended for Saskatchewan.

‘Dropmore’ linden (Tillia flavescens ‘Dropmore’)

A hybrid of the American linden (Tillia americana) and the little leaf linden (T. cordata), the ‘Dropmore’ linden was introduced by Frank Skinner of Skinner’s Nursery in 1955 and named for the then closest post office that served the nursery. A strong grower of about 50 x 35 ft, it has a dense conical form and has performed well and consistently across the prairies since its introduction. It has fragrant flowers in mid-summer, yellow fall colour and is resistant to the linden leaf gall mite

‘Lone Star’ linden (Tillia cordata)

Keeping lindens in the family, Frank’s son, Hugh, introduced ‘Lone Star’ in 2018. Hugh selected it from a row of little leaf seedlings in 1982 and it has since been tested extensively across Canada and the United States. Derived from a Swedish race of little leaf linden, ‘Lone Star’ is about 40 x 25 ft with a dense symmetrical canopy and pyramidal form and needs little pruning. The flowers are much visited by bees and the green heart-shaped leaves turn golden yellow in fall. It thrives in full sun to partial shade. Once established, it’s adaptable to various moisture and soil conditions

‘Navigator’ pear (Pyrus ussuriensis)

A selection of the Ussurian pear, ‘Navigator’ is 35 x 20 ft, with a dense, conical to pyramidal form. It has gorgeous white flowers in early spring that emerge before the leaves, making it an excellent ornamental as well as a pollinator for hardy edible pears (unfortunately ‘Navigator’ pears are not for eating). The dark green foliage shifts from yellow to red in fall. Place it in full sun. Adaptable to various soil types, once established it is quite drought-tolerant.

’Shooting Star’ Northern pin oak (Quercus ellipisoides)

About 40 x 30 ft, northern pin oaks are excellent, long lived (up to 100 years) shade trees with furrowed gray bark and green glossy foliage that turns a brick red in fall. They’ll grow in full sun to partial shade.  Pyramidal to oval in form, they are relatively fast growing and prefer average to moist soil. But because they are grafted onto bur oak root stock, they are more tolerant of drier, high pH soils.

‘Top Gun’ bur oak (Quercus macrocarpa)

Bur oak, native to the eastern prairies, is tough and long-lived. With a dense, spire-like, narrowly upright form of about 45 x 15 ft, ‘Top Gun’ is ideal for a narrow space. Its branches are shorter rather than upright. The large, dark green lobed leaves turn yellow in fall. The bark is corky and gnarled. It produces large acorns. It can be grown in full to partial sun, dry or moist sites and various soils.

‘Regal Celebration’ Freeman maple (Acer x freemanii)

Here is a selection from a population of natural hybrids of silver maple (Acer saccharinum) and red maple (A. rubrum) from Ontario and Minnesota’s Lake of the Woods area that has proven hardy in zone 2. Seedless and more tolerant of high pH soils, ‘Regal Celebration’ is an excellent shade tree of about 40 x 30 ft. It has furrowed grey bark and green lobed leaves that turn an outstanding early red fall colour. Grow it in full sun in average to moist soil.

‘Delta’ Hackberry (Celtis occidentalis)

‘Delta’ hackberry (44 x 40 ft) is a great but much under-appreciated shade tree that tolerates alkaline soils and urban stress. Although somewhat similar in appearance to elms, it is immune to Dutch Elm Disease. Originating from a seed strain from the Lake Manitoba’s southern shores, it has warty gray bark. Grow it in full sunlight to partial shade. Once established, it is adaptable to various soils and moisture conditions.

Sara Williams is the author and coauthor of many books including Creating the Prairie Xeriscape, Gardening Naturally with Hugh Skinner and, with Bob Bors, the recently published Growing Fruit in Northern Gardens. She continues to give workshops on a wide range of gardening topics throughout the prairies.

This column is provided courtesy of the Saskatchewan Perennial Society (SPS; saskperennial@hotmail.com). Check our website saskperennial.ca) or Facebook page (facebook.com/saskperennial). All Saskatchewan Perennial Society events are on hold until further notice.

Looking for new and different trees?

by Sara Williams
Saskatchewan Perennial Society

Manitoba maples, green ash and American elms have dominated prairie landscapes for more than a century. And for much of that time our universities and federal and provincial research stations carried out extensive testing of new trees for hardiness and disease and insect resistance. That task has now fallen to the nursery industry. The Western Nursery Growers Group established four test sites across the prairies in which “new” (and sometimes old) species and varieties were trialed from 2008 to 2016. These were located in Edmonton, Alberta; Strathmore, Alberta; Portage la Prairie, Manitoba; and Saskatoon, Saskatchewan. In each location the trees were rated as recommended (R), marginal (M), or not recommended (NR). For additional information, see the WNGG website: www.prairietrees.ca. Some of the trees recommended for Saskatchewan are described below.

For many years, birches (Betula spp.) were a prominent part of our city landscapes. Drought and the bronze birch borer led to the demise of the vast majority of our birches.  Three new introductions are now available. While they will still need even moisture, they have shown resistance (but not immunity) to the ravages of the bronze birch borer. Plant them in full sun to partial shade in well drained average to moist soil. A thick mulch of shredded post peelings is beneficial.

The ‘Chickadee’ paper birch (Betula papyrifera) has a columnar to pyramidal form, is hardy to Zone 2a, and grows to about 40 ft. The foliage turns to gold in fall and its snow white peeling bark provides winter interest. Less susceptible to bronze birch borer.

‘Prairie Dream’ paper birch (Betula papyrifera) is about 40 ft in height with a 25-ft spread. It also has snow white exfoliating bark and golden fall foliage. It is stress tolerant and resistant to the bronze birch borer.

‘Dakota Pinnacle’ birch (Betula platyphylla) is smaller at 25 ft in height with a 10-ft spread and hardy to Zone 3b. It has a dense, narrow pyramidal form well suited for a smaller space, white slightly exfoliating bark, and yellow fall foliage. It is bronze birch borer resistant. Do not allow it to dry out.

The ‘Prairie Horizon’ Manchurian alder (Alnus hirsuta ‘Harbin’) is a largish tree of 40 x 30 ft with a strong central leader, smooth grey bark and dark green glossy leaves that turn yellow in fall. It is hardy to Zone 2 and long lived. Adapted to sun or shade and varying moisture conditions, it is drought-tolerant once established.

Our native larch or tamarack (Larix laricina), found in our boreal forests, is not “new” but seldom planted in our urban landscapes. Yet it is very adaptable to average garden conditions. About 60 x 20 ft at maturity, it does best in full sun in moist soil. It has a narrow pyramidal form.  Larch are our only deciduous conifers. The needles are a bright green, turning golden in the fall, and then falling. The small cones appear as tiny wooden rosettes.

‘Oasis’ Siberian larch (Larix sibirica) is slow growing but long lived, about 40 x 20 ft at maturity and hardy to Zone 2a. (Remember, any plant with sibirica in its botanical name is generally hardy on the Canadian prairies!) Fuller and denser than the species, its fine textured foliage remains green into the fall longer than the species before turning golden yellow. It has a low tolerance for urban pollution and is best not planted as a street tree. Plant it in full sun to partial shade in well drained but evenly moist soil.

More to follow!

Sara Williams is the author and coauthor of many books including Creating the Prairie Xeriscape, Gardening Naturally with Hugh Skinner and, with Bob Bors, the recently published Growing Fruit in Northern Gardens. She continues to give workshops on a wide range of gardening topics throughout the prairies.

This column is provided courtesy of the Saskatchewan Perennial Society (SPS; saskperennial@hotmail.com ). Check our website saskperennial.ca) or Facebook page (facebook.com/saskperennial). All Saskatchewan Perennial Society events are on hold until further notice.

The Sweet and Sour of Rhubarb

by Jackie Bantle
Saskatchewan Perennial Society

When I was growing up, it seemed like rhubarb was a major staple in every garden. Rhubarb, although not botanically classified as a fruit, provided ‘fruit’ throughout the gardening season for pies, jams, cakes and crisps when fruit was not a readily available commodity like it is in today’s modern cuisine. Not as common in gardens as it was in the past, rhubarb is an easy to grow perennial vegetable that should be included in everyone’s garden.

Despite the familiarity of rhubarb on the Prairies, it did not originate here. Early European settlers brought domesticated rhubarb with them to North America. Rhubarb was one edible perennial plant that could survive the harsh northern winters. Rhubarb originated in various parts of China and Russia, growing wild in the cold climate of Mongolia, the Himalayas and Siberia. Records from 2700 BC in China indicate that the Chinese rhubarb root (Rheum palmatum) was used extensively as a laxative but also known for curing fevers, preventing the plague, reducing inflammation and healing soldiers. The earliest recorded use of rhubarb as a food plant was in 1778 when rhubarb stems were used as a filling for tarts and pies. Chinese rhubarb (also known as Turkey or Indian rhubarb) has medicinal properties and a much stronger taste than the rhubarb commonly found in the North American garden (Rheum rhaponticum). The rhubarb that we grow in our gardens today is a hybrid that was developed in the nineteenth century: the roots have little or no medicinal value.

Rhubarb grows best is full sun or light shade. Since it is a perennial vegetable, locate it along the edge of your vegetable garden where the roots will not be disturbed by tillage or digging. If multiple rhubarb plants are being planted, space plants a minimum or 1.2 m apart. Full grown rhubarb plants can be 1-1.75m wide with 2m high flower stalks. Although rhubarb seeds will germinate, resulting plant quality, taste and vigor will be quite variable. It is best to grow rhubarb from root divisions. Spring is the preferred time to plant rhubarb but planting out can happen any time during the growing season. In spring, plant roots as soon as the ground is thawed. Plants should be transplanted after danger of a hard frost (-3°C) have passed.

Rhubarb will tolerate neglect but responds well to some fertility, water and well drained soil. For each plant or root division, dig the hole at least twice the size of the plant or root. The top of the crown should be no more than 5-7 cm below the soil surface. Fill the hole with a mixture of soil and compost (or well rotted manure). Pack the soil firmly around the roots, being careful not to damage the crown. Fill the hole with the soil/compost/manure mixture until it is level with the surrounding soil. Water-in the newly planted rhubarb root or plant. Soil around newly planted rhubarb plants or roots should be kept moist but never wet: overwatering will encourage root rot. Rhubarb plants can be mulched with grass clippings or chopped leaves to control weeds and conserve moisture. Do not mulch newly planted roots until shoots have emerged. Ideally, rhubarb plants prefer 2.5 cm of water each week however, once the plant is well established, rhubarb can withstand occasional drought conditions. Rhubarb plants will benefit from an annual spring application of compost or fertilizer.

To encourage a strong, well-established plant, refrain from harvesting rhubarb petioles for at least two years after planting. In the third year after planting, rhubarb stalks should be harvested freely for only 5 weeks. Stalks that are the width of an adult finger are ready for harvest. Cut stalks at the ground level. Only the red/green petioles are edible: rhubarb leaves are poisonous. As flower stalks appear, remove flowers, especially on young plants, to encourage more leaves and healthy roots. In well- established plants, never harvest more than 50% of the stalks during one season.

Large, old rhubarb plants can sometimes lose their vigour if underground shoots become too crowded.

An older rhubarb plant with many thin, spindly shoots can be rejuvenated by dividing up the roots and crown. It is best to divide the roots in spring or late fall.

This column is provided courtesy of the Saskatchewan Perennial Society (SPS; saskperennial@hotmail.com ). Check our website saskperennial.ca) or Facebook page (facebook.com/saskperennial). All Saskatchewan Perennial Society events are on hold until further notice.

Celebrate Arbor Week: May 28th – June 6th, 2021

by Jackie Bantle
Saskatchewan Perennial Society

Trees are one of those things in life that many people take for granted.  Not only do trees improve soil and water conservation, but their ability to moderate local climate by providing shade as well as providing a home for wildlife improves the health and wellness of animals and human beings. 

Thanks to the Yellowhead Flyway Birding Trail Association, which is an affiliate of Nature Saskatchewan, the Government of Saskatchewan officially proclaimed an Arbor Day and Arbor Week in Saskatchewan for the first time in 2020.  This year, Arbor week is being held from May 28th to June 6th, 2021.  I encourage you to take some time during Arbor week to appreciate the trees surrounding us that we so often take for granted. 

The University of Saskatchewan’s Patterson Arboretum, located on the southeast corner of Preston Avenue and College Drive, is a botanical collection of over 800 different trees and shrubs.  Each tree and shrub is labelled with the botanical name, common name and year it was planted.  There are some specimens in this collection that are not found anywhere else in western Canada and species that are 50+ years old in this location.  Arbor week will be an excellent time to visit the arboretum to enjoy some beautiful spring blossoms. 

Another place to enjoy a wide variety of trees and landscapes is the main campus of the University of Saskatchewan and Innovation Place.  Wandering around either of these outdoors spaces showcases a plethora of unique, mature trees and shrubs.  My favorite garden areas at Innovation Place include Garden Park near the former Boffins Public House restaurant for its picturesque pond and espaliered pear tree as well as the walking path along the northern edge of Innovation Place that highlights tree species from Saskatchewan’s northern forest.

Of course, the Forestry farm and Park is an excellent place to appreciate Prairie trees and plants.  Bernadette Vangool has prepared a walking tour for the Saskatoon Forestry Farm and Park for Jane’s Walk 2021.  This walk takes approximately 1.5 hours, starts at the parking lot of Cathedral of the Holy Family and winds its way through the Forestry Farm.  An excellent pamphlet outlining the walk as well as the history of the Forestry Farm Park and Zoo can be downloaded at: https://janeswalksaskatoon.ca/wp-content/uploads/2021/04/walkinthepark.pdf

Two afforestation areas, located on the southwest edge of the city of Saskatoon, were planted in 1972 by a crew from the City of Saskatoon Parks Department.  The Richard Ste. Barbe Baker Afforestation Area and George Genereux Urban Regional Park contain areas of grassland, wetlands and mixed forest.  Trails are found in these areas for walking, biking and wildlife site-seeing. 

The grand American elms that line many streets in the mature areas of Saskatoon should not be overlooked.  One of the best places to experience the American elm ‘forest’ in Saskatoon is Woodlawn Cemetery, located just northwest of the corner of 33rd street and 2nd avenue.  The elms in this cemetery are over one hundred years old in some areas.  Spruce and other stately trees also shade the narrow lanes of this cemetery providing an excellent place for quiet contemplation and meditation. 

In 2015, SOS Elms (now known as SOS Trees) published a booklet entitled ‘Saskatoon Tree Tour’.  The booklet highlights 25 of the most notable trees in Saskatoon, providing their location as well as some background information on each tree.  The booklet can be found at several locations in the City of Saskatoon or online at https://www.sostrees.ca/pdf/TT-publication-wo-map.pdf.  A fun ‘staycation’ could be biking around the city throughout the summer looking at each of the 25 notable trees. 

In honor of arbor week, consider taking out a membership in SOS Trees Coalition (https://www.sostrees.ca/index.html).  Their work in protecting Saskatoon’s urban forest is invaluable.  SOS Trees and their partners have organized an Arbor week full of fun activities for the entire family.  Check out all of their planned events at https://www.sostrees.ca/arborweek.html

No matter your age, consider planting a tree or two during Arbor week.  “Blessed are those who plant trees under whose shade they will never sit.” (Indian proverb)

This column is provided courtesy of the Saskatchewan Perennial Society (SPS; saskperennial@hotmail.com ). Check our website saskperennial.ca) or Facebook page (facebook.com/saskperennial). All Saskatchewan Perennial Society events are on hold until further notice.

More plants for Dry Shade (Part II)

by Sara Williams
Saskatchewan Perennial Society

Here are another half dozen plants that do well in shade that’s on the dry shade. Just remember to keep them evenly moist during their first year. And to mulch them to a depth of at least four inches with post peelings or clean straw.

Strawberry (Fragaria virginiana)

The genus name is from fraga, the classical Latin name for strawberry, derived from fragans meaning fragrant, alluding to the delightful smell of the fruit. Virginia is one of its many native habitats that include the temperate regions of both North and South America.

Strawberries are stoloniferous plants, which makes them so effective as ground covers. They have attractive compound leaves, white flowers in early summer, and of course, delectable fruit, mostly red. Our native strawberry, 10 to 15 cm (4-6 in.) high, makes an excellent ground cover with numerous runners.

Plant them in full sun to partial shade in a loamy soil rich in organic matter. Our native strawberry is quite drought tolerant once established. It is best used as  ground cover and is

easily propagated by runners and (more patiently) by seed.

False Solomon’s seal, star-flowered Solomon’s seal (Maianthemum stellatum, syn. Smilacina stellata)

Native to moist woodlands of a large portion of North America including parts of the Canadian prairies, false Solomon’s seal is surprisingly undemanding and moderately drought tolerant once established. It is best purchased from a nursery specializing in native plants. Accidentally transplanted, it has grown under pines on sandy soil in Sara’s garden for years.

The botanical names are descriptive. Maianthemum is from the Greek Maios, May, and athema, bloom, while stellatum means starlike and describes the form of the flower. About 30 cm (12 in.) high, plants produce single stems of alternate, lanceolate, stem-clasping leaves. Star-shaped, white flowers form on terminal racemes in May. Only 30 cm (12 in.) in height, the light green leaves turn golden in fall.

It spreads by creeping rhizomes to form colonies and is very much at home in a shade or woodland garden and also works very well as a ground cover in shade. Propagate by division.

Siberian barren strawberry (Waldsteinia ternata)

This is a plant that deserves much greater availability in our garden centres and nurseries. It’s tough, good looking, hardy, and adaptable to sun or shade. The common name, Siberian barren strawberry, speaks volumes: it’s ruggedly hardy, barren (do not expect it to produce fruit) and its leaves resemble those of the strawberry (glossy green leaves in clusters of three). Only 10 to 15 cm (4-6 in.) in height, it’s equally at home in sun or shade, with or without water. Small, bright yellow flowers bloom from late spring to early summer.

Western Canada violet (Viola canadensis)

Native to the woodlands of the prairie provinces, this is a hardy, enduring and attractive groundcover of 15 to 30 cm (6-12 in.) tall for dry shade. Fragrant white flowers with a yellow eye and distinct purple-pink veins appear in late spring and early summer above heart-shaped foliage.

‘Sem’ false spirea (Sorbaria sorbifolia)

A tough, hardy shrub, ‘Sem’ is a fairly recent addition to our arsenal of ground covers. It survives in deep shade with little water once established. It emerges in the spring with startling pink-orange-golden foliage mingled with lime green, brightening even the gloomiest shade. Pinnately compound leaves and white feathery flowers in late summer add to its landscape value. Up to 1 m (3 ft.) in height, it eventually forms a continuous understory (ideal below taller trees) through suckering. As attractive as the foliage appears in a nursery pot in spring, don’t be fooled into thinking that it will be well behaved in a shrub border. It will be out of bounds within a season. Use it as intended: as a ground cover.

Virginia creeper (Parthenoccissus quinquefolia)

The genus name echoes the common name: parthenos is the Greek word for virgin and kissos means ivy. (It was first introduced to England from the Virginia colony in 1629.) The species name describes the foliage: quinque means five and folia, leaf, thus the five leaflets that make up the compound leaf.

Although a vine, Virginia creeper also works as a groundcover, particularly on slopes. It is most admired for its brilliant scarlet fall foliage which will be somewhat subdued in shade. Hardy, fast growing and vigorous, it is drought-tolerant once established. It grows in sun or shade in most soils. Leafhoppers are sometimes present and powdery mildew can be a problem during periods of high humidity if air circulation is poor.

The large leaves (5-15 cm / 2-6 in.) are palmately compound, each with five toothed leaflets. The inconspicuous flowers are followed by small blue berries resembling grapes.

Sara Williams is the author and coauthor of many books including Creating the Prairie Xeriscape, Gardening Naturally with Hugh Skinner and, with Bob Bors, the recently published Growing Fruit in Northern Gardens. She continues to give workshops on a wide range of gardening topics throughout the prairies.

This column is provided courtesy of the Saskatchewan Perennial Society (SPS; saskperennial@hotmail.com ). Check our website saskperennial.ca) or Facebook page (facebook.com/saskperennial). All Saskatchewan Perennial Society events are on hold until further notice

Raspberries part two: Flowing, Fruiting and Varieties

by Sara Williams

Raspberry flowers have both male and female parts and are self-fruitful meaning that two cultivars are not needed to set fruit. Flowering occurs over a four-week period and bees are the main pollinators. Avoid using insecticides.

Fruit takes 30 to 45 days to develop, depending on the cultivar and weather conditions. Since the greatest increase in fresh weight occurs in the final 7 to 10 days of fruit development, watering at this time is beneficial.

The fruit should be harvested when just ripe as no further ripening occurs once the berry is picked. Berries usually ripen in July or August. A ripe berry is red (without darker colouration), plump, firm and sweet and separates easily from the receptacle when picked. Raspberries reach a peak of maturity quickly, maintain top quality for a few days and then deteriorate. Fruit quality is usually highest at the beginning of the season when berries have a higher fresh weight than that of fruit produced later. They are very perishable and should be harvested early in the morning (but after dew has evaporated) and cooled immediately. Raspberries should be picked every 3 to 4 days.

Modern raspberry varieties include genetic material from both the Old and New World. Old World selections contribute good fruit quality and New World selections hardiness and tolerance of heat and cold.

The following are a few of the cultivars that have been developed specifically for prairie conditions. Other varieties are worth trying, but start with just a few to see if they will grow well for you in your location.

‘Boyne’ is one of the older but most frequently grown raspberries on the prairies. Developed at the Morden Agricultural Canada Research Station in Manitoba, it is hardy and consistently productive. Canes are medium height, thick, erect, and stocky, with many lateral branches. ‘Boyne’ suckers freely. Fruit is medium-sized (1.6 cm / 5/8 in. diameter), dark red, juicy, aromatic and tart. It is very good fresh or frozen and excellent for processing.

‘Red Mammoth’, from the University of Saskatchewan (1999), has firm juicy, bright red berries that are easily picked and produced over a long period. The fruit is larger  than ‘Boyne’ (2.15 cm / 7/8 in. diameter), sweeter, and higher yielding. It has good vigour and is hardier than ‘Boyne.’ The drawback: canes are less sturdy and require trellising for support.

‘Steadfast’, another University of Saskatchewan selection, has very little suckering, making it ideal for smaller urban gardens. The fruit quality is similar to ‘Boyne’. The round, bright red berries are easily detached, produce over a longer season, but are lower yielding. Cane sturdiness is similar to ‘Boyne’.

 ‘Red Bounty’, also from the University of Saskatchewan (1999) has large (1.99 mm / 0.8 in.), flavourful, round bright red fruit that is excellent for processing and easily detached for picking. Hardier than ‘Boyne’, the canes are of medium stature, but less sturdy and require support.

‘Honey Queen’, developed many years ago by Robert Erskine of Rocky Mountain House, Alberta, is a sweet, golden yellow berry with a unique taste, excellent for fresh eating and with ice cream. It does not freeze well but is said to make excellent wine.

Fall-bearing raspberries such as ‘Double Delight’ produce fruit late in their first season. Worthy of trial in a protected location if space permits, they are generally not reliable unless our growing season is prolonged without near or below-freezing temperatures.

Sara Williams, with Bob Bors, is the author of Growing Fruit in Northern Gardens.

This column is provided courtesy of the Saskatchewan Perennial Society (SPS; saskperennial@hotmail.com ). Check our website saskperennial.ca) or Facebook page (facebook.com/saskperennial). All Saskatchewan Perennial Society events are on hold until further notice.

Raspberries part one: care

by Sara Williams
Saskatchewan Perennial Society

“There was a man in our town
And he was wondrous wise;
He jumped into a bramble bush
And scratched out both his eyes.” Mother Goose

Yes, they can be thorny, but there was a time when there was a raspberry row in every prairie garden. And why not? They’re hardy, easy to care for, generally insect and disease-free, making them well worth the effort. Nothing beats a handful of sun-kissed raspberries, fresh off the canes in July and August.

The genus name, Rubus, is from the Latin word for red, while the species name, idaeus, was named by Linnaeus to honor Mount Ida in Greece where raspberries were believed to have originated and where the Greek gods were said to have gone berry picking. 

The red raspberry is native to temperate regions of North America, Europe and Asia. Wild raspberries were gathered in the wild for thousands of years before they were grown in gardens. The Greeks and the Romans used them medicinally before they were commonly eaten as a fruit. By the 16th century, they were a common plant in English gardens, and European settlers brought raspberry selections with them when they arrived in North America.

Raspberries should remain productive for ten to twenty years, so careful site selection and soil preparation is important. A good loam-based soil in full sun is recommended. Ensure that the soil is weed-free (especially of perennial weeds like quack grass) and well amended with organic matter (e.g. compost, peat moss, well-rotted manure). Provide shelter from wind and avoid low-lying, frost-prone or poorly drained areas.

Plant in the spring as plants break dormancy fairly early. This also allows a healthy root system to develop during their first year. Canes should be set at the same depth or up to 5 cm (2 in.) deeper than they were previously planted. Space the raspberry canes about 23 cm (9 in.) apart within the rows, with rows 90 cm (3 ft.) apart. Water immediately after planting. Within three years, a continuous “hedgerow” should develop.

Do not allow the canes to dry out during their establishment year. In subsequent years, water your raspberries from bud development through to fruiting. They’ll require about 2.5 cm (1 in.) of water per week from first bloom to last harvest. After August, water only enough to prevent stress on the newly formed canes. Once canes have entered dormancy in late fall, give them one final watering prior to freeze-up.

There is a direct relationship between fruit yield and the vigor and diameter of the canes – the thicker the canes, the larger the fruit. Therefore, it is important to promote vigorous cane growth early in the growing season with consistent watering and a spring application of a high phosphorous fertilizer such as 16-20-0.

Control weeds through shallow (5-8 cm / 2-3 in.) cultivation. Raspberries have a fibrous, long-lived perennial root system. Remember, 70% of the root system is within the top 25 cm (10 in.) of the soil surface and deep or careless cultivation may damage the roots. Avoid cultivation once fruit begins to form in mid- to late June.

A better option than cultivation for controlling weeds is mulching (placing a permanent 10 cm / 4 in. layer of organic material on the soil surface between the rows). Weed-free straw, post peelings, leaves and grass-clippings will all do the job. Besides weed control, other advantages of using mulch include moisture conservation, decreased daily soil temperature fluctuation and cleaner picking. Apply the mulch in the fall following the first season of establishment.

Depending on the cultivar, raspberries may be grown in unsupported hedgerows or with the support of a trellis made of poles and wires. Trellises are used when canes are very tall, weak, or simply to make picking easier.

Most raspberries have a biennial growth habit. First year (“primocane”) growth is rapid and vegetative (leafy), taking place in spring and early summer. These canes are mostly unbranched. During their second year, these canes (now called “floricanes”) flower and fruit. Buds in the middle portion of the cane are the most fruitful. Canes do not increase in height during their second year, and after fruiting, they die. At the same time, new canes are produced to replace them for the coming season.

There are a number of reasons to prune raspberries. If left uncontrolled, plantings become jungle-like with fruit in the centre often going unpicked. Keep the row width to 30-45 cm (12-18 in.). Suckers are usually initiated in the fall, when they grow only to the soil surface. Additional above-ground growth of the suckers occurs the following spring. Each spring, remove the small, thin, less productive canes, produced randomly from the roots (further from the established row). Also remove last year’s fruiting canes – these canes will be have side branches (alternatively, this can be done in fall following harvest). Keep the vigorous, more productive canes that are produced from the crown at the base of the plant. Aim for 15 canes of 1.3 cm (0.5 in.) or greater diameter per meter (40 in.). Thinning increases yield, berry size and berry quality on the remaining canes.

Sara Williams, with Bob Bors, is the author of Growing Fruit in Northern Gardens.

This column is provided courtesy of the Saskatchewan Perennial Society (SPS; saskperennial@hotmail.com ). Check our website saskperennial.ca) or Facebook page (facebook.com/saskperennial). All Saskatchewan Perennial Society events are on hold until further notice.

Gardening with the pits

by Sara Williams
Saskatchewan Perennial Society

Kitchens tend to be busy places during the winter. It’s also the time of year when we’re most apt to savour the exotic. What doesn’t go into the compote, need not end up in the compost. Kitchen propagation with your kids with the pits can be an opportune learning experience.

Once you’ve prepared your guacamole,wash and dry the large avocado seed. Plant it with the small pointed end poking up through the soil. The soil should be kept moderately moist without being overly wet, but never be allowed to dry out. You probably won’t get the medium size tree native to South and Central America, but you should be able to produce a respectable house plant.

An alternative method, that also can be used with mangoes and sweet potatoes, involves toothpicks. Insert three toothpicks into the side of the seed about 1/8 inch deep, as in the spokes of a wheel, and carefully suspend the seed over the rim of a glass of water so that an inch and a half of the pit is submerged in the water. Don’t allow it to dry out. Once the roots develop, transplant it to soil.

Place the container in bright light, but out of direct sun, until the roots and shoots emerge. Be patient, this may take a few months. Then move it to full sun. To encourage branching, pinch out the central stem when the plant is about 15 cm (6 in.) high. Expect fairly rapid growth from this point on.

Mangoes, large trees native to India, are grown in a similar manner to avocados but can be more difficult. Plant the seed with the eye or bud facing up, just covering it with loose soil, or use the toothpick method. Keep it warm and moist. The young leaves may be red but will change to green on maturity.

Sweet potatoes, long cultivated in Central America, can be grown by the soil or toothpick method, but use the entire tuber with half of it submerged. First, wash it off thoroughly to remove any growth inhibitors that may have been applied to keep them from sprouting in the grocery store. (This in itself could make a good consumer education project. Try this with one washed, the other not.) Place it in full sun. Roots and shoots will develop into a luxurious vine and it will continue to grow until it has exhausted the resources of the tuber. At that point, the new shoots can be used as cuttings: root them in sand and then plant them in a soil mix.

Pineapples are members of the large tropical bromeliad family, originating in South America and the West Indies. First brought to European attention by Christopher Columbus, they are the only member of this family that bears edible fruit, and one of the few with its feet stuck firmly in soil – the vast majority of bromeliads spend their life perched on trees as epiphytes. Select a pineapple that is relatively large and with the freshest crown of leaves in the store. Remove the top (including the green leaves) together with about an inch of the fruit, trimming away the soft sweet parts and leaving the hard stringy tissue. Allow the cut surface to dry for a few days to form a callus layer to prevent decay. Plant the top in sand, keeping it evenly moist but not overly wet. Bromeliads naturally collect water in their central “vase”. Move it to a well drained soil mix in full sun once it has rooted.

Oranges, lemons and grapefruit can also be grown from seed, sowing them about 2 cm (1/2 in.) deep. I stuck some in a large pot in which a mature fig tree was already growing and simply forgot about them. Expect germination within 6 weeks. They like a rich soil in a deep pot in full sun but seem to handle benign neglect very well. They’ll grow into large shrubs with shiny leaves.

Besides the hands-on experience, these projects can involve a trip to your local library to find out more about these plants and their native habitats. But don’t expect your labour to bear fruit. These plants seldom produce indoors unless provided with cross-pollination and/or conservatory-like conditions.

This column is provided courtesy of the Saskatchewan Perennial Society (SPS; saskperennial@hotmail.com ). Check our website saskperennial.ca) or Facebook page (facebook.com/saskperennial). All Saskatchewan Perennial Society events are on hold until further notice.

What is the Best Potato to Grow?

By Jackie Bantle

“What is the best potato to grow?” is one of the most common questions that I often hear from eager vegetable gardeners.  According to the World Catalogue of Potato Varieties (co-edited by Lukie Pieterse and Uwe Hils), there are at least 4500 cultivated varieties of potatoes in over 100 countries around the world.  The best potato for you to grow depends on the end use.

Potato cultivars typically found in Saskatchewan can be organized into one of four categories: white, russet, red or novelty.  Red skinned potato varieties are recommended for boiling since their flesh is usually more watery.  Russet varieties generally have more solids/tuber and usually become mushy when boiled.  Potatoes that are high in solids are preferred for frying as they use less oil.  The cooking qualities of white skinned and novelty potatoes are dependent on the variety. 

Traditional potato varieties on the Prairies have included mainstays like Russet Burbank (formerly known as ‘Netted Gem’).  Russet Burbank has a dry texture and is excellent as a baking potato or French fry but often turns mushy when boiled.  Growing Russet Burbank can be challenging in a dry climate like the Prairies as this variety is prone to hollow heart (i.e. holes in the centre of the potato) and knobs when moisture conditions fluctuate during the growing season.  Better choices for drier fleshed potatoes that are good for baking or French fries include Goldrush, Gemstar Russet, Umatilla and Ranger Russet.   

Pontiac was the traditional ‘red-skinned’ potato variety grown on the Prairies for many years.  Pontiac is early maturing, recommended for boiling and usually produces excellent yields of large sized tubers.  However, Pontiac is also known for its intense scab problems, hollow heart and deep eyes. 

Norland (red skin) was registered as a variety in 1960 and is still one of the most popular red potato varieties for Prairie gardeners.  Norland’s skin is a brighter red than Pontiac and does not oversize as quickly as the Pontiac.  Norland is early maturing, somewhat resistant to scab and has excellent boiling qualities. 

Other red skinned potato cultivars recommended for the Prairie garden include; Viking (early maturing, oversize tubers late in the season), Sangre (mid-season maturing, excellent boiling, medium sized tubers) and AC Peregrine (mid to late season maturity, uniform size and shape, resistant to scab, the best storage variety of the reds).

Two purple skinned cultivars with bright white flesh that perform well in the Prairie garden are Purple Viking (early-maturing, large tubers and excellent flavour) and Caribe (mid-season maturity with good flavour). 

Shepody is an excellent flavoured white skinned potato recommended for boiling, French frying and baking.  Shepody tends to produce oversize tubers later in the season and is susceptible to scab and hollow heart.  Adora, an early-maturing, light yellow fleshed potato is recommended for boiling and baking. 

Yukon Gold (good yields, boiling, bake or fried) and Bintje (late maturing with excellent yields of small to medium sized potatoes) are deeper yellow fleshed cultivars recommended for their flavour. 

Some unique potato varieties to try include: Banana or French Fingerling (long to banana-shaped, small, yellow-fleshed tubers), Russian  Blue (purple skin and purple flesh) or All Red (red skin and red flesh). 

Always plant certified potato seed, preferably seed that is grown locally.  Purchasing local potato seed grown by experienced Saskatchewan seed potato growers reduces the risk of spreading devastating potato and soil diseases. 

Although it is tempting to plant potato tubers early, if the soil is too cold (below 10°C), certain fungal diseases can rot seed tubers in the ground or result in disease issues like rhizoctonia (the black ‘dirt’ that won’t wash off your potatoes at harvest time). 

To get an early start on potatoes without risking disease issues, try green sprouting your potato seed tubers.  At least 10-14 days before planting out, spread potato tubers out in a single layer in a brightly lit location.  Ideally, the air temperature should be near 20°C with high humidity.  Warm temperatures will encourage the potatoes to sprout while bright light will prevent the sprouts from elongating.  Higher humidity prevents the potato tubers from drying out.  Potato tuber sprouts should be less than 2.5cm long, dark green in color and may have small leaves forming.  These green sprouted potato seeds will have been growing for two weeks under ideal conditions indoors before being placed outside in the warm soil (15°C+).  When planting outdoors, take care not to break off the developing sprouts.

This column is provided courtesy of the Saskatchewan Perennial Society (SPS; saskperennial@hotmail.com ). Check our website saskperennial.ca) or Facebook page (facebook.com/saskperennial). All Saskatchewan Perennial Society events are on hold until further notice.

Planting a tree – Part II – Putting it in the ground!

by Sara Williams

Once the hole as been prepared, set the root ball on top of the mound, spreading out the roots so that they grow away from the trunk and as horizontally as possible. The trunk flare should be even with the natural grade of the soil. In areas of poor drainage, it can be an inch or so higher. Prior to backfilling, ensure that the tree is upright and straight with its “best face forward” facing where it will be viewed.

Once the tree has been positioned, backfill the hole, tamping it gently to remove large air pockets and to ensure than the roots are in firm contact with the soil of their new home. Then form a low “dike” or berm of several inches of soil around the outer perimeter of the planting hole to act as a well or catchment basin so that when watered, the water will stay where it is intended, and percolate downward to the roots rather than run off.

Water the area within your dike slowly and thoroughly, to the depth of the root ball and a few inches into the soil below. The object is to gently settle the soil and to encourage deeper and wider rooting.

Fertilizer is seldom needed. In over forty years I have NEVER fertilized a tree and many are now towering specimens of 40 to 50 ft or more.

Staking is seldom necessary unless the area is extremely windy and unsheltered. Research has shown that non-staked newly planted trees establish faster and produce stronger roots compared to staked trees. Most trees do not need to be staked.

Next, mulch! Over the course of those many trees and decades, I have gone through about a dozen semi-truck loads of mulch. I used mainly post peelings (the bark and other stuff that is peeled off in the manufacture of fence posts) from our northern mills. It is applied at a depth of about four inches over the soil surface, up to and including the dike. Depending on weather, it generally lasts three to four years.

[An interesting aside? A friend who comes to pick mushrooms, one day mentioned that many of the ones that she finds in “the pasture” (now a forest) are native to the boreal forest and should not be here. Our guess – the spores came with the post peelings and settled in.]

Once mulched, I have found that a thorough and deep watering once a week through the first growing season works well. Don’t hurry and skimp. For a few summers I hired my neighbour’s grandchildren to do the watering of a few hundred newly planted trees. Their instructions? I would provide a lawn chair and a kitchen timer. They were to bring a book. They were to set the timer for 8-10 minutes per tree, watering with a very long (600 ft) hose from the well, and then move to another tree. It was summer, so I did not demand a book review…This system worked well.

After the first season, water thoroughly every 2 weeks or as needed. (Feel under the mulch to see if it is moist or dry.) By the third season, they should be well established and on their own.

Sara Williams is the co-author, with Bob Bors, of Growing Fruit in Northern Gardens.

This column is provided courtesy of the Saskatchewan Perennial Society (SPS; saskperennial@hotmail.com ). Check our website saskperennial.ca) or Facebook page (facebook.com/saskperennial). All Saskatchewan Perennial Society events are on hold until further notice.

Plant a tree – or thousands! Preparation

by Sara Williams

My first serious tree planting began after I moved to a then treeless bromegrass pasture of five acres south of Saskatoon over forty years ago. Purchased in the winter, I had no idea of what the soil was like. And after the heavy clay soil of a Sutherland home, I was not quite sure what to do with the almost pure sand of the acreage. Friends commented on the somewhat “rolling terrane” of the back pasture – so sandy that it had indeed blown to form a few small undulating dunes during the dry dirty thirties.

Guidelines for planting trees have changed somewhat over those four decades but the principles remain. Many of the problems associated with tree planting come from letting them dry out between the time of purchase and the time of planting, encircling roots, placing the tree at the wrong depth, too small a planting hole or unnecessary staking.

Although it might seem counter-intuitive, adding an overabundance of organic amendments to the planting home, especially in a heavy clay soil, may result in the roots never leaving the hole to venture out into the surrounding soil.

The ideal planting time is spring as it provides the longest time frame for the tree to become established. Summer also works as long as attention is paid to weather that is too hot, too dry or too windy and the tree is watered accordingly. Early fall is also an option – as long as the tree is in active growth but has enough time to harden off (cease growth and prepare for winter) in its new home.

Most trees do best in full sun and well-drained soil. Before planting, check with utility companies to avoid placing trees on top of hidden underground utilities. And look up to ensure they will not be growing into overhead utility lines.

Small trees are usually sold in containers while larger ones may be “balled and burlapped.” Large orders of smaller trees may be bare-rooted. Always handle trees by their lower trunks.

When removing the tree from its container, minimal damage occurs if this is done while the tree and container are laying on their side. If balled-and-burlapped, remove all wrapping materials. Soak the root ball for a few hours in (preferably) lukewarm water. If any roots are circling, spiraling or girdling the root ball or growing inward, they should be straightened out so they grow away from the root ball, not into it or around it. If gently re-positioning the roots does not work, then cut them off with a sharp pruner. Consider this a “kind cut”. New roots will quickly form and be heading in the right direction. If left to grow inward or circle around, they will in effect strangle themselves. At the time of planting, only prune dead, diseased or broken branches.

Trees should be planted at the same depth at which they were grown in their container or in the nursery field, at a mid-point in the “trunk flare.” This is where the trunk bulges or broadens slightly before the roots begin. It is important that the trunk is above the soil line and the roots below the soil line.

I found the most success on my sandy soil when digging a generous planting hole. Take a cue from the lyrics of Michael, Row Your Boat Ashore, “The Jordan River is deep and wide, Hallelujah!”  Sing while you dig and dig both deep and wide. The depth of the planting hole should be about four inches deeper than the depth of the root ball; the width at least twice that of the root ball. Err on the side of generosity. If needed, place a mound of soil on the bottom of the planting hole to ensure that the planting level is neither too high nor too deep.

Recommendations have changed a bit in forty years, but if your soil is predominantly sand, adding moderate amounts of organic amendments such as compost, peat moss or composted manure to the soil in the planting hole will help to retain moisture.  Otherwise, go with the soil that you have.

Next – Part 2 – Planting!

Sara Williams is the co-author, with Bob Bors, of Growing Fruit in Northern Gardens.

This column is provided courtesy of the Saskatchewan Perennial Society (SPS; saskperennial@hotmail.com ). Check our website saskperennial.ca) or Facebook page (facebook.com/saskperennial). All Saskatchewan Perennial Society events are on hold until further notice.

Add colour to your spring and fall landscape with Majestic Skies northern pin oak – an ideal shade tree

Erl Svendsen
Saskatchewan Perennial Society

I spent most of my childhood in places where the fall canvas was painted with bright splashes of reds and oranges with a few daubs of yellow. The prairie region is just the opposite – a sea of yellows with occasional, and somewhat short-lived oranges and reds. Majestic Skies northern pin oak (Quercus ellipsoidalis ‘Bailskies’) can help change that.

Part of the problem is that there are relatively few hardy and attractive landscape worthy tree species available on the prairies. Most have been introduced from other parts of the world. There are a few native species (green ash, bur oak, American elm), but even these were not widespread across the prairies originally and come with a host of insect pests and diseases. The Western Nursery Growers Group recognized these problems and the risk our urban landscape faces with the introduction of just a single pest or disease: bronze birch borer, emerald ash borer, Dutch elm disease, fire blight and black knot, to name a few. For example, only two years ago, Saskatoon lost many of its Mancana and black ash to the cottony psyllid combined with an unfavourable winter.  The Group’s plan was to test new cultivars and species in four location representing the major climatic and soil zones across the region. They named their program Prairie T.R.U.S.T (Testing of Rural and Urban Shade Trees)*. To receive a Recommended rating, a tree must be hardy, have high to complete resistance to insect pests and disease, and be adapted to a wide range of Prairie soils. And not only this, but it must be good looking to as well!

One of their Recommended cultivars across all test sites is Majestic Skies northern pin oak. This is an outstanding tree for many reasons. The show starts in spring as pointy-tipped, lobed leaves emerge brick red, gradually shifting to a glossy dark green. In the fall, they transform again to become a resplendent red, contrasting nicely with their surrounding landscape. Like other oaks (e.g. bur oak), their flowers and acorns are not particularly noteworthy (except when in contact with your lawn mower). After the leaves take their final bow in the fall, the furrowed grey bark and silvery branches add attractive dimensions to the winter scene.

Northern pin oak is no shrinking violet – at maturity it can reach 18 metres (60 feet) in height by 14 metres (45 feet) wide with a pyramid-oval canopy. Majestic Skies has straighter and more even sized branches than its native North American kin, making for a relatively uniform canopy.  Its size and shape make it an ideal shade tree, even without its bright spring and fall colour display! But, because of its mature size, take care not to plant it too close to your house or under powerlines. As it grows, remove the lower branches to allow people to walk underneath without threat of losing an eye or their sunhat. Plant it in full sun to partial shade in deep well-drained soil. Although drought tolerant, it prefers evenly moist soil. It is not too particular to soil type, but in very alkaline soils, leaves may become chlorotic (yellow with green veins).  Because of its size and adaptability to Prairie conditions, you can grow it as a specimen tree for shade, massed in a larger landscape (parks, acreages), as part of a shelterbelt to control wind and reduce noise, or in a wildlife planting. It has a medium growth rate and should live for at least a century – you’re planting it as much for yourself as for your children and grandchildren.

*Visit the Prairie T.R.U.S.T website (www.prairietrees.ca) to see all recommended trees from their trial for your region.

Erl gardens in Saskatoon and tweets about it on occasion @ErlSv.

This column is provided courtesy of the Saskatchewan Perennial Society (SPS; saskperennial@hotmail.com ). Check our website saskperennial.ca) or Facebook page (facebook.com/saskperennial). All Saskatchewan Perennial Society events are on hold until further notice.

To till or not to till

by Bernadette Vangool

No-till gardening is a technique in which the gardener mimics nature by adding organic matter to the surface of the soil. In nature, leaves fall and grasses and flowers die off. They are incorporated into the soil by millions of little creatures, fungus, bacteria and others large and small. These organisms work continuously to turn dead organic matter into nutrients which feed the new growth of plants in the immediate area.

In contrast, the till method incorporates organic matter into the soil directly by tilling or manual digging. Tilling disrupts the cycle of fungal, bacterial and insect activity and thus creates an imbalance in the existing ecosystem. In the short term, the till method results in more immediate greater productivity, while the no-till method enriches the soil with organic matter over a longer period of time.

No-till gardening is a relatively new phenomenon. Traditional gardening has usually depended on the till method. People who grew up with the till  method, which has been very successful for them, are reluctant to change and adopt new ways. Both methods have pros and cons and perhaps the best course of action is to adopt a portions of both methods in your garden practices.

Soil is improved over time when covered with at least 4 inches of organic material which decomposes slowly and is incorporated naturally. However,  it is difficult to germinate small seeds in a deep mulch. Mulched soils tend to warm up more slowly in spring, an advantage in perennial gardens as it protects plants from late spring frost damage. For the vegetable gardener, facing an already limited number of frost free days in our climate, it shortens the growing season even further. For those of us with heavy clay soils, it may take years to “soften” the soil.

The major disadvantage of simply tilling soils is that they do not retain moisture as well. It can also lead to water run off, resulting in the leaching of soil nutrients, and general erosion. Tilling, while breaking up the soil structure, may bring the larvae of beneficial and not so beneficial insects to the surface, thus eradicating pests by interrupting their life cycle. But weed seeds will also be disturbed and given an opportunity to germinate and flourish in the upcoming growing season. Either method of gardening will see a reduction of unwanted weeds over time, assuming that weed control is practiced by pulling, deadheading and mulching.

Making the transition from conventional tilling to a more sustainable method of gardening may take some adjustments. It helps to define your garden beds by creating permanent pathways. These should be covered with mulch to discourage weeds. In a smaller garden, planting boxes can be constructed to easily define the vegetable beds. Defining these areas gives you the freedom to mix it up a bit. For example, vegetables with large seeds such as corn, peas and beans as well as crops that are transplanted into the garden, can be planted in the no-till beds with the heavy mulch. The small seeded crops such as lettuce, carrots and spinach can go in the tilled beds that provide easier germination. The tilled beds can be rotated throughout your garden to discourage pests from invading sections of your garden over time. This includes the dreaded slugs, which seem to be more prevalent as more and more people are switching to no-till. Pick a sunny day in spring or fall, till your garden and let the pests bask in the sunshine until the birds find them.

Whichever method of gardening you decide to embrace, don’t skimp on the inputs. Every garden benefits from copious amounts of well rotted manure and compost, and a good regimen of watering. Happy gardening everyone!

The opinions expressed above are those of the writer, a long term member of the Saskatchewan Perennial Society.

This column is provided courtesy of the Saskatchewan Perennial Society (SPS; saskperennial@hotmail.com ). Check our website saskperennial.ca) or Facebook page (facebook.com/saskperennial). All Saskatchewan Perennial Society events are on hold until further notice.

Perennial geraniums that tough it out

Sara Williams

Perennial geraniums (Geranium spp.) go by the common names of cranesbill or geranium. (These are not to be confused with the annual bedding plant, also called a geranium, but in the genus Pelargonium.). The genus Geranium includes more than three hundred species widely distributed in the temperate regions of the world. Only about a dozen of these have proven reliably hardy on the Canadian prairies, but though small in number, they have become a mainstay of our gardens.

Geranium comes from the Greek geranos, meaning crane, referring to the seed capsule that resembles the beak of a crane. The seeds are forcibly expelled from the capsule, scattering them widely.

In mounds or mats ranging in height from 20 to 60 cm (8-24 in.) or more, geraniums have mostly basal-lobed or divided leaves. The five-petaled, cup-shaped flowers appear singly or in clusters, mostly in early and mid-summer, in pastel shades of pink, blue, and purple as well as red, magenta and white. They are long-lived and long-flowering.

Generally of easy care, perennial geraniums do well in ordinary but well-drained soil in full sun to partial shade. Many are moderately drought-tolerant once established. They may be pruned back after flowering for a neater appearance. Most are well placed in a border or rock garden. Some make excellent ground covers. They are easily increased through spring division, by terminal cuttings, or by seed.

Lilac cranesbill (G. himalayense) is native to Sikkum, India, and spreads by short rhizomes. It has some of the largest flowers of all species, lilac-blue to deep blue with purple veins, and is from 30 to 50 cm (12-20 in.) in height. It blooms in summer.

‘Johnson’s Blue’ (G. himalayense x G. pratense) was selected in 1950 by A. T. Johnson of North Wales, who wrote A Garden in Wales (1927). It is very hardy and dependable but somewhat sprawling. It is 30 to 45 cm (12-18 in.) high with 4 to 5 cm (1.6-2.0 in.) blue flowers, borne profusely over a long period in late spring and early summer. It spreads by stolons and is better used as a ground cover. Sterile, it sets no seeds.

Iberian cranesbill (G. ibericum) is native to Turkey and the Caucasus. It is 45 cm (18 in.) in height, vigorous, hardy and drought tolerant, with upward-facing, violet-blue flowers with notched petals in early summer. It can become somewhat weedy and is best used as a ground cover.

Big root geranium (G. macrorrhizum), native to the subalpine woodlands and rock scree of the Alps and Carpathian Mountains of Europe, was introduced to England by 1576. The word macrorrhizum means big root and, like the common name, refers to the thick, fleshy rhizomes, which soon form dense, weed-proof mats. It forms a wide-spreading, bushy mound of 20 to 40 cm (8-15 in.), with pink flowers from late spring to early summer. The lobed, aromatic foliage, which turns red in the fall, was once used medicinally, for tanning, as well as for oil of geranium in the perfume industry-its fragrance is very distinctive when the leaves are crushed. It is both shade and drought tolerant. ‘Ingwersen’s Variety’ has pink, darker veined flowers, 5 cm (2 in.) in diameter. ‘Album’ has white flowers with pink to red calyxes. ‘Bevan’s Variety’ is reddish purple and about 30 cm (12 in.) in height.

Bloody cranesbill or blood red geranium (G. sanguineum) is native to the sea cliffs and sand dunes of England as well as Europe and western Asia. Originally grown for medicinal purposes, it was once used as a healing salve. It forms sturdy clumps or low mounds of dark green, deeply divided foliage, 20 to 45 cm (8-18 in.) in height with a 60 cm (24 in.) spread. Solitary, magenta-red flowers bloom from late spring to early summer. The dark green foliage turns rusty orange to red in fall. Its tough, fleshy rhizomes lend it drought tolerance. It is well placed in a rock garden or used as a ground cover.

‘Album’ is white and a bit taller with a looser habit. ‘Alpenglow’ is 20 cm (8 in.) high with vivid rose-red flowers. ‘Lancastriense’ (syn. var. ‘Striatum’) is a dwarf plant, forming a prostrate mound of 25 to 30 cm (10-12 in.), with pale, salmon pink flowers with deeper pink veins, blooming for a long season. ‘Max Frei’, a German introduction, is a compact plant of only 20 to 25 cm (8-10 in.) with reddish-purple to deep magenta flowers and good autumn foliage colour. ‘New Hampshire Purple’, 20 to 30 cm (8-12 in.) in height, has purple flowers in early summer and bronzy fall foliage.

Sara Williams is the co-author, with Bob Bors, of Growing Fruit in Northern Gardens.

This column is provided courtesy of the Saskatchewan Perennial Society (SPS; saskperennial@hotmail.com ). Check our website saskperennial.ca) or Facebook page (facebook.com/saskperennial). All Saskatchewan Perennial Society events are on hold until further notice.

Growing your own vegetable transplants

By Jackie Bantle

As you look forward to spring and warmer weather, its time to start exercising those green thumbs.  Consider growing your own transplants for your garden.  The excitement and challenge of planting seeds, waiting for them to emerge and caring for the tiny plants until they are ready to be released to the outdoors is an excellent late winter activity for children and adults.  Growing your own transplants also enables you to grow vegetable cultivars that might not be available at your local greenhouse.  It is time to start planting some of those seeds! 

Vegetables that must be transplanted in order to mature during our relatively short growing season include:  tomatoes, peppers, celery, eggplant, Spanish onions, leeks and Brussels sprouts.  Vegetables that benefit from transplanting in the Prairie garden but are not required to be transplanted include: cauliflower, broccoli, cabbage, melons, squash, pumpkins, cucumbers and corn. 

Not all vegetables should be seeded immediately.  Some vegetable seed takes longer to germinate or, grows very slowly once it has germinated.  Other vegetables dislike having their roots disturbed and are best transplanted outdoors when they are only 1-2 weeks old.     

The following table summarizes seeding dates for common vegetables that are transplanted.

Vegetable TypeDate to SeedSeeding Depth (cm)
PepperMarch 150.5
TomatoMarch 300.5
EggplantMarch 300.5
CeleryMarch 10Cover very lightly – celery seeds need light to germinate
Spanish OnionsMarch 200.5
LeeksMarch 100.5
Brussels sprouts and other brassica cropsApril 100.25
Vine crops, cornMay 71
Photo Submitted
The following table summarizes seeding dates for common vegetables that are transplanted.

Vine crops and corn do not like to have their roots disturbed.  Grow these transplants in a Jiffy 7 peat pellet or a biodegradable container.  Both the container and the Jiffy 7 can be planted directly in the ground without disturbing the plant roots:  the developing roots will grow through the netting or the container. 

A few basic guidelines for growing your own transplants indoors will help ensure success. 

1) Use a commercially prepared media that has a mix of peat, vermiculite and perlite.  Garden soil is NOT recommended for any container since it does not drain properly and can be a source of insects and disease.

2) Containers should be clean and must have drainage holes in the bottom to ensure excess water drains away; thereby preventing root rot diseases.

3) Adequate lighting is crucial for growth of healthy transplants.  Supplemental lighting will be necessary.  Grow-lights can be purchased at most garden centers.  Place the lights 30-45 cm above the seedlings for 12-14 hours per day.  To test if the lighting is sufficient, the shadow cast on a white piece of paper at midday by an object 10-15cm above the paper should have a definite outline.

4)  Most commercial medias contain very few nutrients.  Apply a water soluble 20-20-20 fertilizer once/week.  Mix according to label directions.

The ideal transplant has a good root system but is not root bound.  The stem will be strong and the internodes between the sets of leaves will be small.  Transplants that are too tall will tend to break and dry out more easily once planted out into the garden.  To control transplant height, lightly brush the tops of the plants with a wooden stick or a rolled up towel or, place an oscillating fan approximately 3 feet from the transplants for 6 to 8 hours/day.  The gentle brushing or the gentle breeze will tend to decrease transplant height and strengthen stems. 

A large difference between day and night temperatures can also result in elongated transplants.  Warm days followed by cool nights tend to increase the internode length, resulting in ‘stretched’ plants.  Aim to keep the day and night temperatures within several degrees of each other to help minimize the length between internodes.

‘Damping Off’ is a fungal disease that can be a problem when starting seedlings.  Symptoms include poor seed germination or water-soaked, soft spots on the stem just above the soil line in newly emerged seedlings.  The seedlings topple over where the stem has become constricted.  No treatment is available for Damping Off.  Prevent the disease by using clean pots, providing adequate air movement around seedlings and resisting overcrowding seedlings. 

Good luck growing your transplants.  Spring will be here before we know it!

This column is provided courtesy of the Saskatchewan Perennial Society (SPS; saskperennial@hotmail.com ). Check our website saskperennial.ca) or Facebook page (facebook.com/saskperennial). All Saskatchewan Perennial Society events are on hold until further notice.